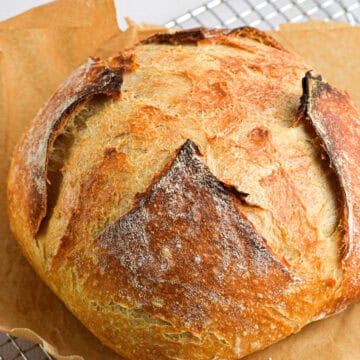
Beginner Sourdough Bread
If you’ve been wanting to try your hand at sourdough but weren’t sure where to start, this Beginner Sourdough Bread recipe has you covered. It’s simple, straightforward, and gives you that classic crusty loaf with a chewy, flavorful crumb—no fancy equipment required. Once you get the hang of it, you’ll be hooked!
Equipment
- Kitchen Scale
- Large glass mixing bowl
- Dough whisk or spoon
- Plastic wrap or proofing bag/bowl cover
- Banneton or proofing bowl
- Dutch oven or Bread oven
- Parchment Paper
- *See equipment notes in blog post*
Ingredients
- 150 grams active sourdough starter
- 330 grams room temperature water
- 450 grams flour I recommend using 50 grams whole wheat flour, 50 grams all-purpose flour, and 350 grams bread flour. You can increase the bread flour to 400 grams if your loaf seems too loose or wet.
- 12 grams salt
Instructions
The Night Before
- In a large glass mixing bowl whisk together active sourdough starter with room temperature water until well combined. Add flour and salt and mix until it forms a shaggy dough. Cover with plastic wrap and let it rest for about 45 minutes.
- After 45 minutes, remove the plastic wrap and perform the first set of stretches and folds (no need to knead!). To do so grab one side of the dough, stretch it up gently (don’t tear it!), then fold it over onto itself.Turn the bowl 90 degrees and repeat - stretch up, fold over.Do this a total of four times, turning the bowl each time, so you've stretched and folded from all sides.
- Repeat the process 1-3 more times in 30 minute intervals. Then cover your dough one final time and let it bulk ferment overnight for 6-12 hours. (SEE NOTE ON TIMING AND TEMPERATURE BELOW)
The Next Morning
- Once the dough has approximately doubled in size and shows signs of bubbles forming around the sides it is ready to be shaped for the second rise. Use the dough scraper to help you gently turn the dough out onto a floured surface. To shape the dough fold the edges over the center, kind of like you're wrapping a package. The top side should be smooth and round.
- Transfer to a floured or lined banneton or proofing bowl, seam side up. Cover and allow it to rise for about 2 more hours at room temperature. (SEE NOTE ON ALTERNATIVE PROOFING METHODS BELOW)
- When you have 20-30 minutes left of rise time, place your Dutch oven with lid in the oven and preheat at 500 degrees F. The pot should get VERY hot.
- When you're ready to bake, place the bread smooth side up onto a floured piece of parchment paper. Generously flour the top of the bread, then score with a bread lame or sharp knife. *You can get fancy or a simple cross works great.*
- Place the parchment paper with the bread on it into the preheated Dutch oven. *At this point you can throw in one ice cube for a crisp crust.*Place the lid back on the pot and turn the heat down to 450 degrees F. Bake with the lid on for about 20 minutes. Then remove the lid and bake for another 30-35 minutes until the crust is a beautiful golden brown.
- Remove from the oven and place the bread onto a wire rack. Cool for at least an hour before slicing (otherwise it can get quite gummy).Serve and enjoy!
Notes
A Quick Note About Timing and Temperature
If you’ve ever read one sourdough recipe that says the bulk rise takes 4 hours and another that says 8… you’re not crazy! The bulk fermentation time can vary a lot depending on your kitchen temperature, the strength of your starter, the type of flour you’re using, and even the humidity in the air.
In a warm kitchen (around 75–78°F), bulk rise might only take 4–5 hours. In a cooler space, it could take closer to 10 hours or more. Rather than watching the clock, it’s best to watch the dough—look for it to become puffier, smoother, and show signs of bubbles forming around the edges and surface. When it’s jiggly and airy but still has structure, you're ready to go.
So don’t stress if your dough isn’t on the exact same schedule as the recipe. Your sourdough is as unique as you are!
Notes on Alternate Proofing Methods:
There are a few different ways you can schedule your sourdough bake depending on what works best for your routine. The main recipe walks you through an overnight countertop proof followed by a second shorter proof and then baking the next morning. Here are two more options to consider:
1. Long Cold Proof (Before Shaping):
Finish your stretch and folds at night, then cover the dough tightly and place it straight into the fridge. You can leave it there overnight or up to 48 hours. When you're ready to bake, let the dough come to room temperature for a couple hours, then shape it and place it in a banneton for its final proof. Once it’s puffy and ready, bake as directed. 2. Overnight Room Temp Bulk + Cold Final Proof:
After your folds, let the dough bulk ferment at room temperature overnight. In the morning, shape it, place it into a banneton, and move it directly into the fridge for the final proof. When you're ready to bake, you can take it straight from the fridge to the oven. No need to bring it to room temp first.
Tried this recipe?Let us know how it was!