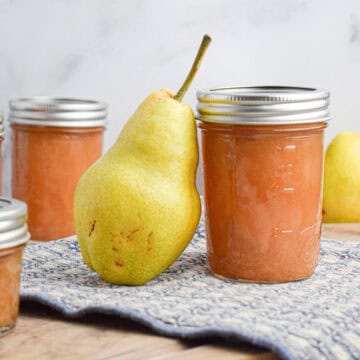
Old Fashioned Pear Preserves {canning safe}
When fresh pears are in season, there’s no better way to use them than in a batch of old-fashioned pear preserves. This easy recipe cooks down into sweet, cinnamon-kissed goodness that’s perfect on biscuits, pancakes, or spooned over yogurt any time of year.
Equipment
- Large pot
- Cutting board, knife and peeler
- Measuring cups and spoons
- 7 Half pint mason jars
- Water bath canning equipment (see above)
Ingredients
- 10 cups Pears, peeled, cored and thinly sliced
- 1 cup brown sugar
- 1 cup white granulated sugar
- 1 small lemon, seeded and sliced
- ½ tablespoon lemon juice
- 1 cinnamon stick
- pinch of salt
Instructions
- Peel, core, and slice the pears, then place them in a large, heavy-bottomed pot.Add in the brown sugar, white sugar, sliced lemon, lemon juice, cinnamon stick, and a pinch of salt. Stir to coat the pears evenly.
- Set the pot over medium-high heat and bring the mixture to a full boil, stirring occasionally.Once a boil has been reached, reduce the heat to medium or medium-low and cook uncovered for about 1 hour. Stir every so often to prevent sticking.The preserves are ready when the pears are tender and translucent and the syrup has thickened to a glossy consistency. It will thicken a bit more as it cools.
- Remove the pot from the heat. At this point you can either spoon the jam into jars and store in the fridge or can them using the instructions below.
Water Bath Canning Instructions
- Ladle the jam into about 7 half pint jars leaving about ¼th to ⅓rd inch of headspace.Remove air bubbles and wipe the jar rims.Place on new, clean lids and bands and process in a boiling water bath for 10 minutes (adjusting time for altitude).*Remember - do not start the timer until the water has come to a full rolling boil.*Turn off the heat and allow the jars to rest in the warm water for 5 minutes before removing and placing on a towel on the counter (do not place directly on the counter).Allow the jars to cool undisturbed for about 24 hours until all the lids have sealed.Store sealed jars in a cool dry place for 12-18 months for best quality.*Note* If any of the jars do not seal simply store in the refrigerator and consume within 2-4 weeks.Enjoy!
Tried this recipe?Let us know how it was!