Wondering if you're ready to tackle sourdough but not sure where to start? This no-fail Beginner Sourdough Bread recipe is the perfect introduction. Not just because it's easy and delicious, but because baking with sourdough really isn't as intimidating as it seems!

If you've been wanting to try your hand at sourdough but weren't sure where to start, this Beginner Sourdough Bread recipe has you covered. It's simple, straightforward, and gives you that classic crusty loaf with a chewy, flavorful crumb-no fancy equipment required.
Even my mom, who was totally overwhelmed by the idea of caring for a starter and baking bread from scratch, is now completely hooked. She makes this recipe all the time and it's given her the confidence to branch out and try new sourdough recipes and experiment with techniques. If she can do it you can too! And I promise, there's nothing quite like pulling a golden, homemade loaf out of the oven. Once you get going you won't be able to stop!
Jump to:
- What makes sourdough different from other kinds of bread?
- Dietary Benefits of Sourdough
- More sourdough & sourdough discard recipes you will love.
- Equipment
- Ingredients
- Sourdough Starter 101
- Sourdough Starter FAQs
- Step-by-Step Photos & Timeline
- How to Stretch & Fold Sourdough Dough
- Sourdough Bread FAQs
- Alternative Proofing Methods
- Recipe
What makes sourdough different from other kinds of bread?
What makes sourdough different from other kinds of bread is that it is naturally leavened-meaning it rises without commercial yeast. Instead, it uses a wild yeast starter (just flour and water!) that you feed and ferment over time. This is what gives sourdough its signature tangy flavor, chewy texture, and beautifully crisp crust.
Dietary Benefits of Sourdough
Here are some dietary benefits of sourdough that might just make you love it even more:
Easier to Digest: The long fermentation process helps break down gluten and phytic acid, making it gentler on the digestive system-especially for those with mild gluten sensitivities. (Those with Celiac disease should still avoid gluten products, including sourdough, if it triggers symptoms.)
Lower Glycemic Index: Sourdough is digested more slowly than regular white bread, which helps prevent spikes in blood sugar and keeps you fuller longer.
Better Nutrient Absorption: The natural fermentation makes minerals like iron, magnesium, and zinc more bioavailable, meaning your body can absorb them more easily.
Fewer Preservatives: Homemade sourdough doesn't need the additives or preservatives found in store-bought bread-it's just flour, water, salt, and time.
More Flavor, Naturally: Not exactly a dietary benefit-but the flavor from wild fermentation is hard to beat, which makes it easier to enjoy wholesome, homemade bread without extra butter or sugar.
More sourdough & sourdough discard recipes you will love.


Equipment
To bake a simple, crusty loaf of sourdough bread at home, you don't need a ton of fancy gear-just a few basics to get you going:
- Digital Kitchen Scale - For accurate measurements (especially important in sourdough baking). I have several scales and they all basically work the same but this Oxo Good Grips Food Scale is one of my favorites.
- Mixing Bowl - A large bowl for mixing and resting your dough. I love these Pyrex glass nesting mixing bowls with lids. They're great for sourdough and everything else!
- Bench Scraper or Dough Scraper - Super helpful for shaping and handling sticky dough.
- Banneton Basket or Bowl with Towel - For the final rise (proofing). A floured kitchen towel in a bowl works just fine for beginners, or you can use a Banneton basket.
- Dutch Oven or Heavy Covered Pot - This traps steam and gives your loaf that crusty, golden exterior. I typically use my Le Creuset 5.5 Quart Dutch Oven and it works great. But if you get really into baking and want something a little fancier this Le Creuset Bread Oven is amazing.
- Sharp Knife or Bread Lame - For scoring the dough so it bakes up beautifully.
- Oven Mitts + Cooling Rack - Safety first, and cooling your bread properly is key to texture. I love these Kitchenaid Oven Mitts and these stainless steel wire racks.
If you really are starting from scratch and don't have any of the above mentioned equipment, they have some good starter kits on Amazon.
This Superbaking Sourdough Starter Kit includes: a Banneton basket; bread lame; dough whisk; cleaning brush and dough scraper.
Optional but nice to have: a silicone mat for mess-free shaping, a dough whisk (although a fork and spoon work just as well), and a dedicated sourdough jar for your starter (but you can totally just use a regular mason jar).
Ingredients
- Active sourdough starter: It should be fed, bubbly and ready for baking. (More info. on starters below.)
- Flour: I feel like most people who bake with sourdough come up with their own ratio of different flour types, and I'll admit I'm no different. I personally like a mix of 50 grams whole wheat flour, 50 grams of all-purpose flour, and 400 grams of bread flour. But 450 grams of just bread flour or even AP-flour will work. Using 450 grams of whole wheat flour does tend to give you a pretty dense and heavy loft. But hey, experiment with it and see what you like best.
- Water: Room temperature or even lukewarm water is ideal.
- Salt: Regular table or sea salt works great.
Sourdough Starter 101
So what actually is a sourdough starter?
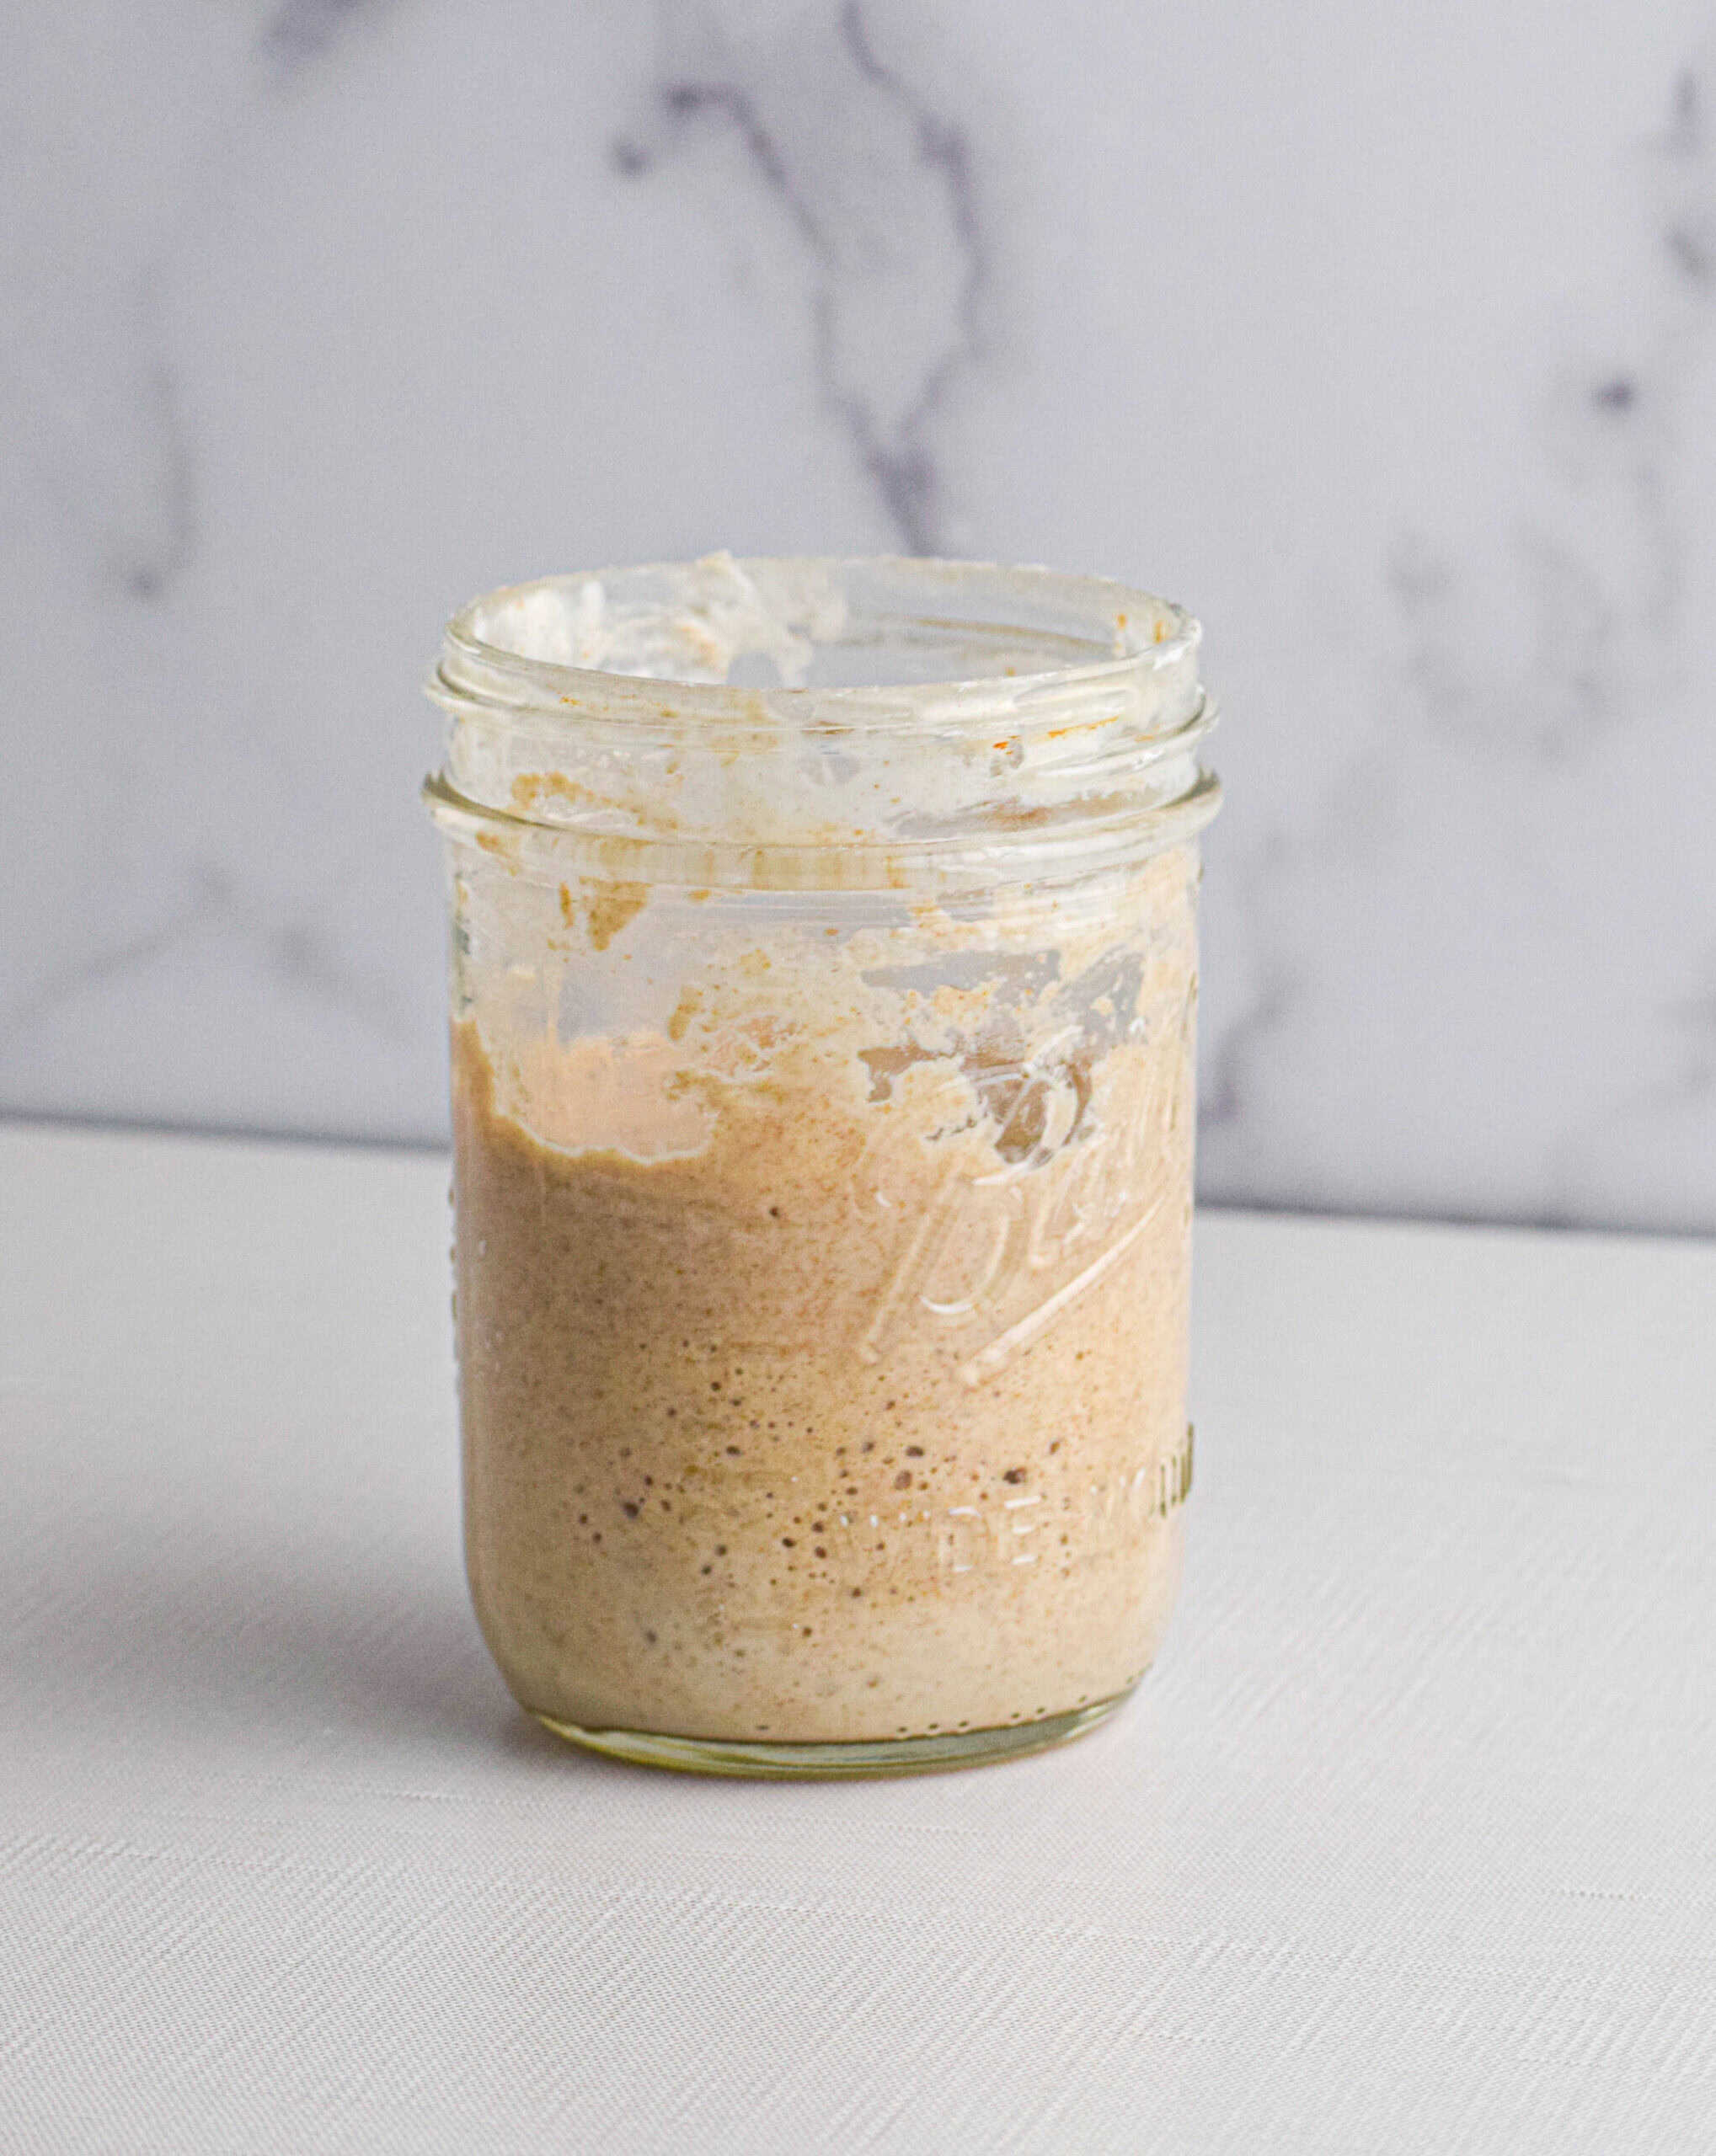
A sourdough starter is really just a mix of flour and water that's been left to ferment over time-kind of like a living, breathing wild yeast pet for your kitchen.
Instead of using store-bought yeast, sourdough relies on naturally occurring wild yeast from the environment. When you feed your starter regularly (with flour and water), it picks up this yeast from the air around you. As the yeast feed on the sugars in the flour, the starter gets bubbly and active which means it's ready to leaven your bread.
How to Make a Sourdough Starter from Scratch
Making a sourdough starter at home might sound like a science experiment (and in some ways, it is!), but I promise - it's easier than you think.
All you need is flour, water, and a little patience. Within 1 to 2 weeks, you'll have your own bubbly, active starter that's ready to turn into delicious, crusty loaves.
Day 1:
In a clean jar or container, mix 50g whole wheat or bread flour and 50g room temperature water. Stir until there are no dry bits, cover loosely (a lid or kitchen towel is perfect), and let it sit at room temperature for 24 hours.
Days 2-7:
Each day, twice a day (I recommend morning and evening) discard about half of the starter and feed it with 50g all-purpose or bread flour and 50g water. Stir, cover, and let it rest at room temp. Around days 3-5, you might see a few bubbles or a bit of rise-but don't worry if it seems slow or even goes quiet for a day or two. That's totally normal.
Days 8-14:
By the second week, your starter should start smelling pleasantly tangy and be noticeably bubbly. Eventually, it will rise and fall predictably a few hours after feeding. When it consistently doubles in size within about 4-6 hours and smells fresh and slightly sour (not funky or off), it's ready to bake with!
After it's established, you can store your starter in the fridge and just feed it once a week-or once a day if left a room temperature.
Sourdough Starter Shortcuts
While creating your own starter from scratch can be very satisfying, if you don't want to wait 1-2 weeks to bake fear not! There are options!
You can actually purchase active sourdough starters online, such as Heirloom Sourdough Starter on Amazon. Or just ask a fellow sourdough baker friend or neighbor to give you some of their starter.
Sourdough Starter FAQs
If you keep your starter on the counter, you'll want to feed it once a day. If you're not baking every day, you can store it in the fridge and feed it about once a week.
You can use all-purpose, bread flour, whole wheat, or a mix! I like starting with whole wheat flour for the first couple of days because it tends to ferment more quickly, then switching to all-purpose or bread flour to keep things going.
You'll want to steer clear of using gluten free nut or seed flours (such as coconut or almond) or enriched flours ( with added oils, sugar, milk powder, etc.)
A fed starter will be bubbly, smell pleasantly tangy and have doubled in size within 4-6 hours of feeding. You can also do the "float test". Drop a small spoonful in water-if it floats, it's ready to bake!
That's called "hooch." And it's just a sign your starter is hungry. Just pour it off or stir it back in before feeding.
Sourdough starters naturally have a tangy or "sour" smell which is perfectly normal. But If it smells really foul or grows mold (fuzzy, colored spots), you'll want to throw it out and start over.
Glad you asked! There's no need to throw perfectly good sourdough starter in the trash when there are so many great discard recipes you can use it in!
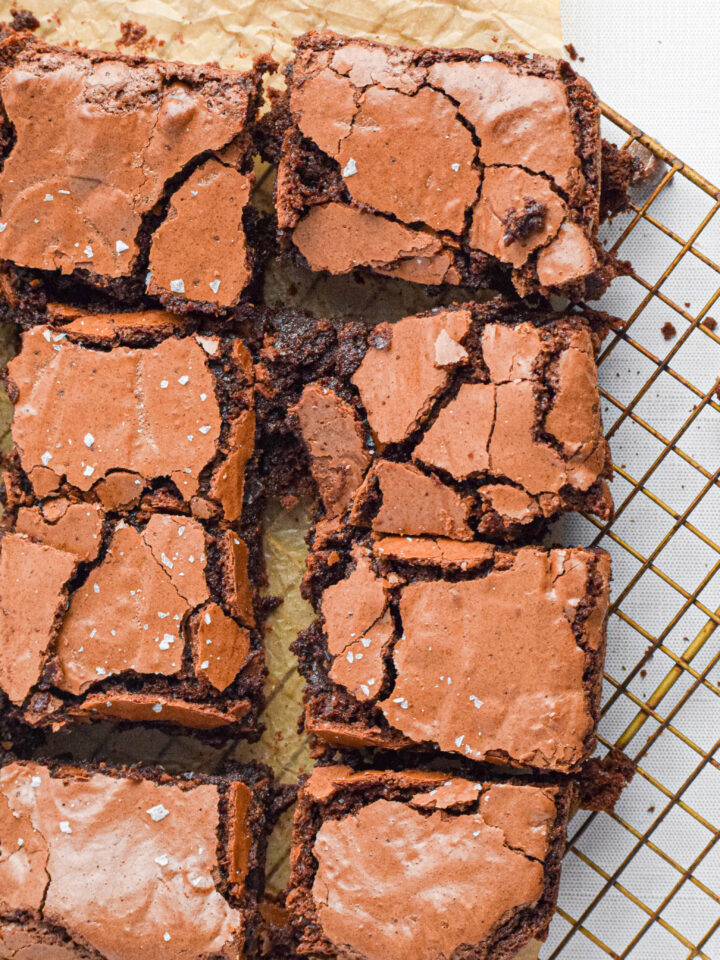
Rather than throwing it away, I usually store my sourdough discard in a separate jar in the fridge. That way I can make Sourdough Discard Banana Bread and Sourdough Discard Brownies whenever I want!

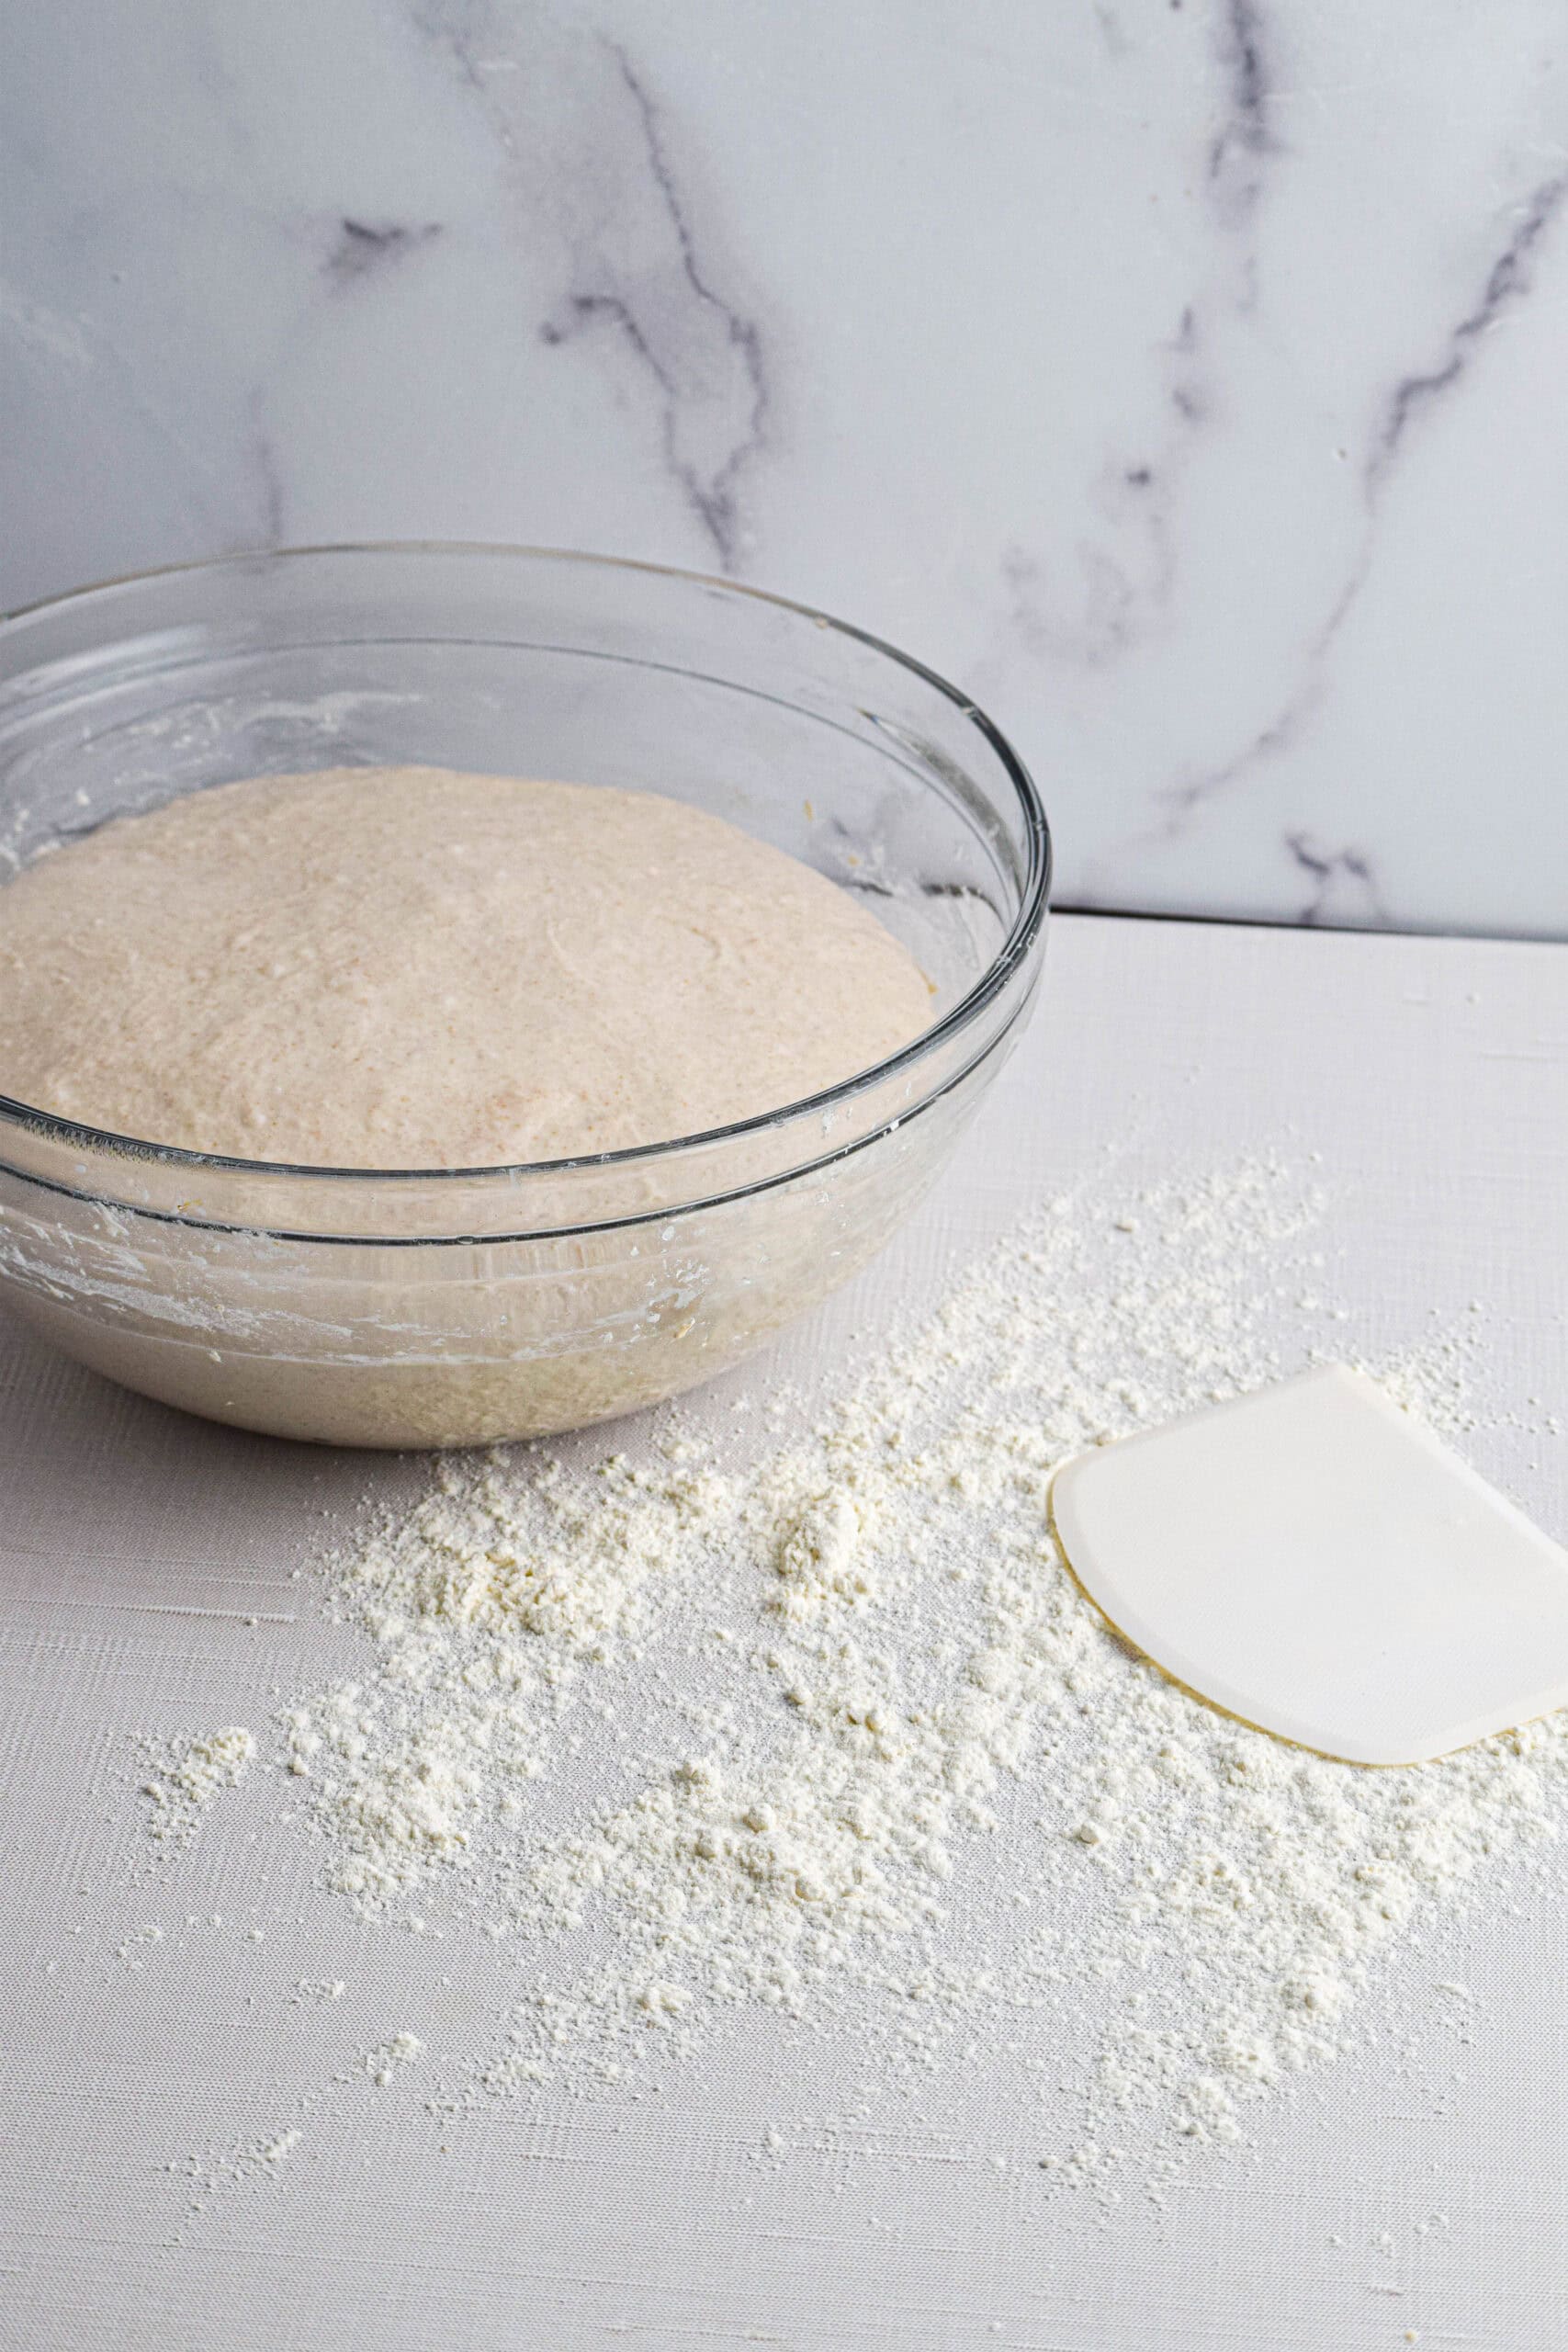
Step-by-Step Photos & Timeline
The Night Before.
I typically recommend starter you bread the evening before you want to bake it, around 7:30/8:00pm, or just after dinner. That will give you plenty of time to mix your dough and perform a couple folds before bed.
Make the dough & Let it rest (AKA: Autolyse)
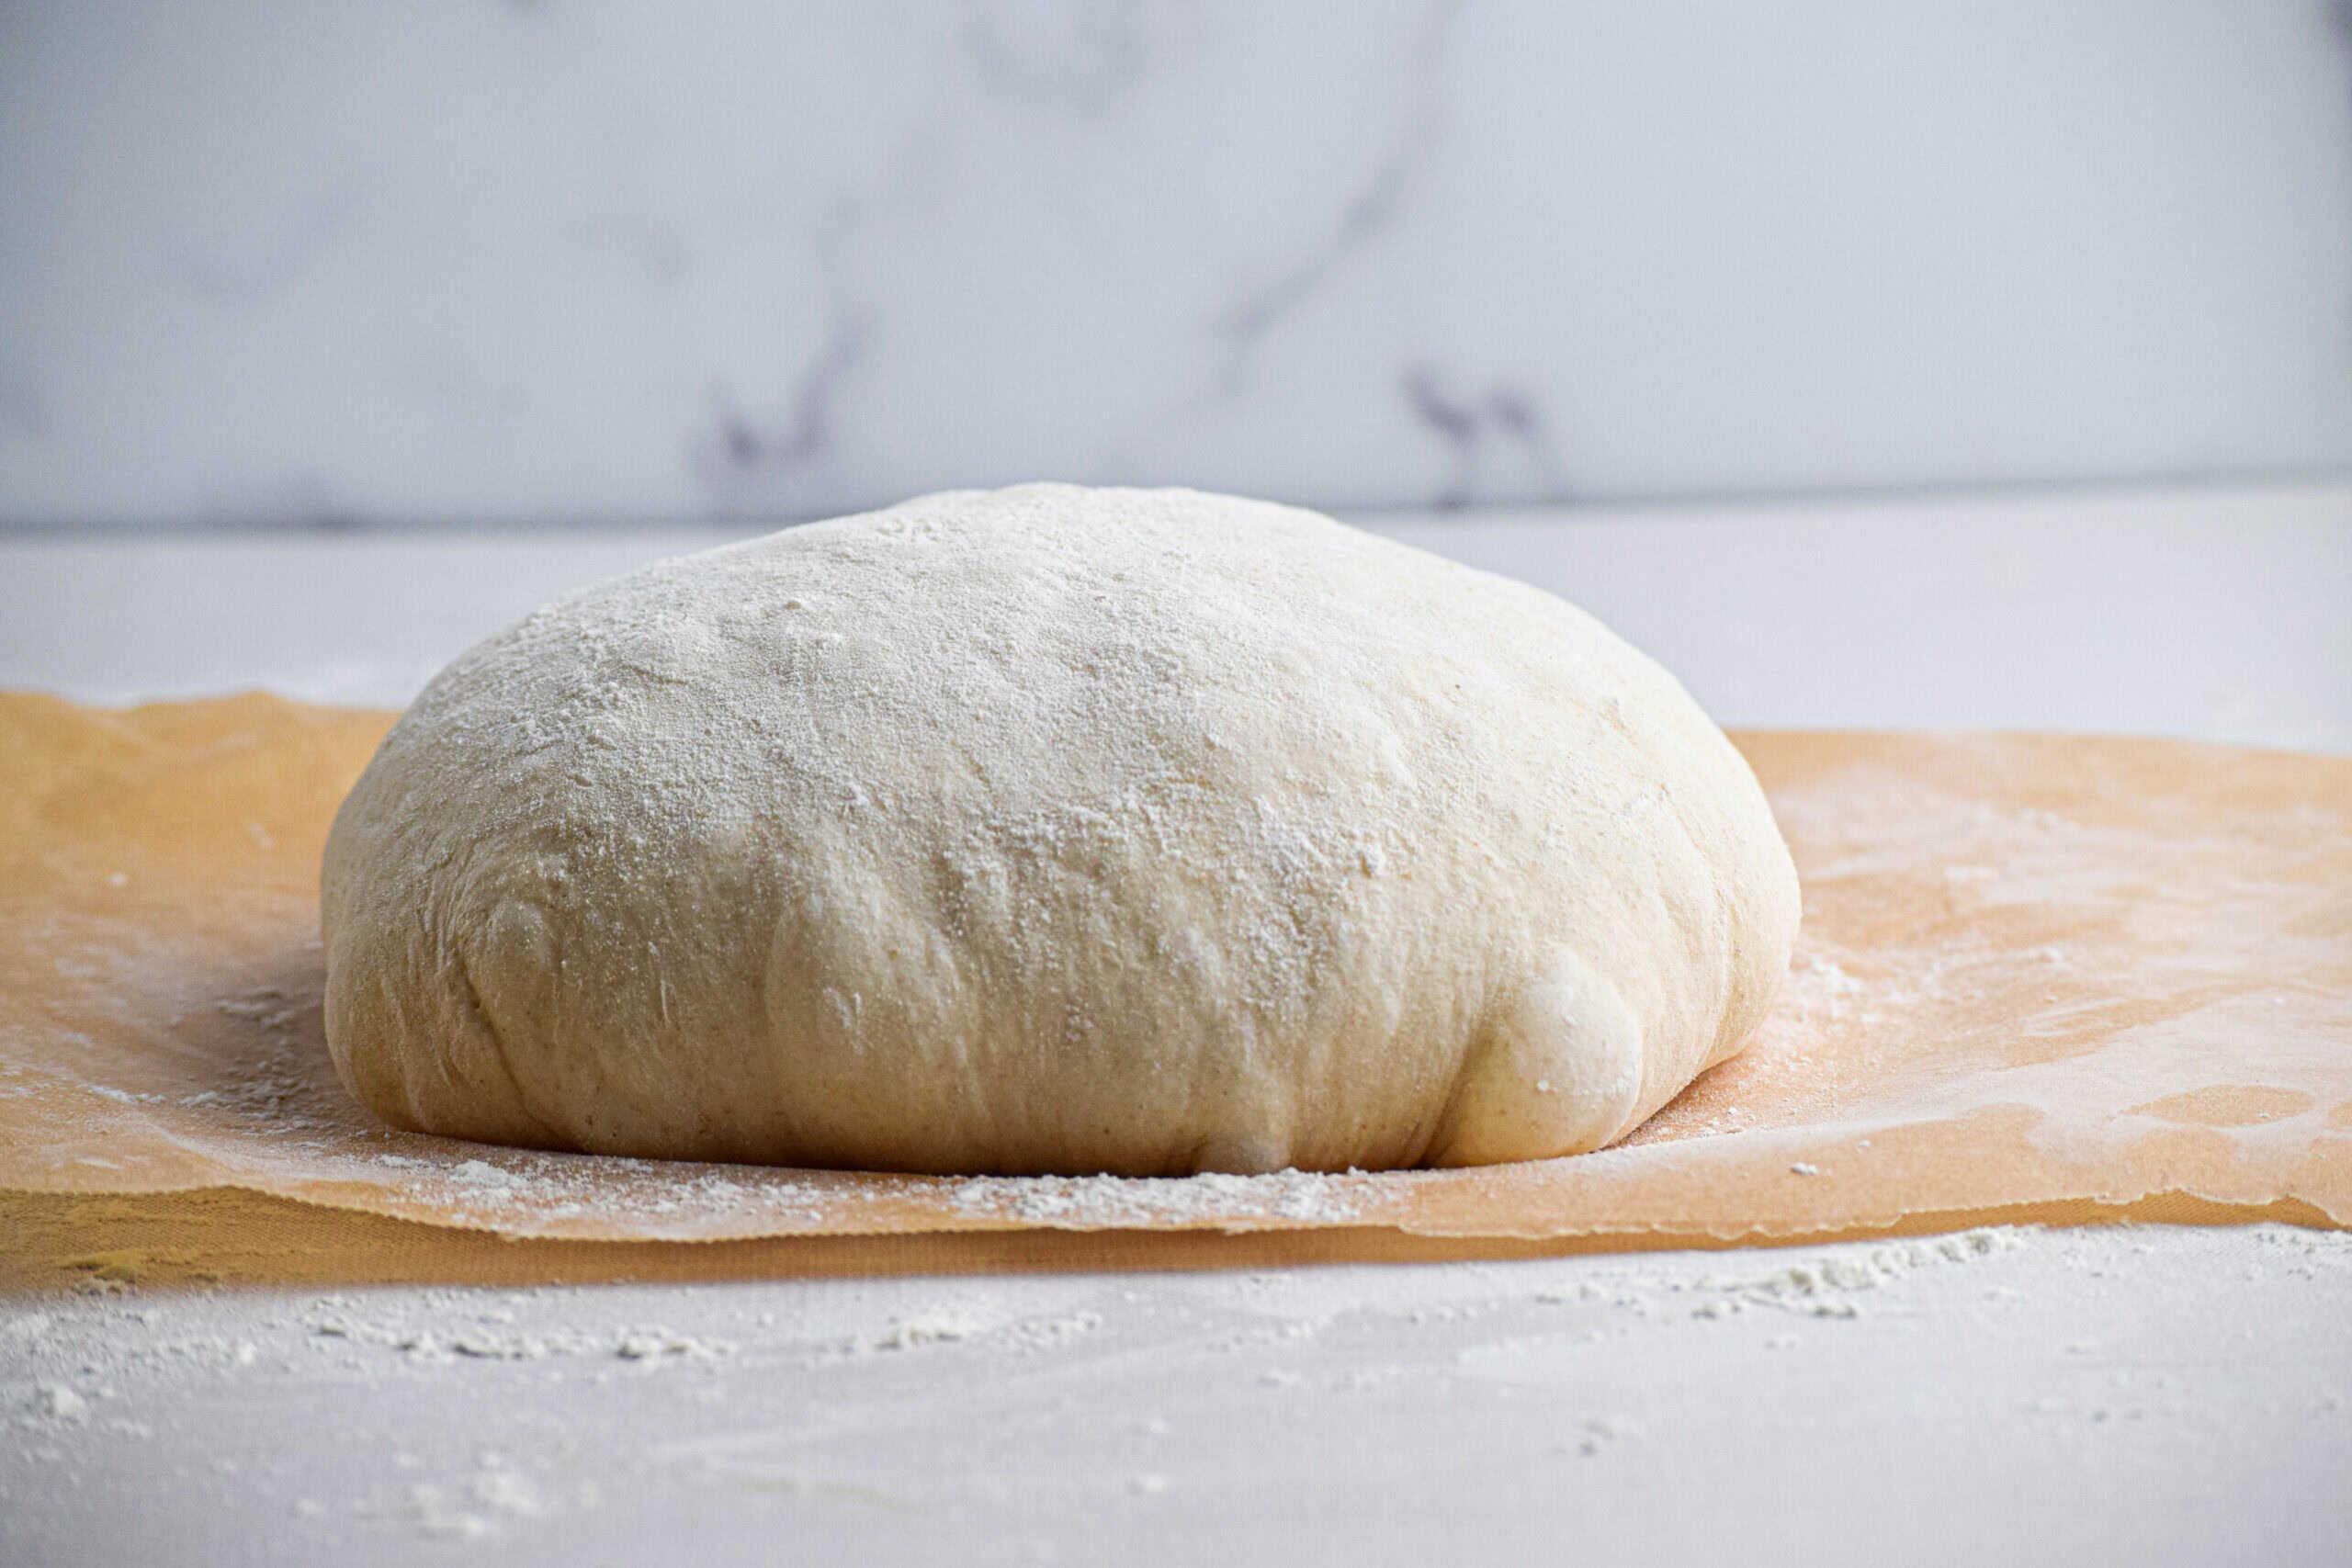
Mix up a shaggy dough and let it rest for 45 minutes before performing the first set of folds.
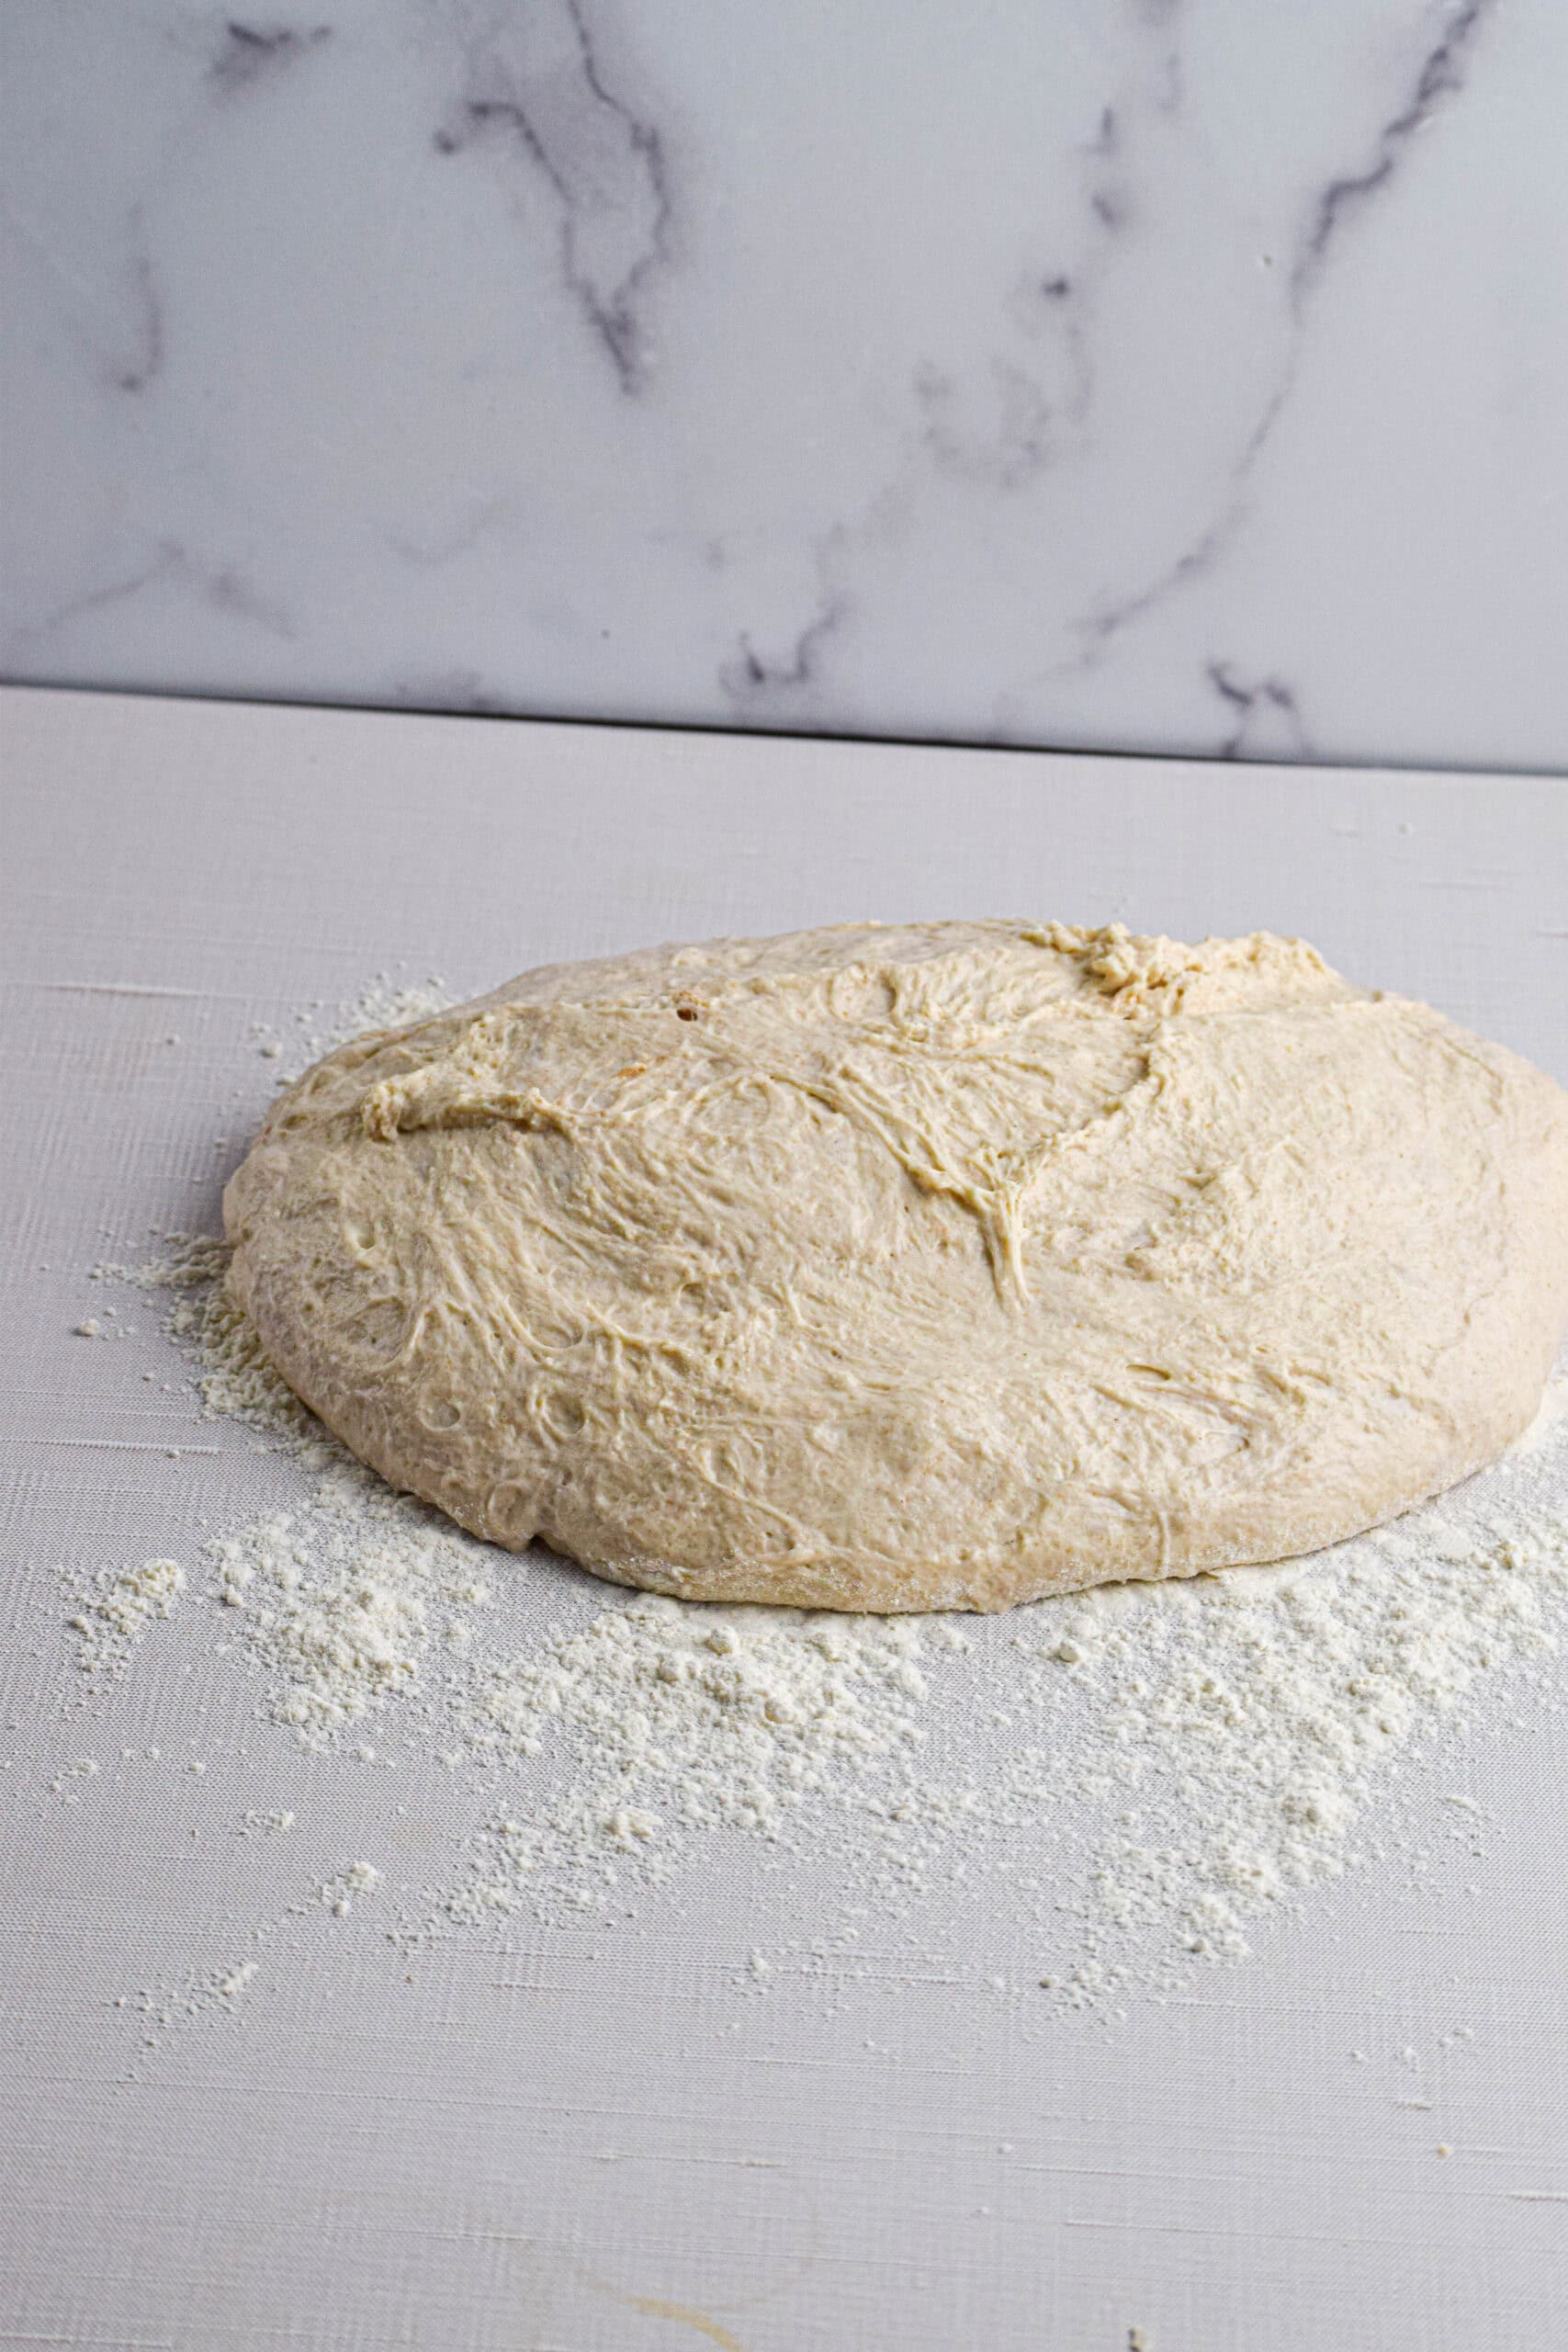
Stretch and fold the dough and repeat.
After the dough has rested for 45 minutes you will perform the first series of stretch and folds.
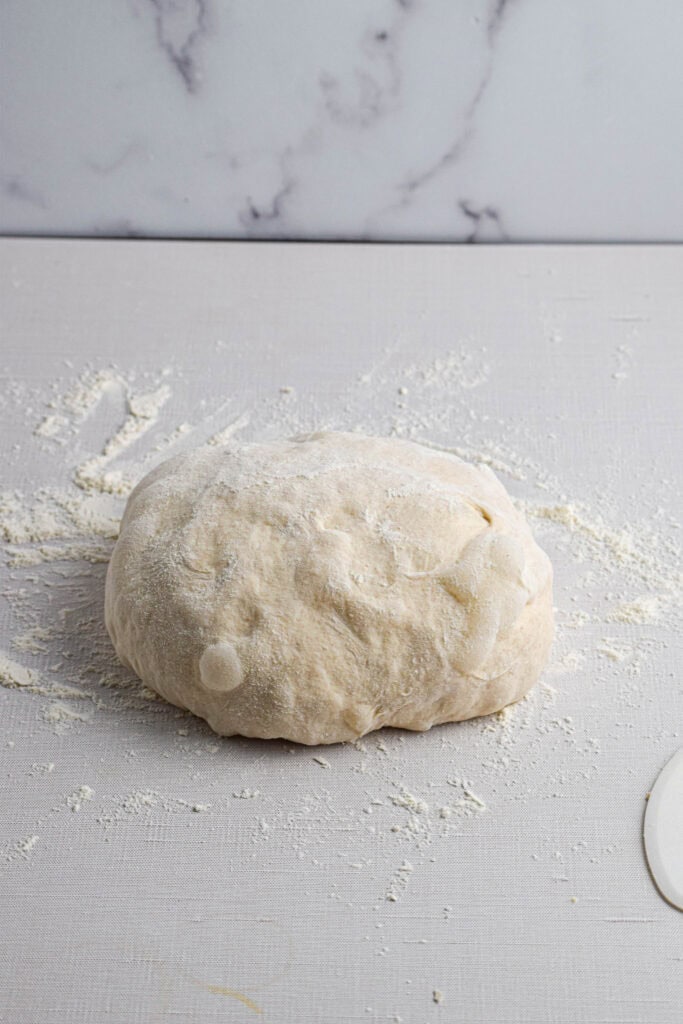
The Next Morning.
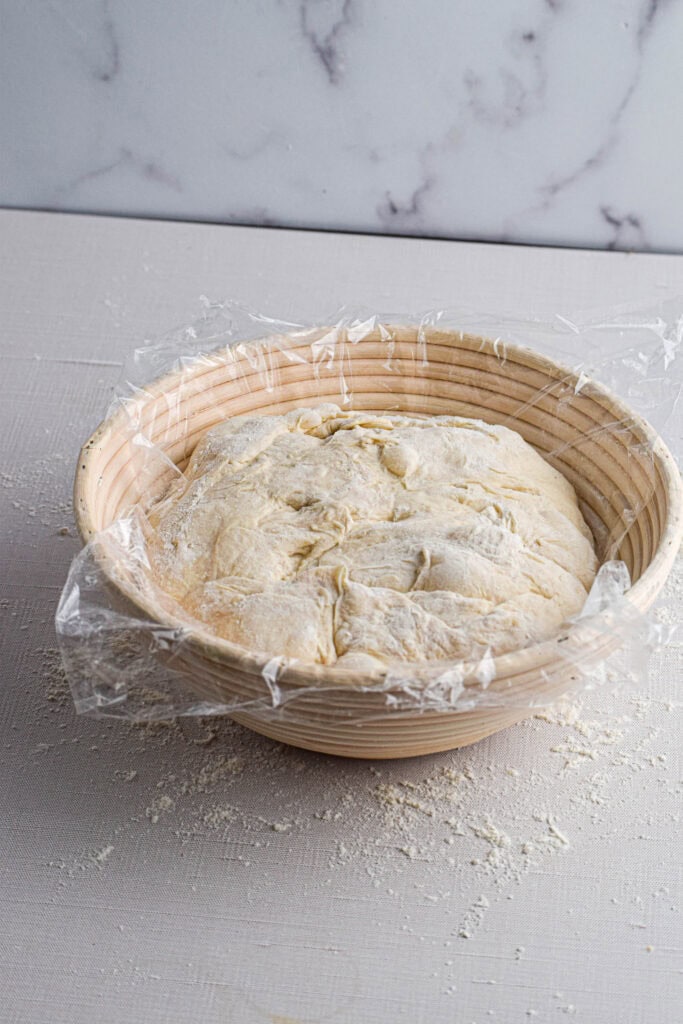
Shape the dough and let it rise.
Preheat the oven and bake.
How to Stretch & Fold Sourdough Dough
Stretch and folds are a gentle way to build strength in your sourdough dough without any kneading.
Here's how it works:
- Wet your hands to keep the dough from sticking.
- Grab one side of the dough, stretch it up gently (don't tear it!), then fold it over onto itself.
- Turn the bowl 90 degrees and repeat-stretch up, fold over.
- Do this a total of two - four times, turning the bowl each time, so you've stretched and folded from all sides.
You'll do this process approximately every 30 minutes during the bulk fermentation (anywhere from 2 to 4 sets depending on how tired your are). With each round, your dough should feel a little stronger and smoother.
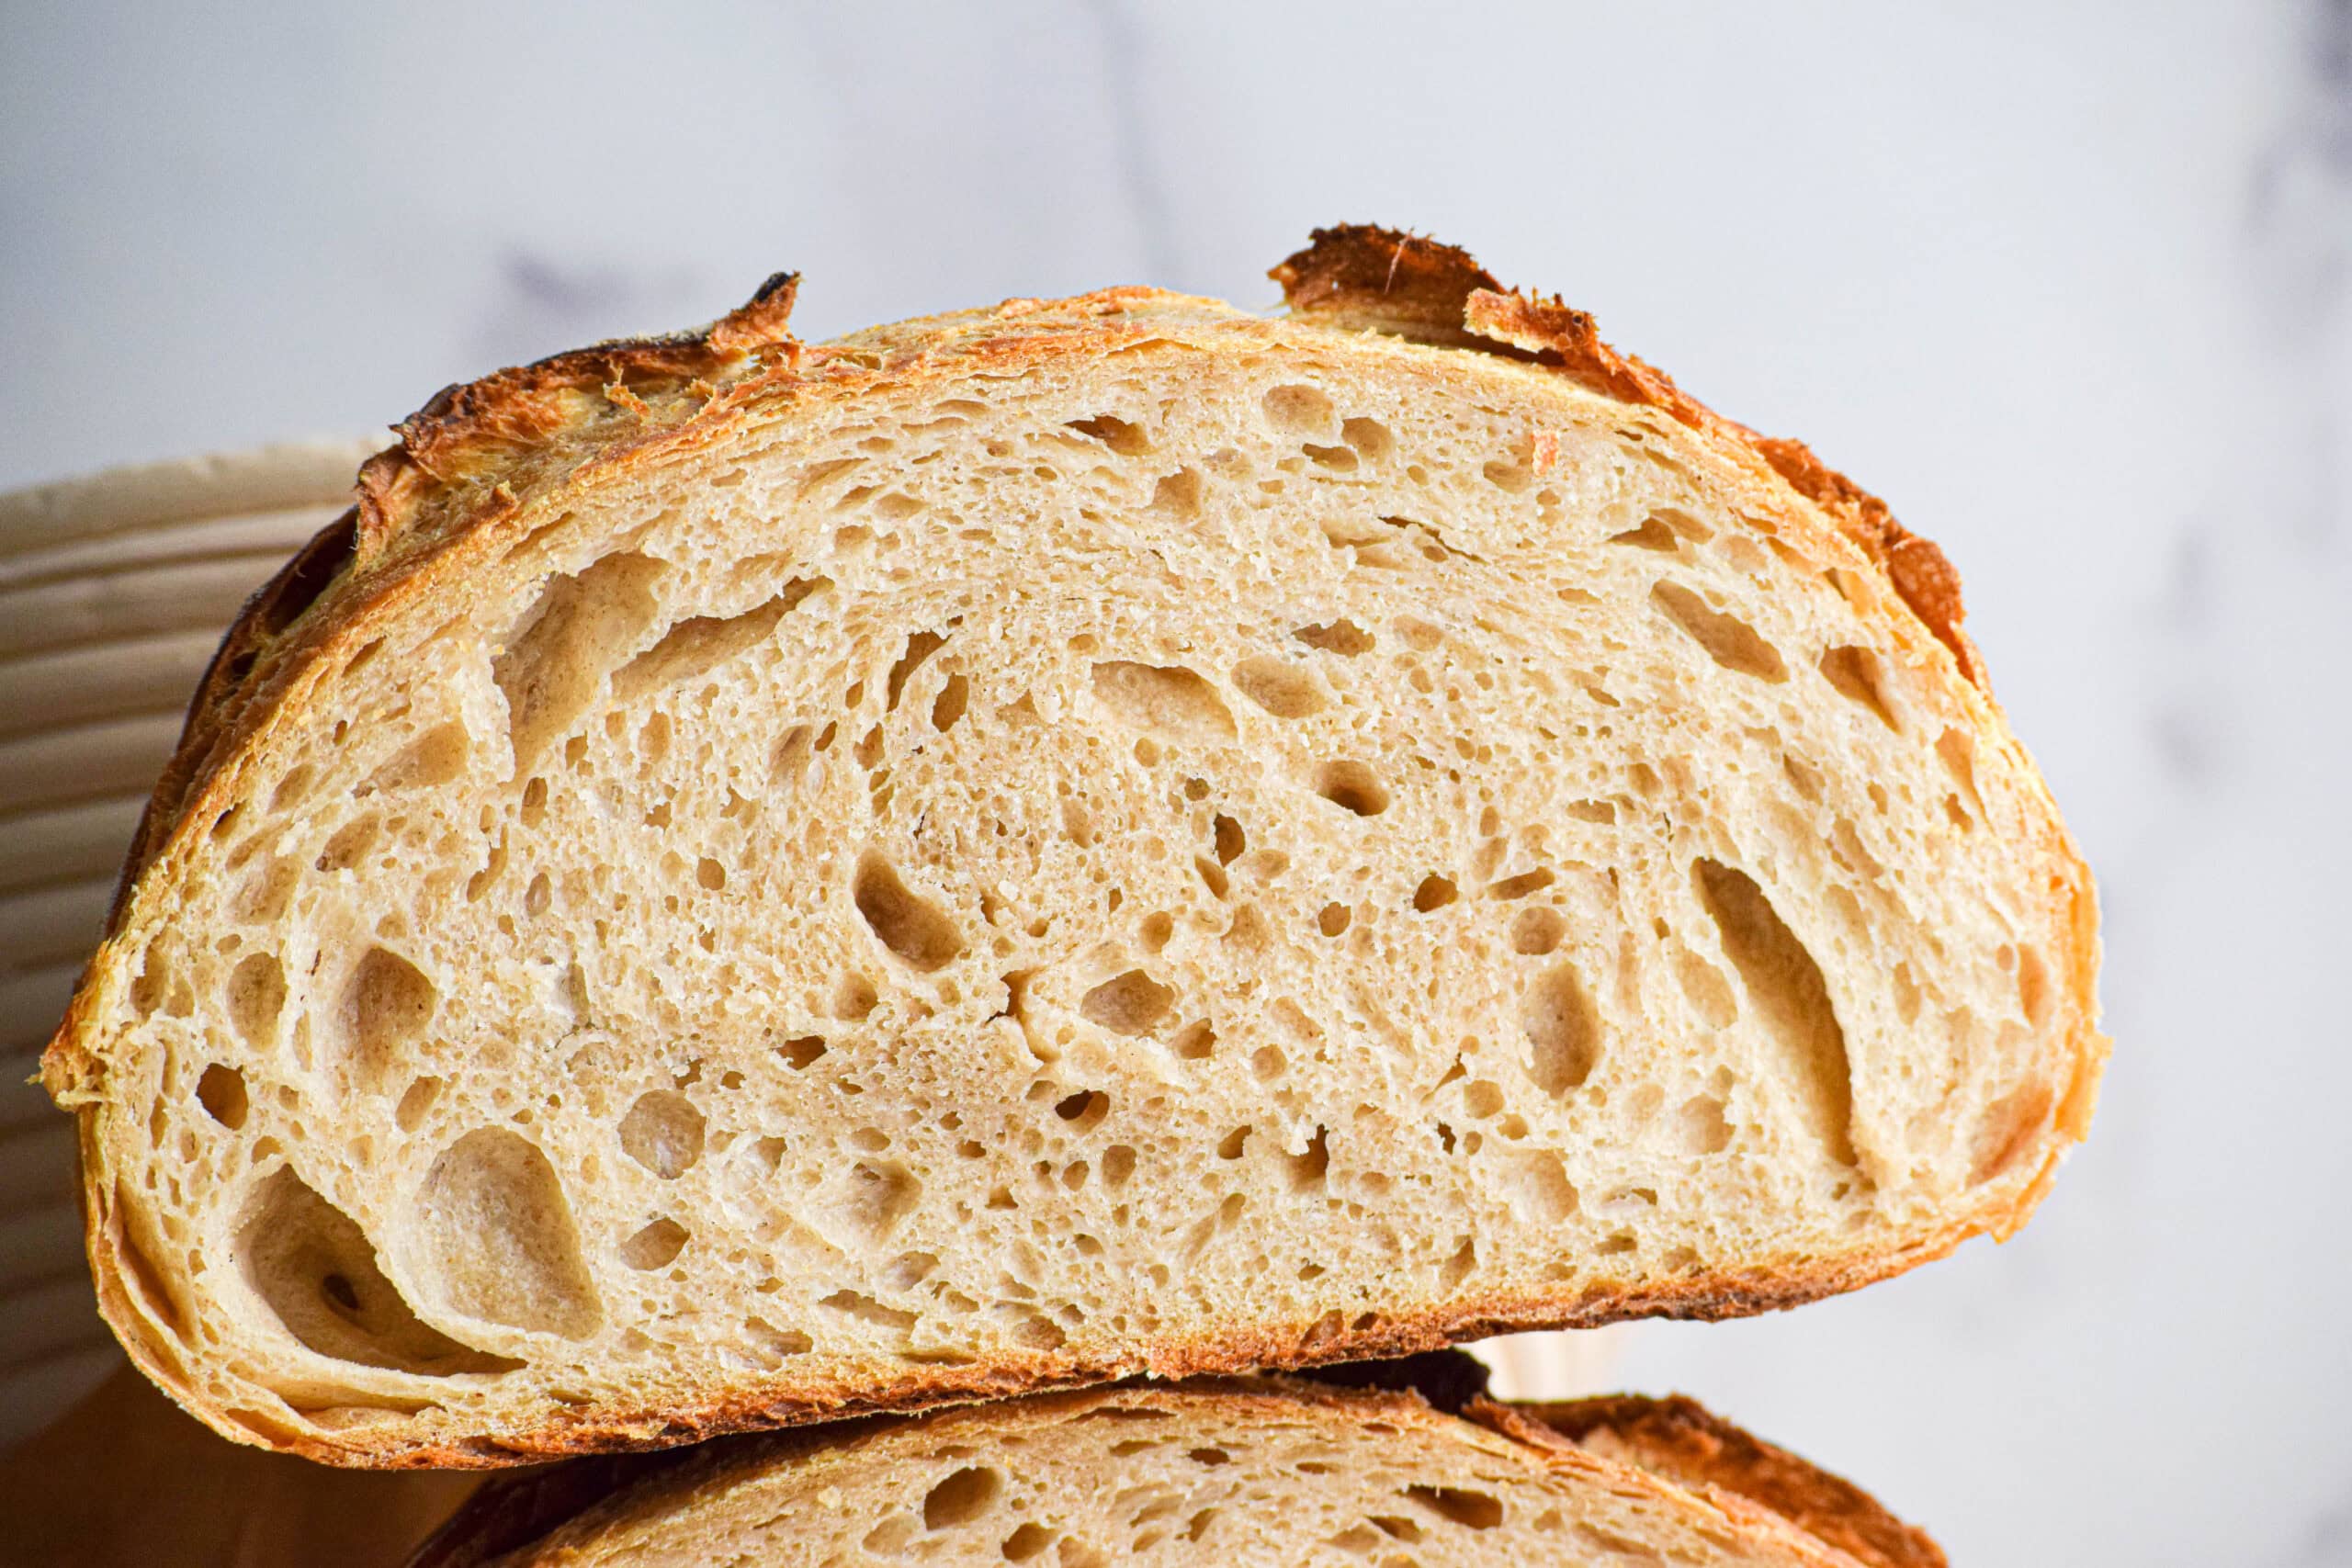
This method helps develop gluten, improve structure, and give you that beautiful rise and open crumb we all love in sourdough.
Sourdough Bread FAQs
This is most likely due to an underactive starter, under-proofing, or not enough gluten development. Let's go over some fixes:
1. Underactive starter - Give your starter a few more days of regular feedings at room temp. Try feeding it with whole wheat or rye flour to boost activity.
2. Under-proofing - If you don't let your dough ferment long enough during the bulk rise, the gluten structure won't develop properly-and that means no lift. Make sure your dough is at least doubled before baking.
3. Not Enough Gluten Development - Be sure to do your stretch and folds during bulk fermentation-usually 2-4 sets spaced 30-45 minutes apart. This helps strengthen the dough naturally.
After the final proof, your dough should be almost doubled in size and should feel airy and slightly jiggly when you gently shake the basket or bowl. A good poke test (where the dough slowly springs back when you press a finger in) is also a great indicator.
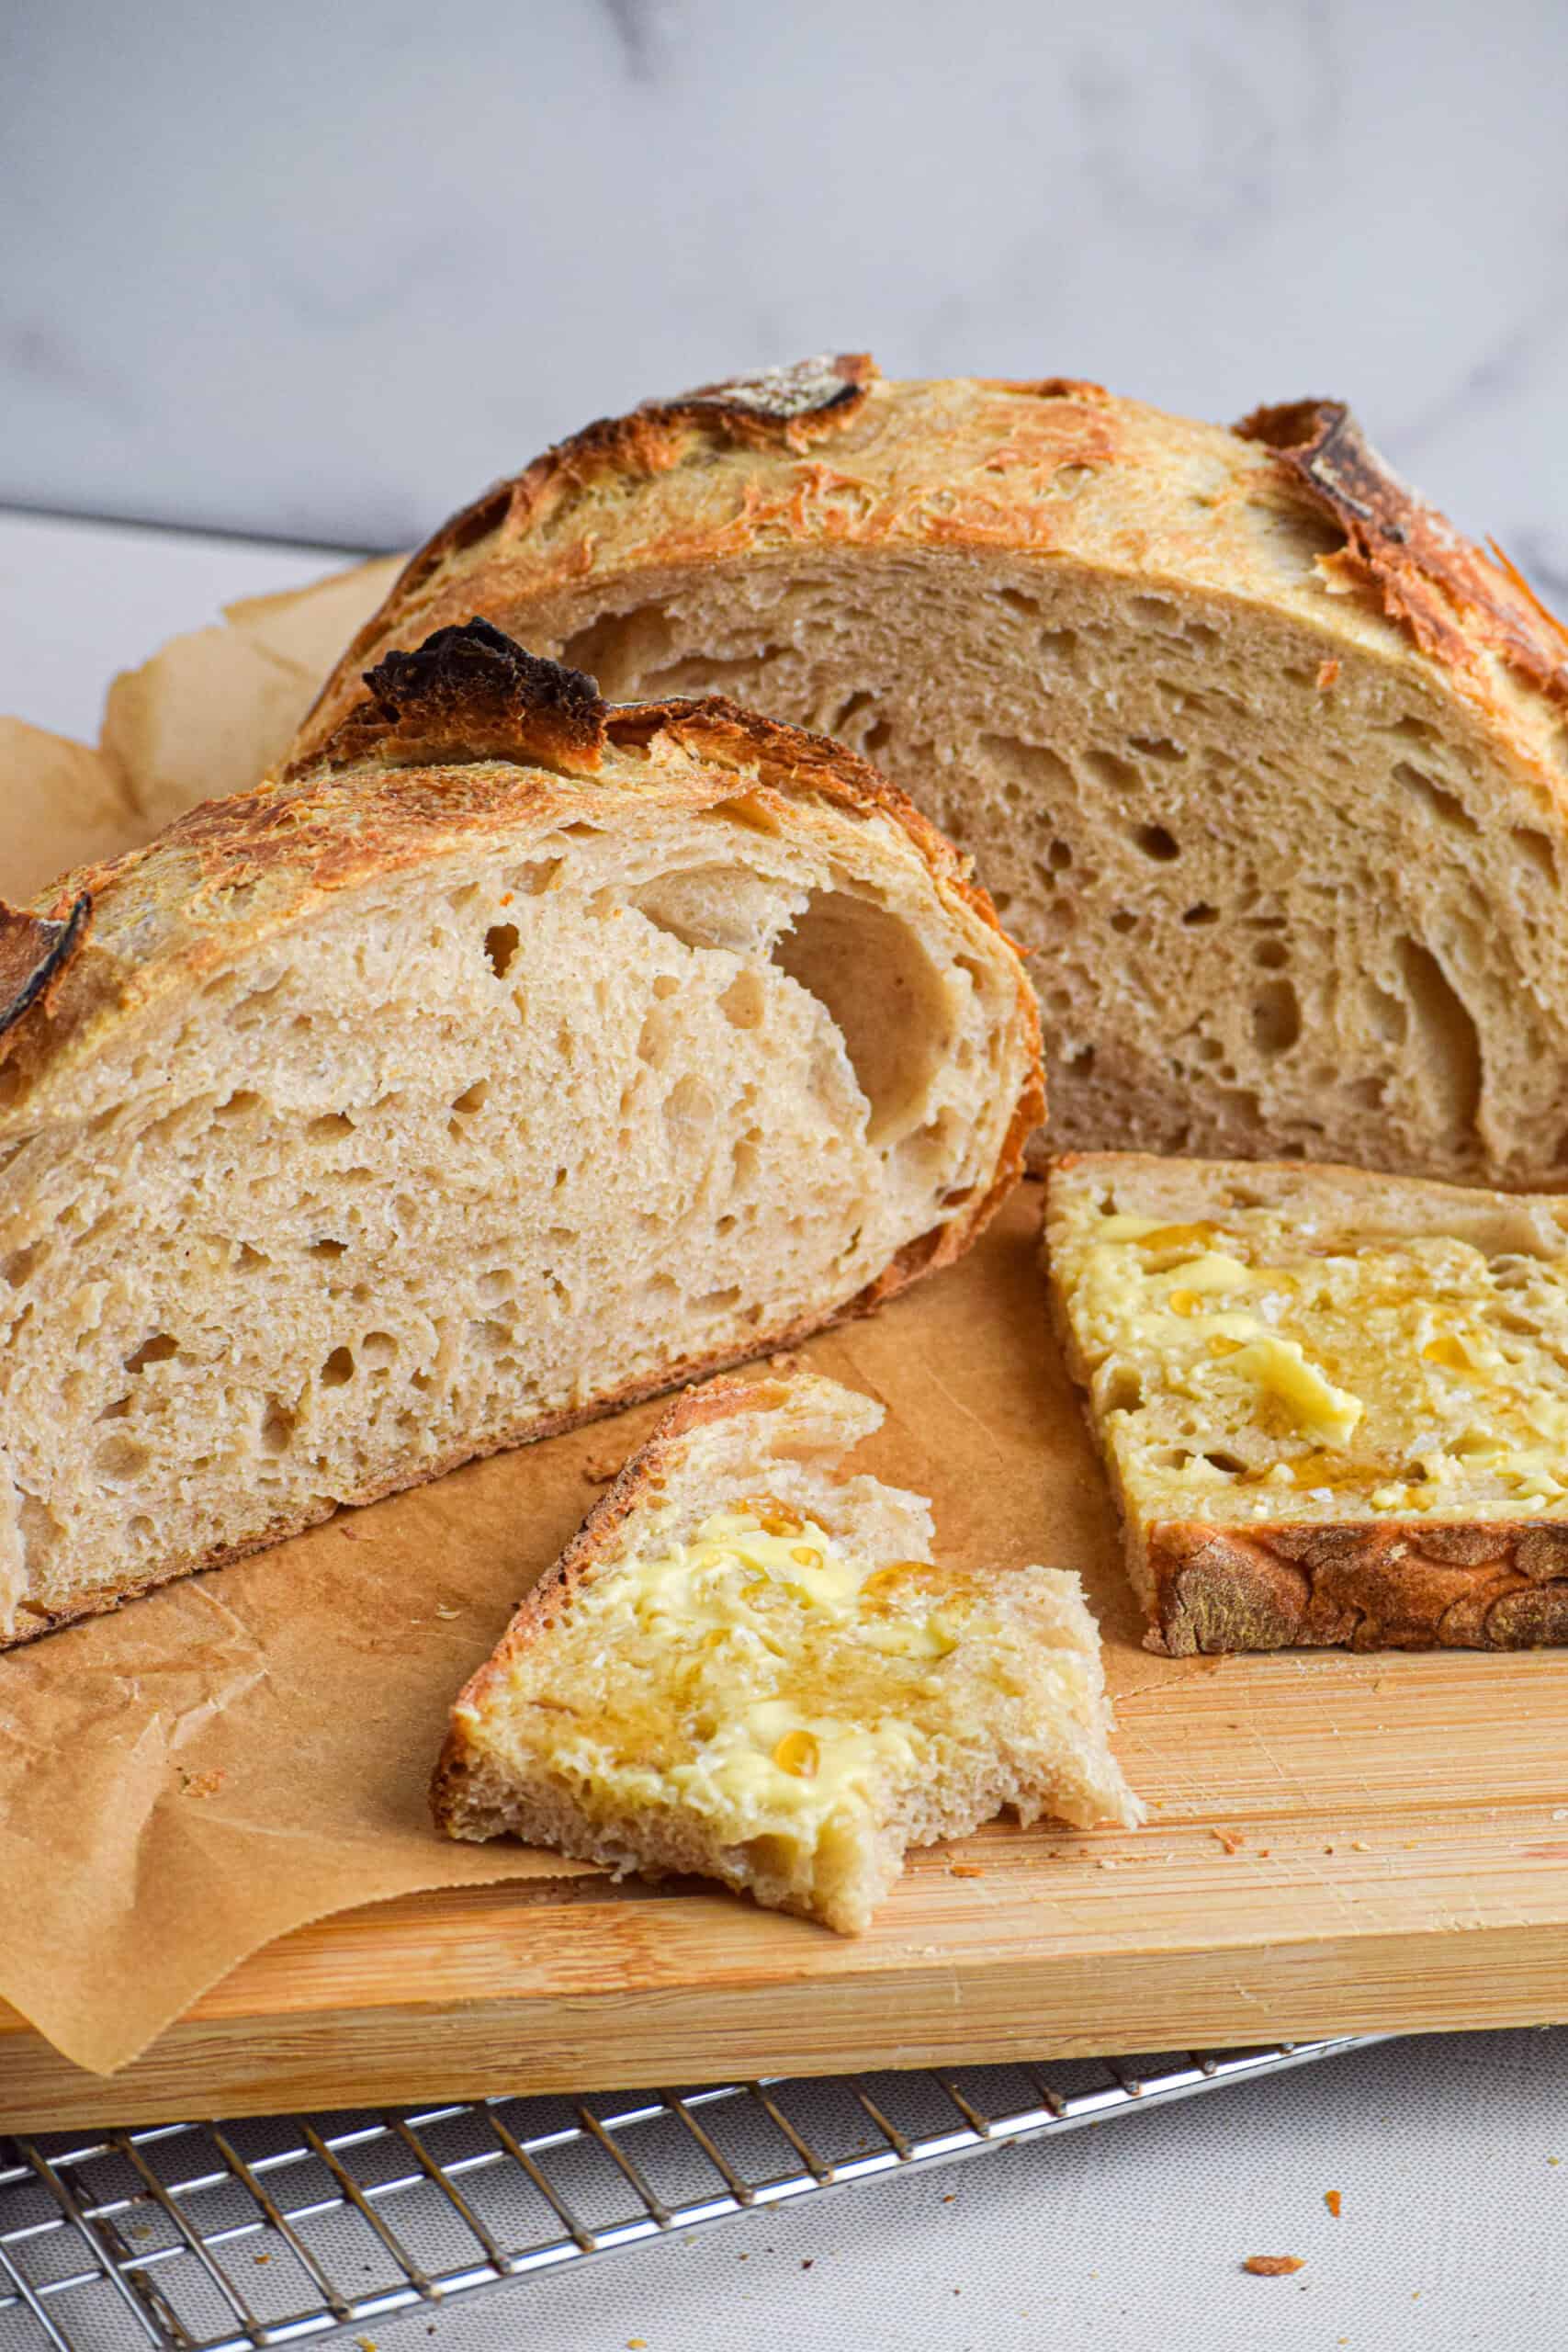
If you cut into your sourdough too soon, you'll let out all the built-up steam too quickly and the inside can turn out gummy instead of soft and airy. The crumb needs time to set, and the flavor actually gets better as it cools. I recommend waiting at least an hour (even though it feels like forever). Trust me-it's worth it.
Alternative Proofing Methods
There are a few different ways you can schedule your sourdough bake depending on what works best for your routine. The main recipe walks you through an overnight countertop bulk ferment followed by a second shorter proof and then baking the next morning.
Here are two more options to consider:
1. Long Cold Proof (Before Shaping): Finish your stretch and folds at night, then cover the dough tightly and place it straight into the fridge. You can leave it there overnight or up to 48 hours. When you're ready to bake, let the dough come to room temperature for a couple hours, then shape it and place it in a banneton for its final proof. Once it's puffy and ready, bake as directed.
2. Overnight Room Temp Bulk + Cold Final Proof: After your folds, let the dough bulk ferment at room temperature overnight. In the morning, shape it, place it into a banneton, and move it directly into the fridge for the final proof. When you're ready to bake, you can take it straight from the fridge to the oven. No need to bring it to room temp first.
Made this Beginner Sourdough Bread recipe? Let me know what you think in the comments!
Recipe
Beginner Sourdough Bread
Equipment
- Kitchen Scale
- Large glass mixing bowl
- Dough whisk or spoon
- Plastic wrap or proofing bag/bowl cover
- Banneton or proofing bowl
- Dutch oven or Bread oven
- Parchment Paper
- *See equipment notes in blog post*
Ingredients
- 150 grams active sourdough starter
- 330 grams room temperature water
- 450 grams flour I recommend using 50 grams whole wheat flour, 50 grams all-purpose flour, and 350 grams bread flour. You can increase the bread flour to 400 grams if your loaf seems too loose or wet.
- 12 grams salt
Instructions
The Night Before
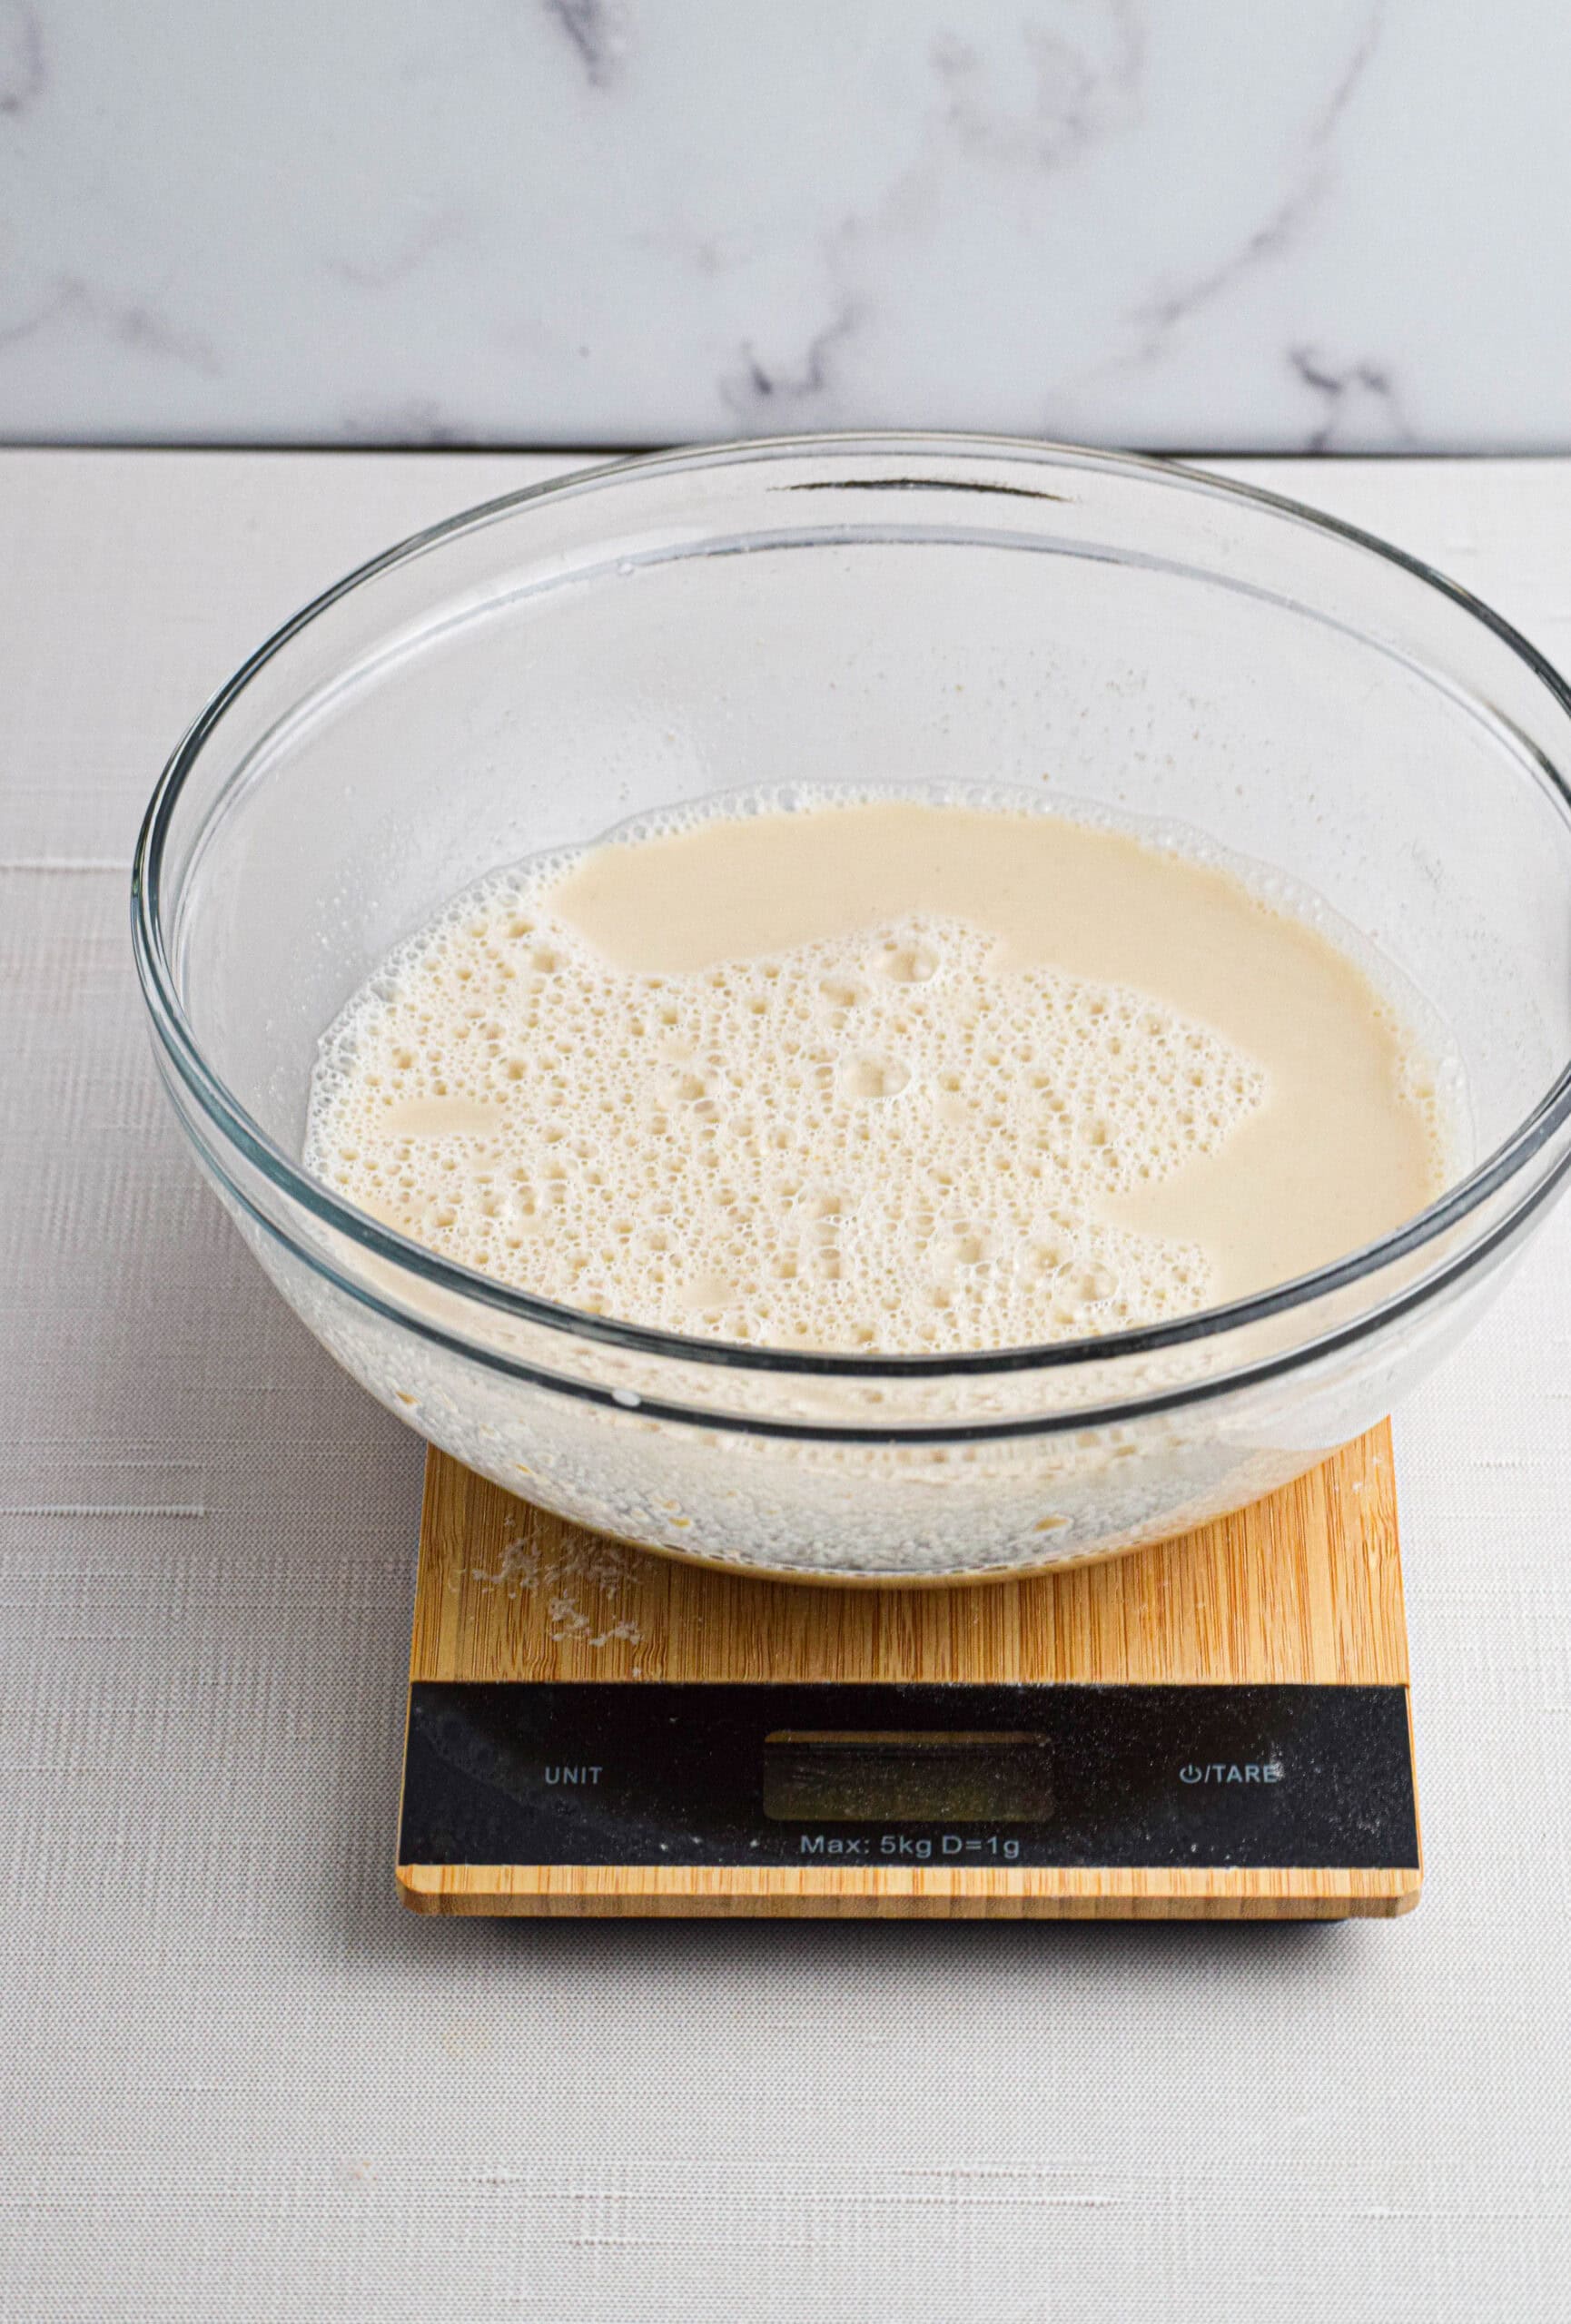
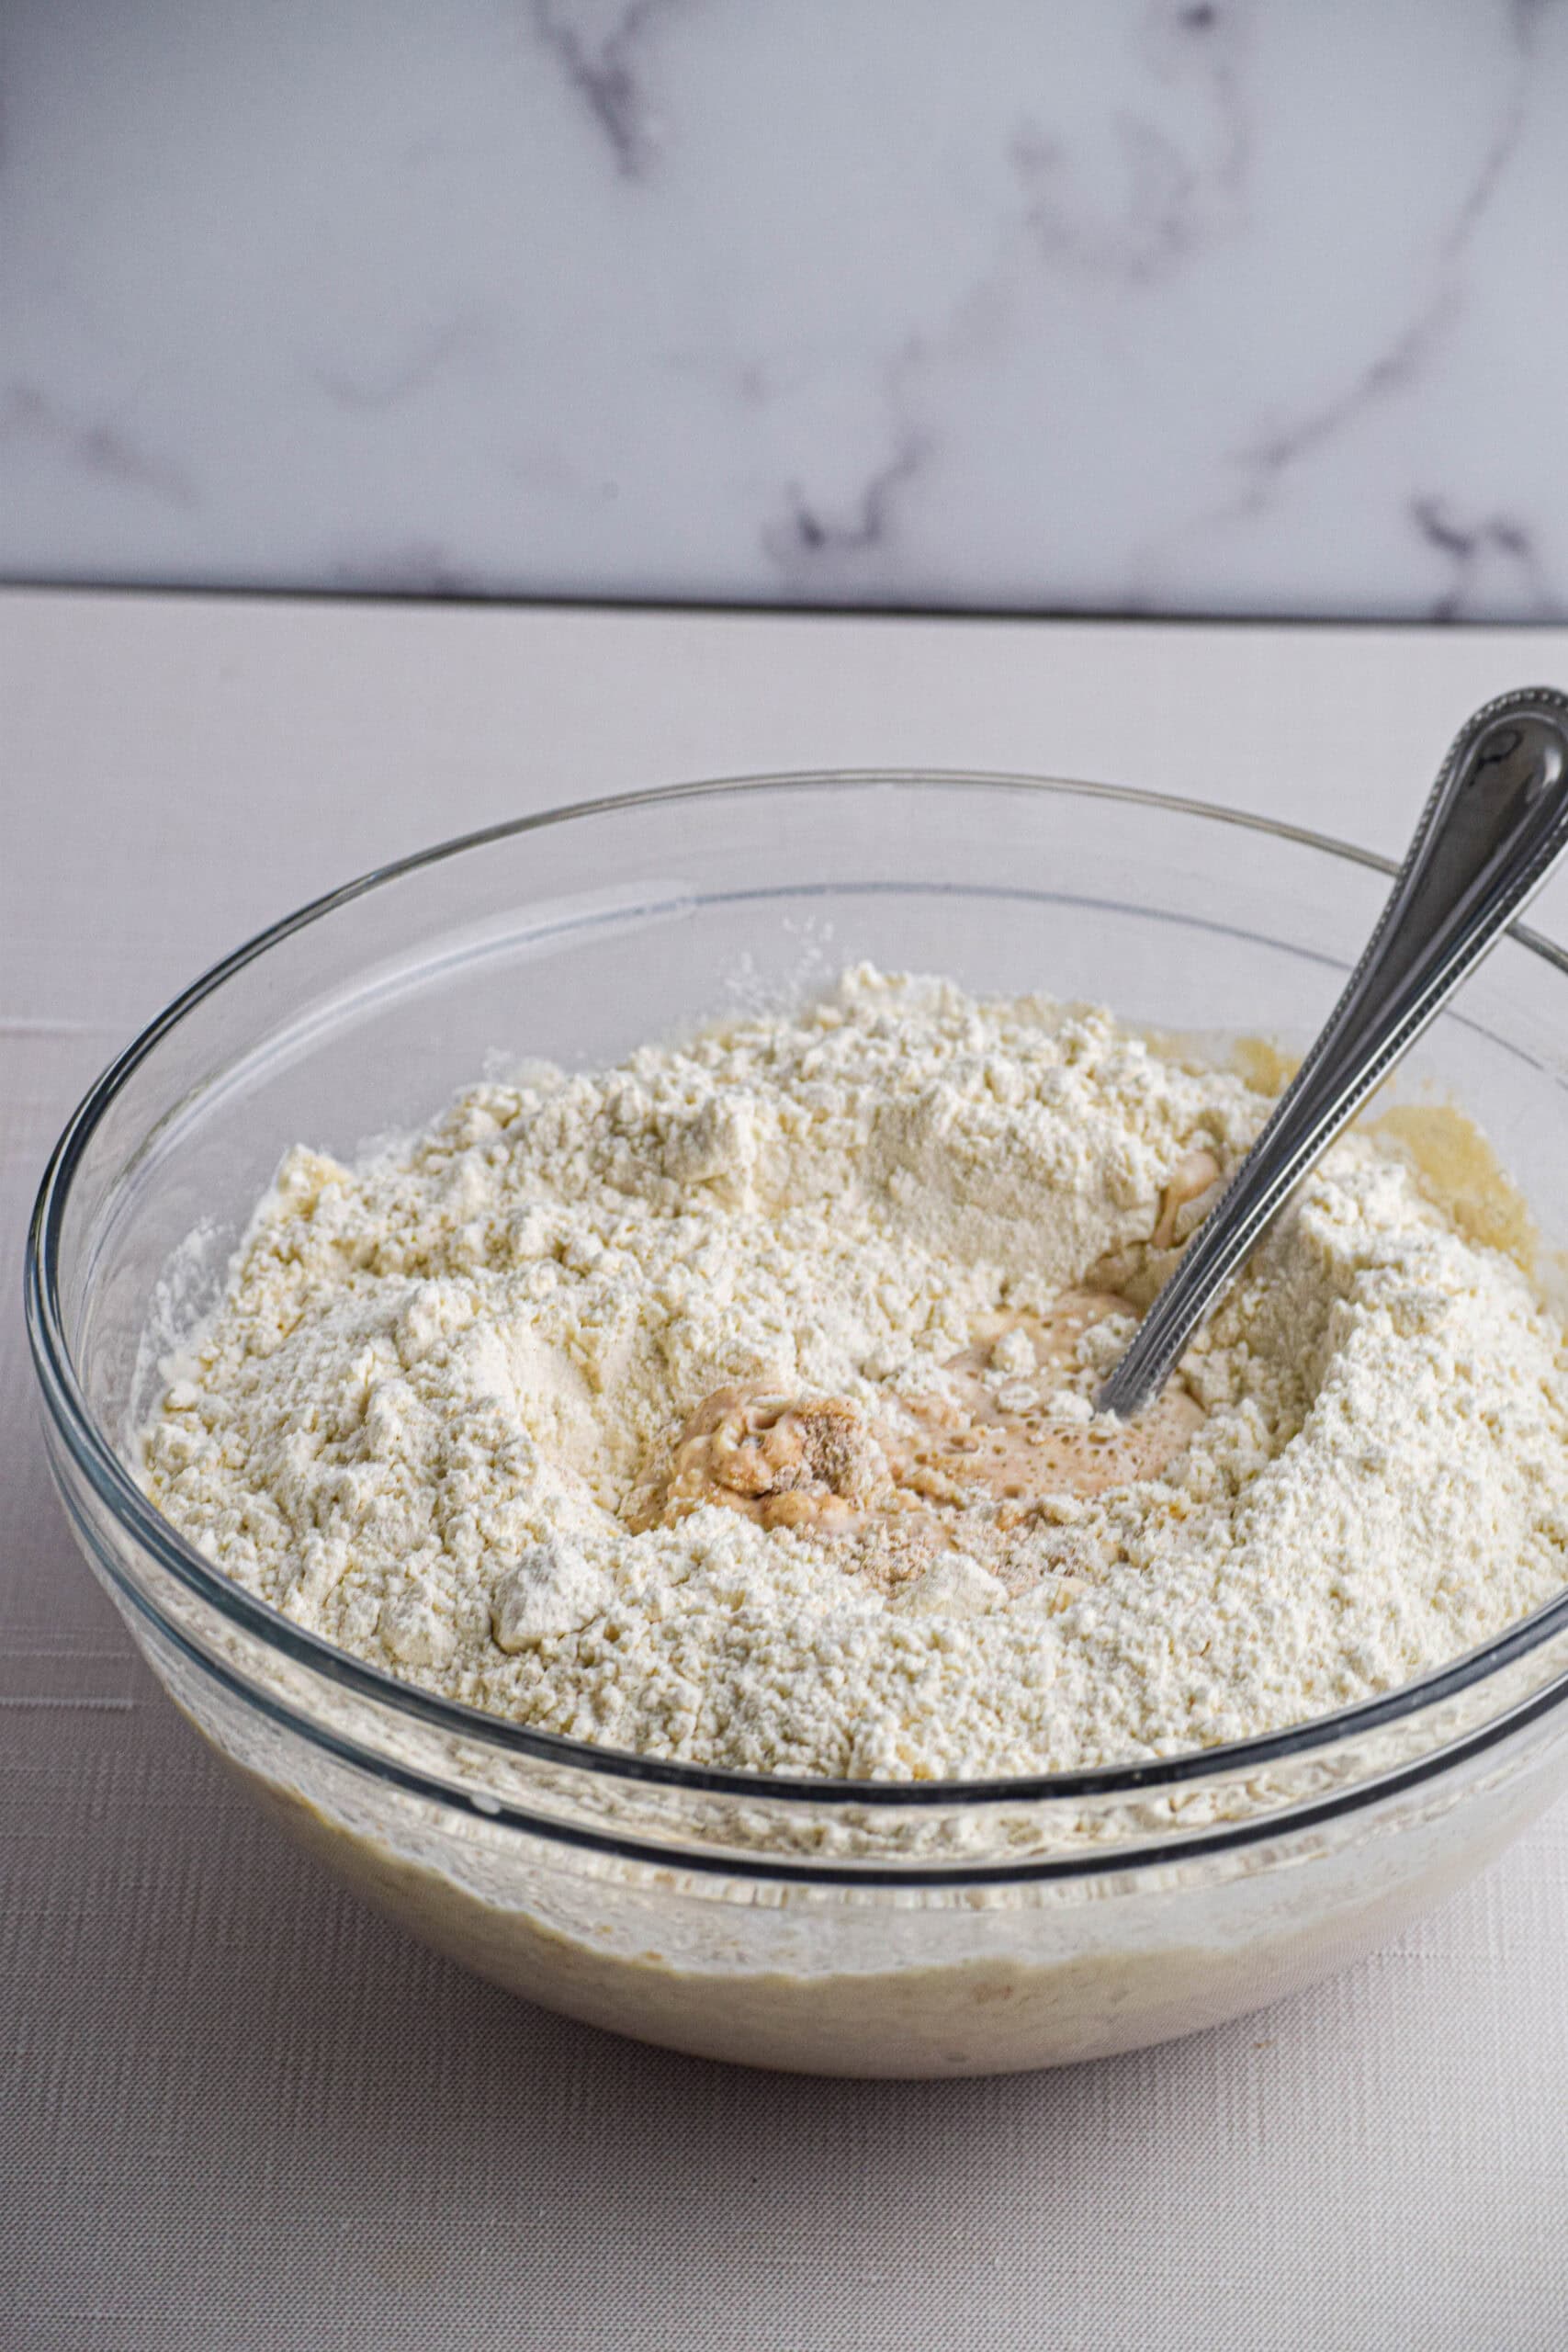
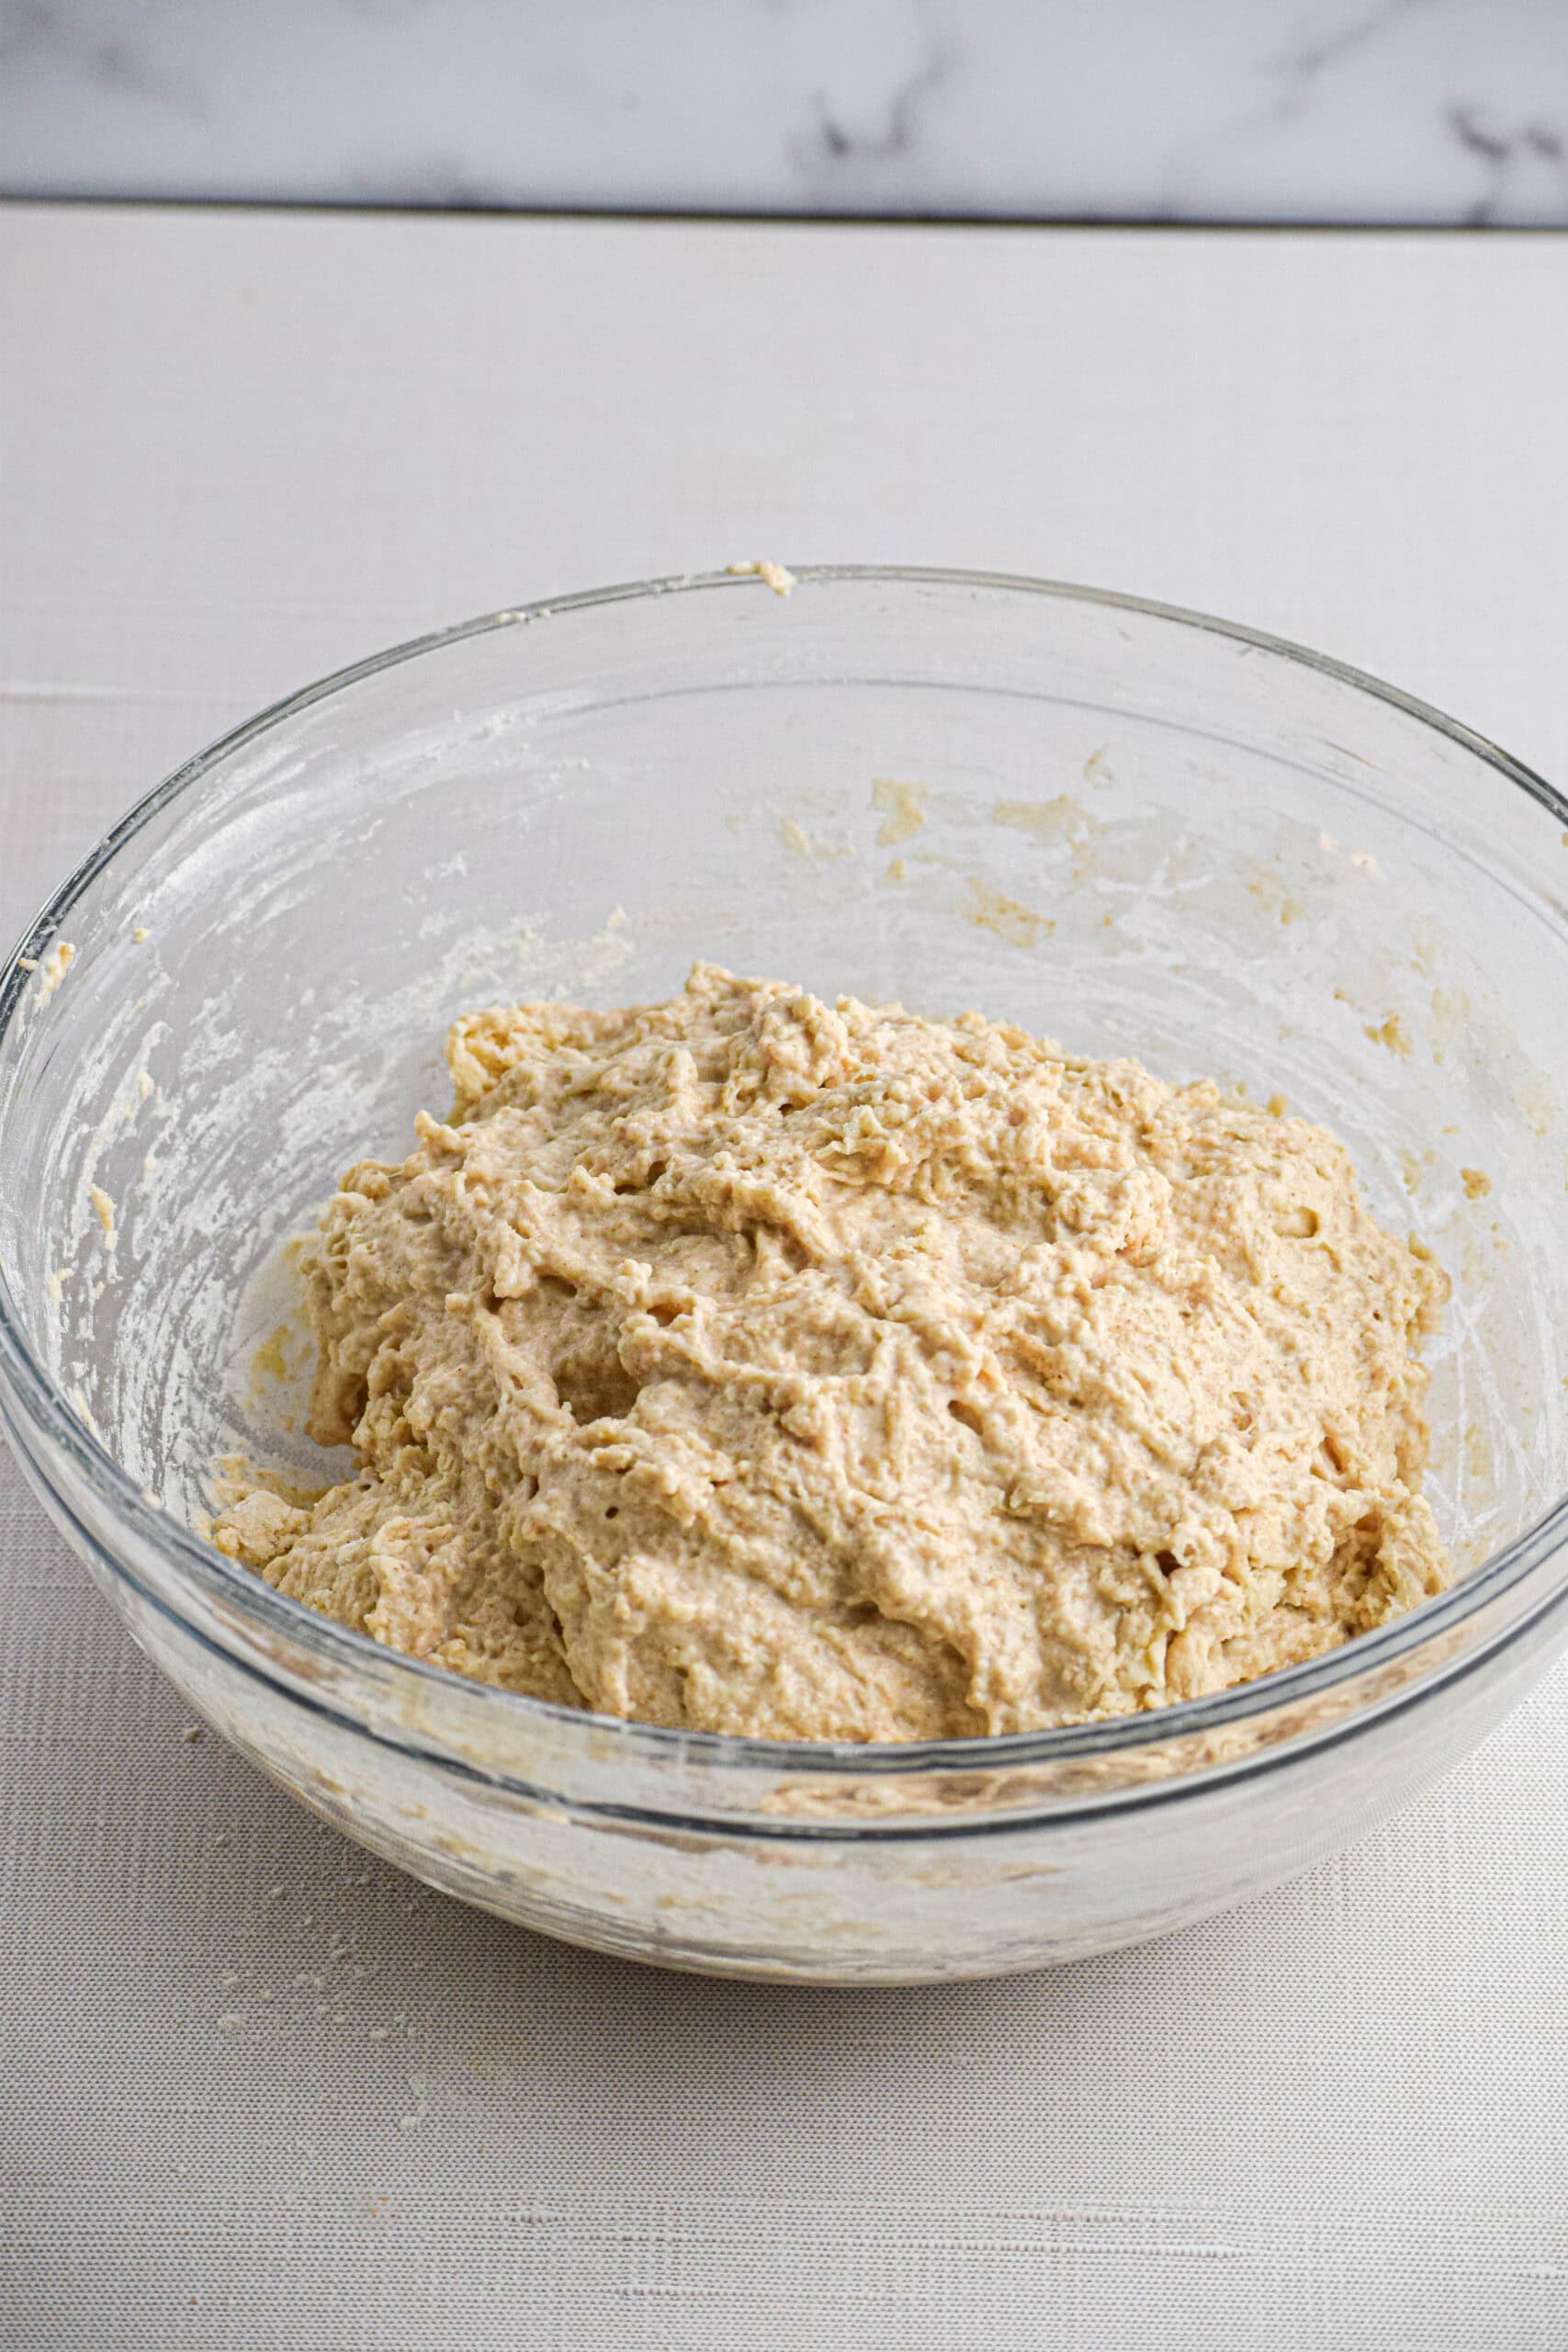
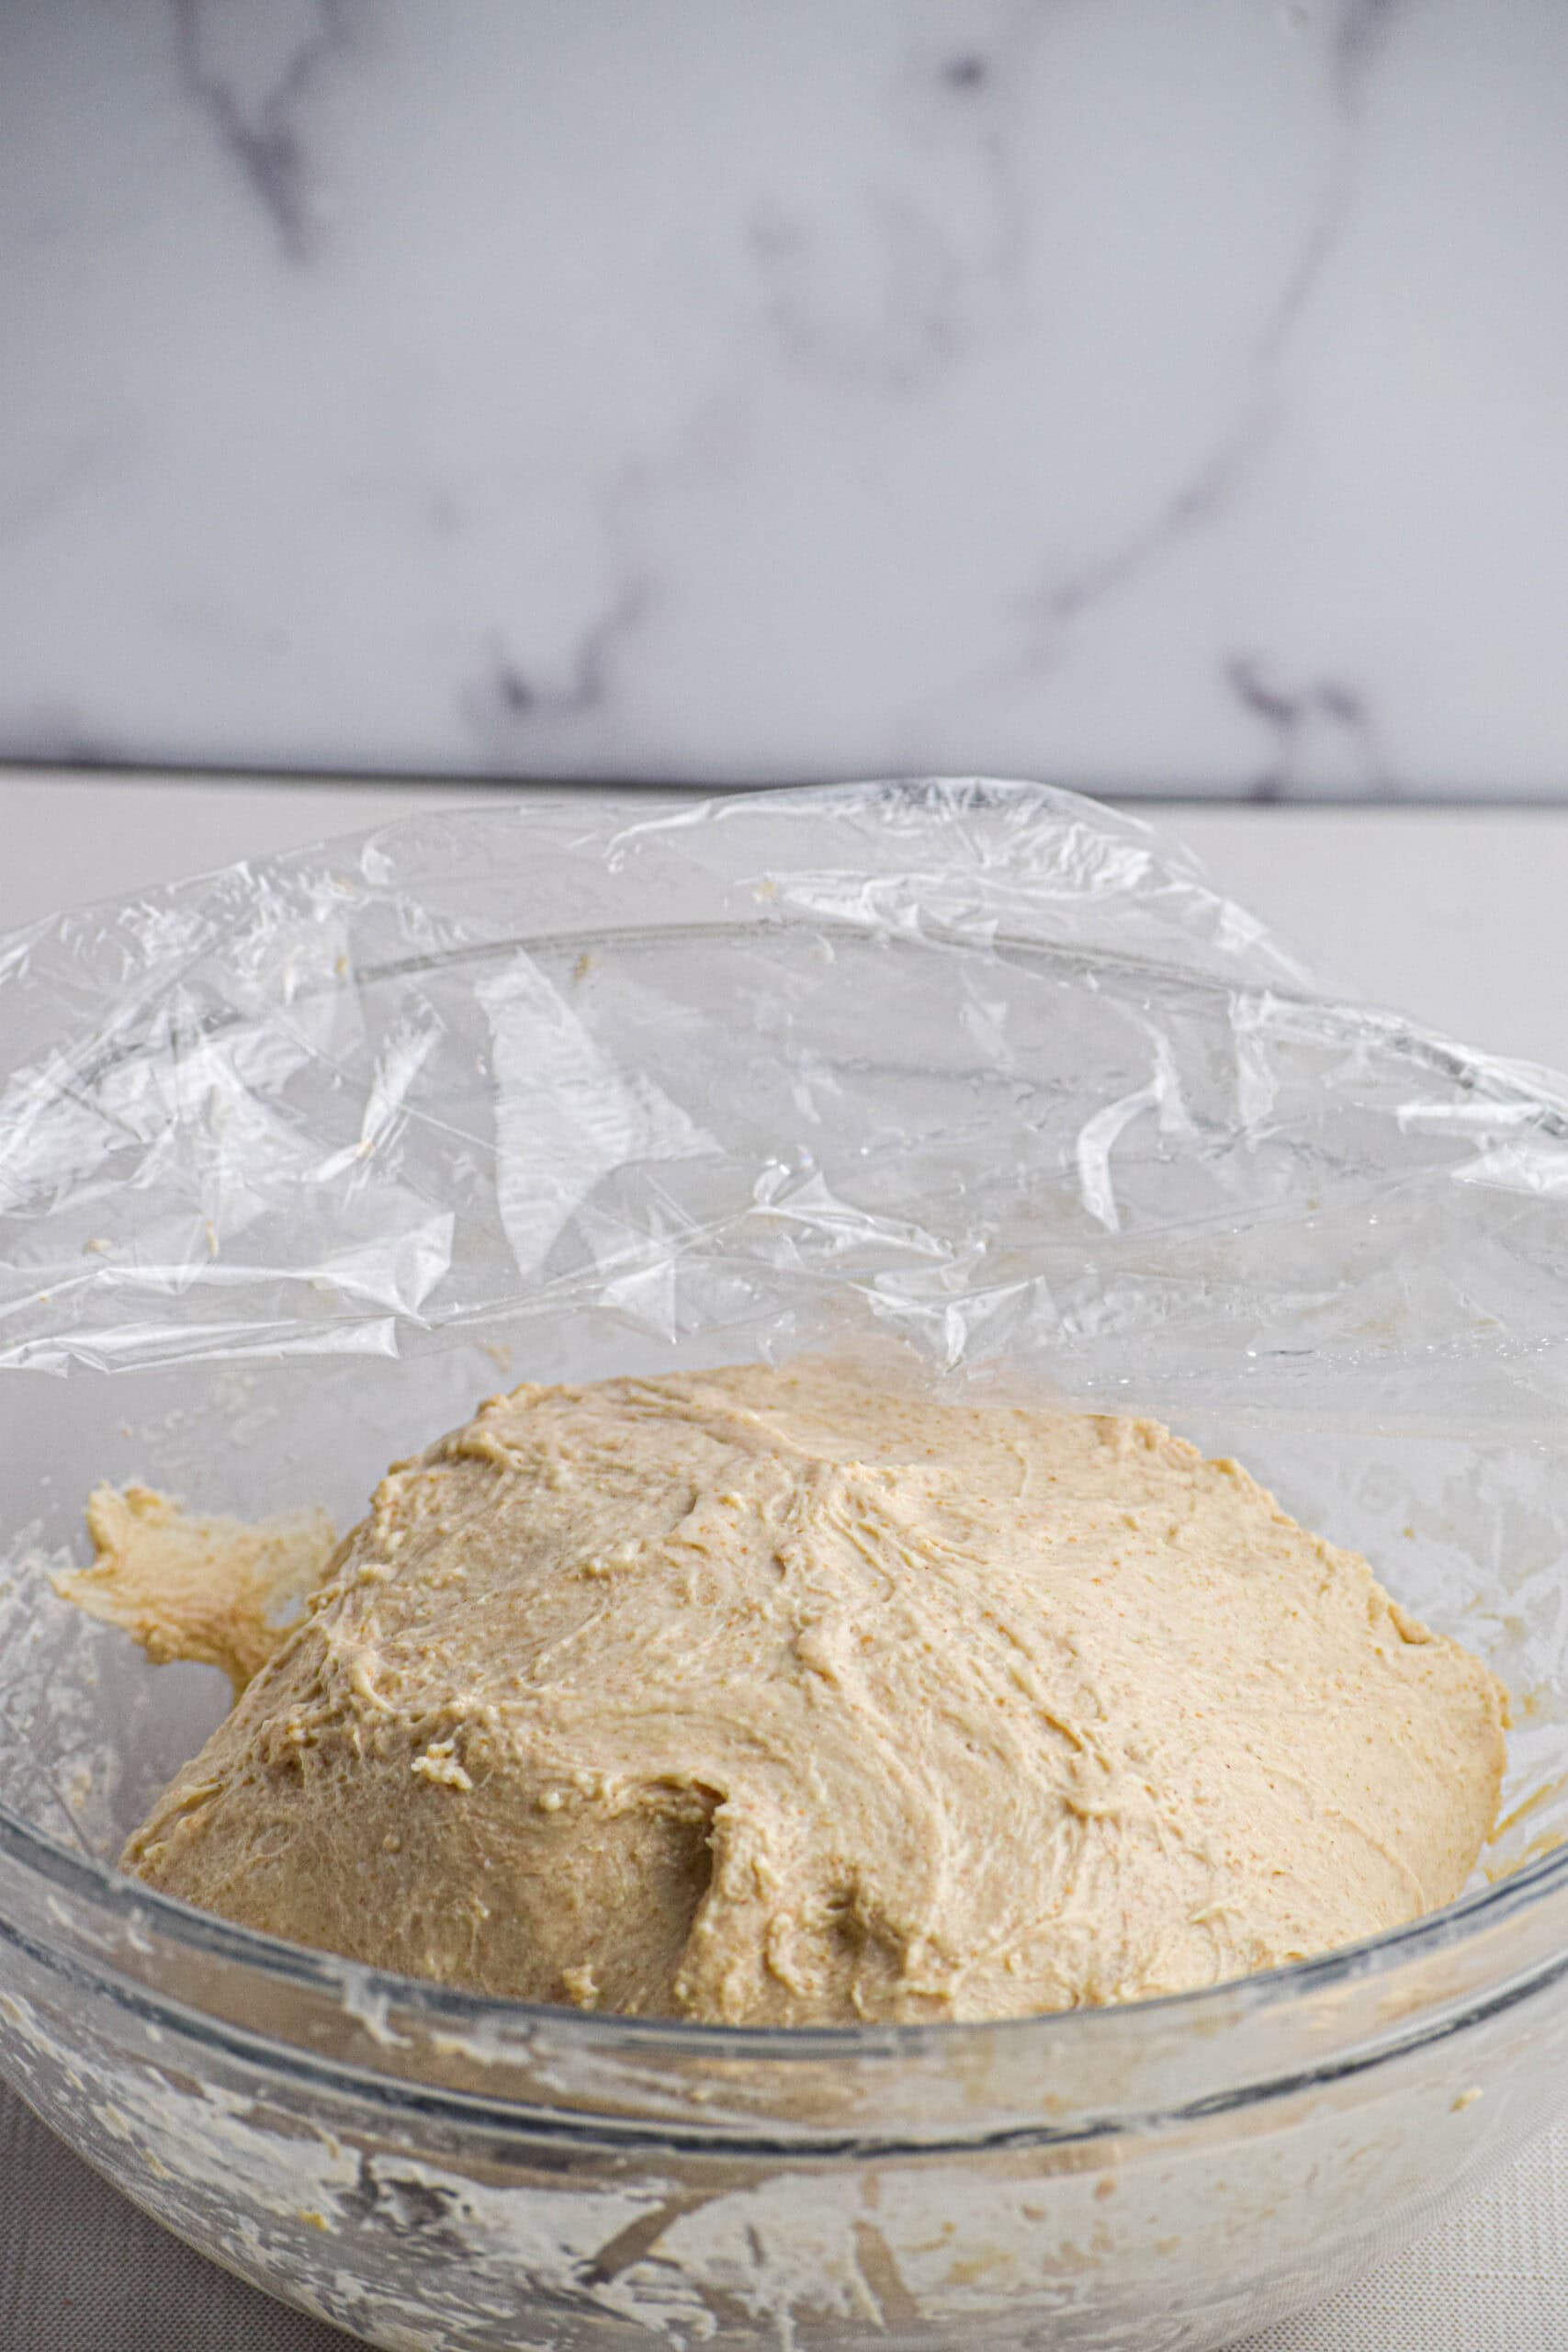
- In a large glass mixing bowl whisk together active sourdough starter with room temperature water until well combined. Add flour and salt and mix until it forms a shaggy dough. Cover with plastic wrap and let it rest for about 45 minutes.
- After 45 minutes, remove the plastic wrap and perform the first set of stretches and folds (no need to knead!). To do so grab one side of the dough, stretch it up gently (don't tear it!), then fold it over onto itself.Turn the bowl 90 degrees and repeat - stretch up, fold over.Do this a total of four times, turning the bowl each time, so you've stretched and folded from all sides.
- Repeat the process 1-3 more times in 30 minute intervals. Then cover your dough one final time and let it bulk ferment overnight for 6-12 hours. (SEE NOTE ON TIMING AND TEMPERATURE BELOW)
The Next Morning
- Once the dough has approximately doubled in size and shows signs of bubbles forming around the sides it is ready to be shaped for the second rise. Use the dough scraper to help you gently turn the dough out onto a floured surface. To shape the dough fold the edges over the center, kind of like you're wrapping a package. The top side should be smooth and round.
- Transfer to a floured or lined banneton or proofing bowl, seam side up. Cover and allow it to rise for about 2 more hours at room temperature. (SEE NOTE ON ALTERNATIVE PROOFING METHODS BELOW)
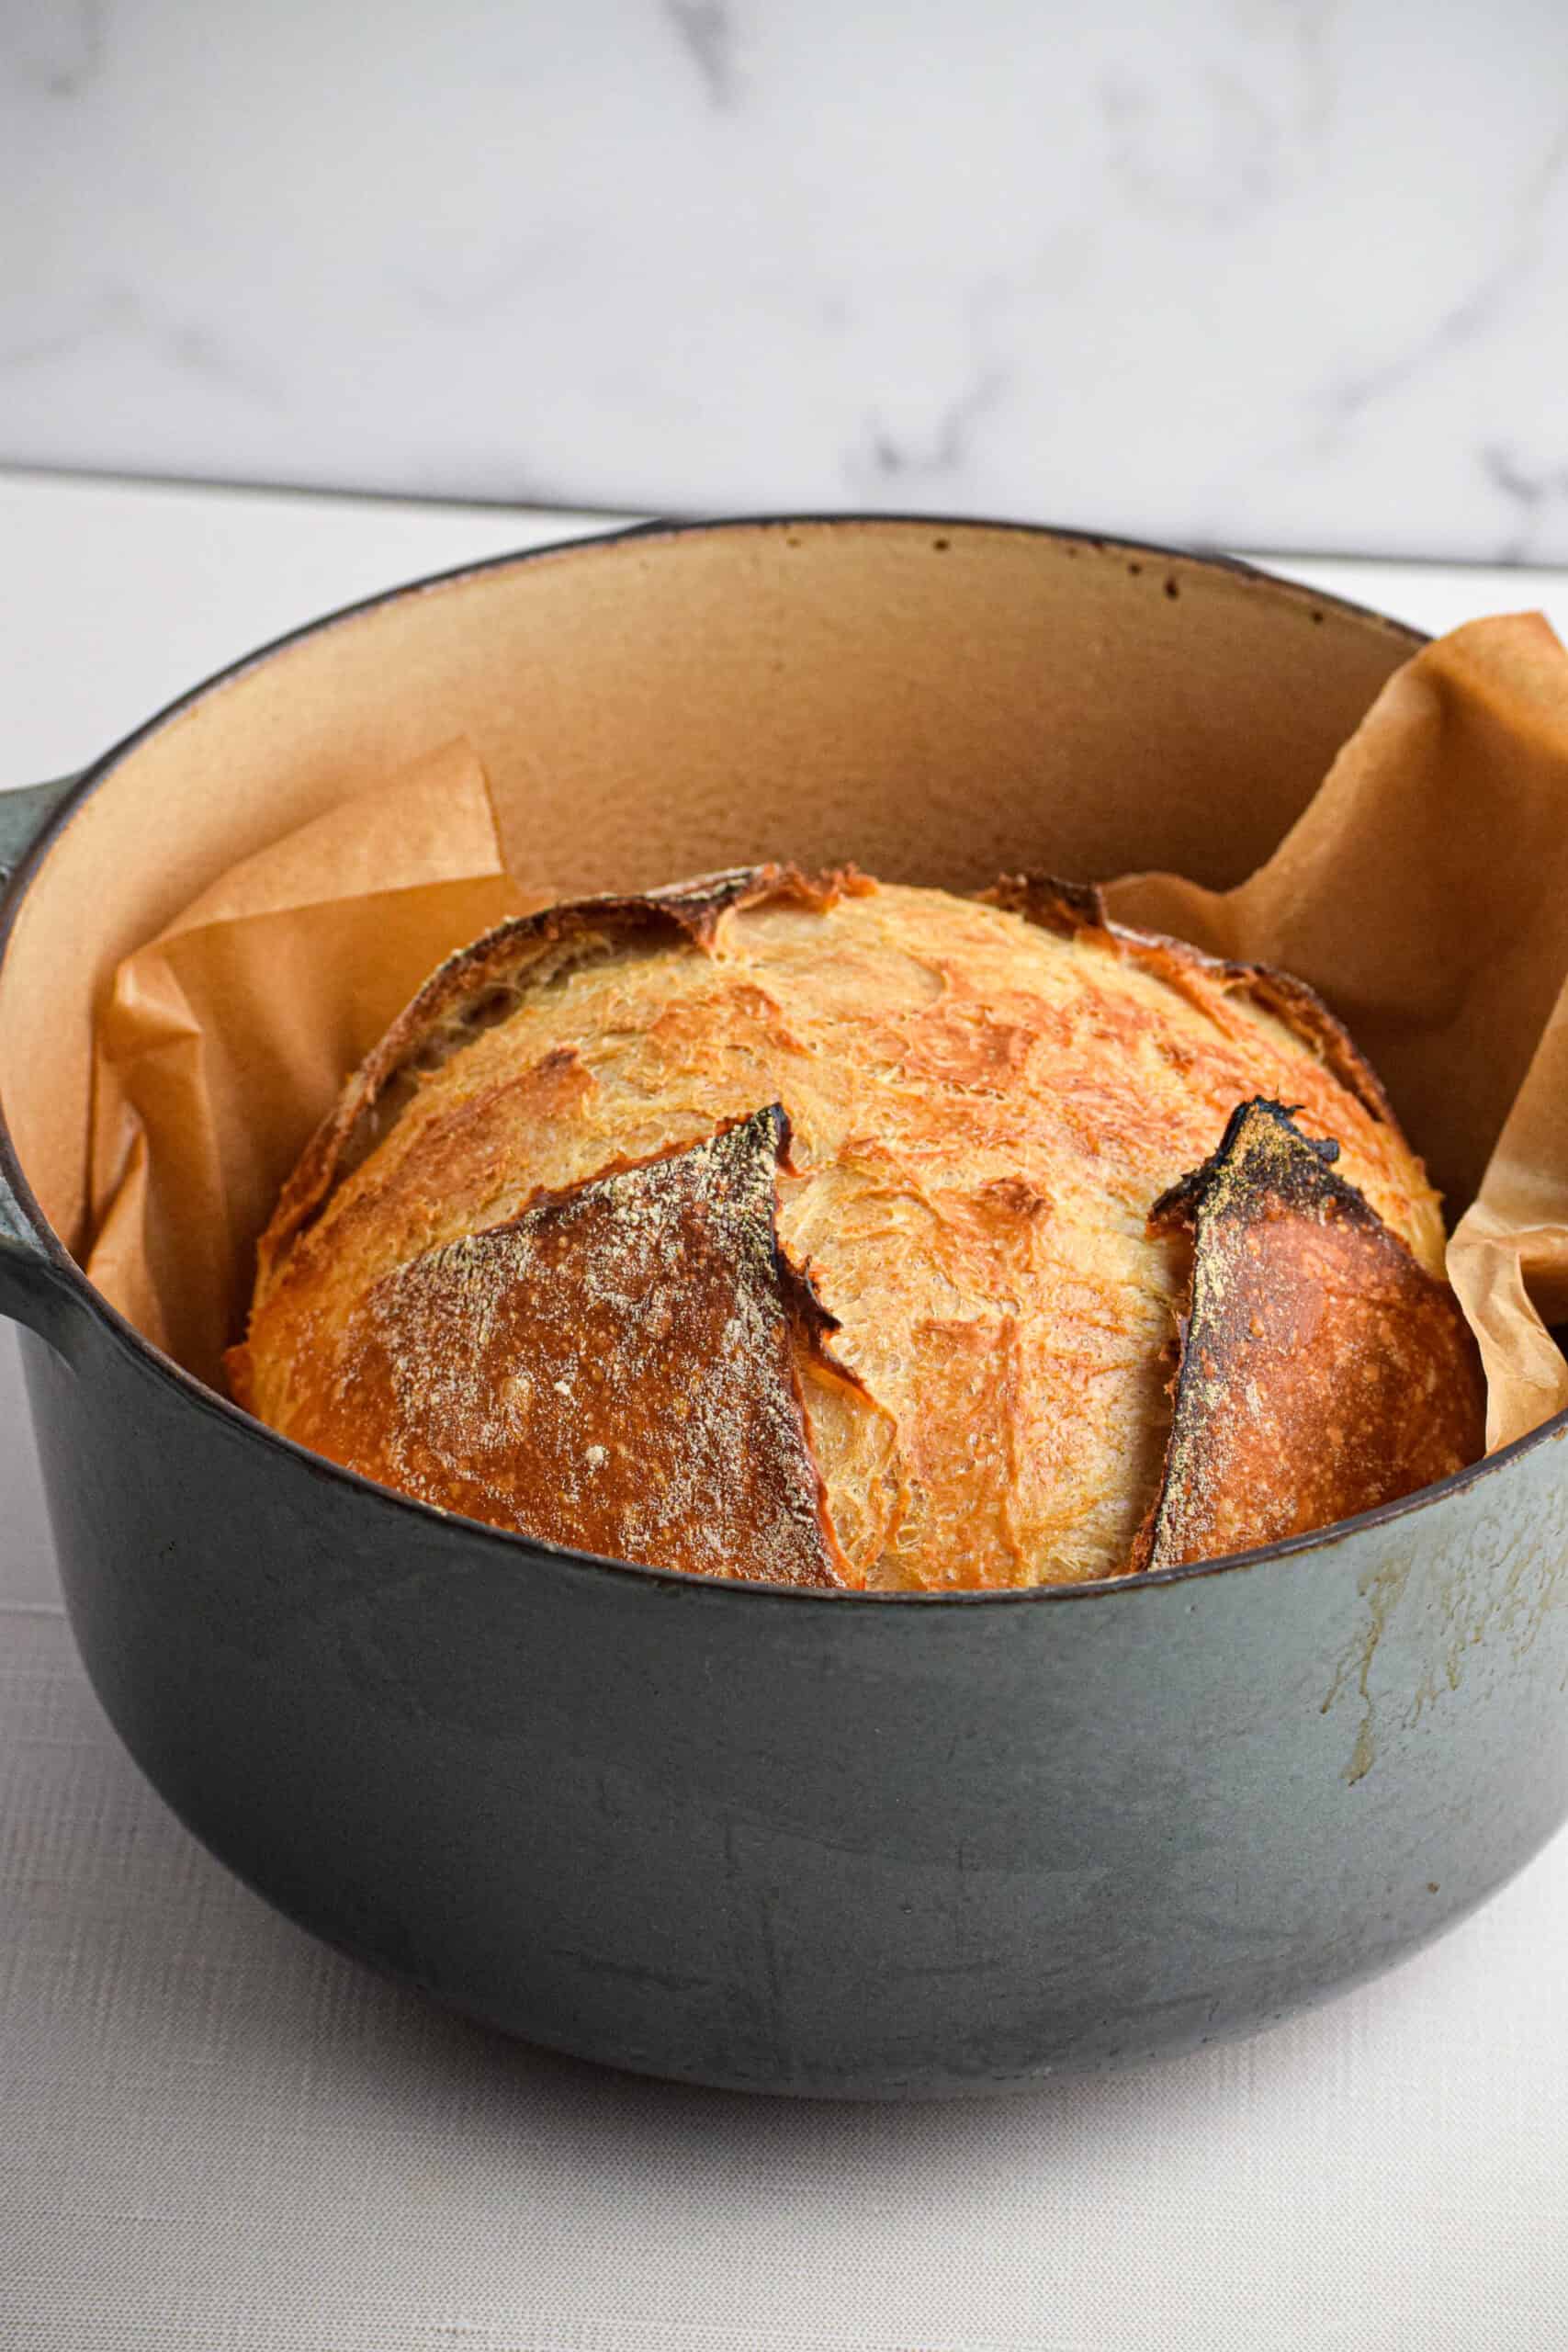
- When you have 20-30 minutes left of rise time, place your Dutch oven with lid in the oven and preheat at 500 degrees F. The pot should get VERY hot.
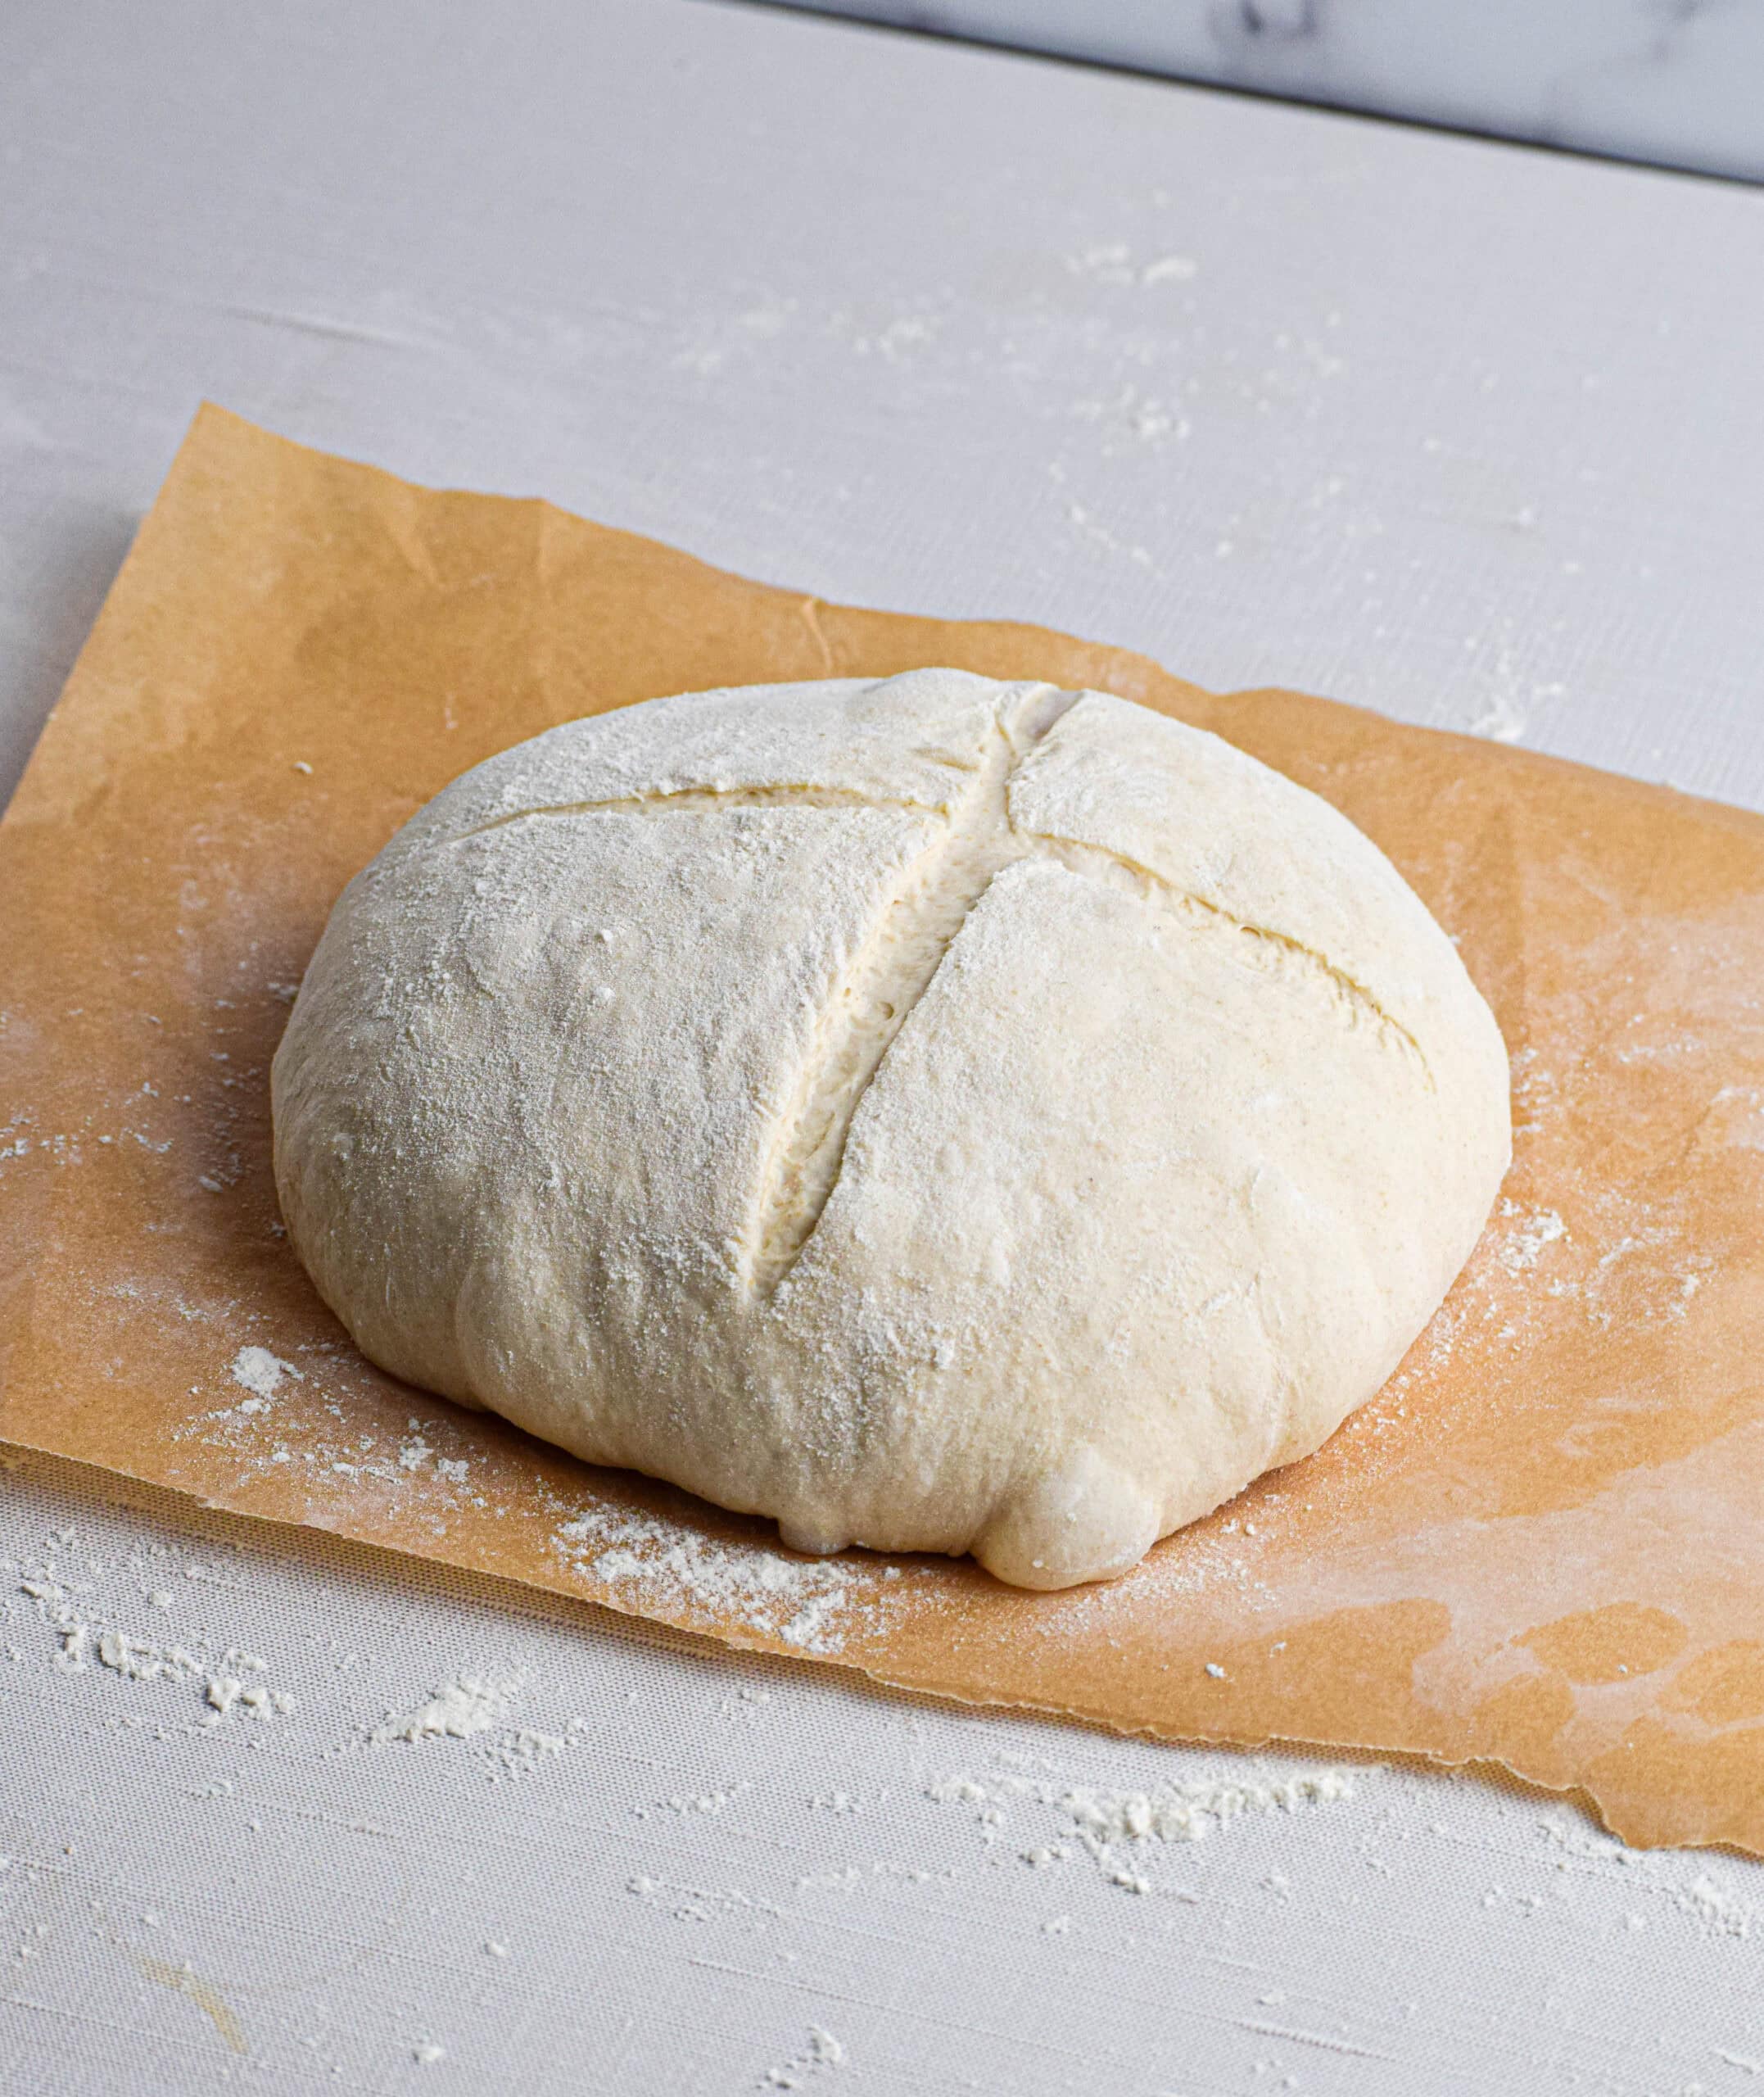
- When you're ready to bake, place the bread smooth side up onto a floured piece of parchment paper. Generously flour the top of the bread, then score with a bread lame or sharp knife. *You can get fancy or a simple cross works great.*
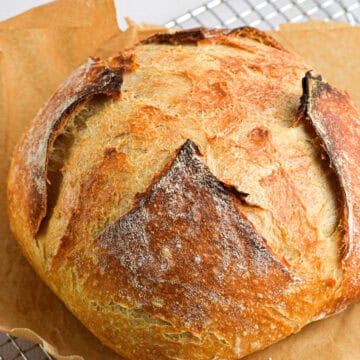
- Place the parchment paper with the bread on it into the preheated Dutch oven. *At this point you can throw in one ice cube for a crisp crust.*Place the lid back on the pot and turn the heat down to 450 degrees F. Bake with the lid on for about 20 minutes. Then remove the lid and bake for another 30-35 minutes until the crust is a beautiful golden brown.
- Remove from the oven and place the bread onto a wire rack. Cool for at least an hour before slicing (otherwise it can get quite gummy).Serve and enjoy!
Notes
Finish your stretch and folds at night, then cover the dough tightly and place it straight into the fridge. You can leave it there overnight or up to 48 hours. When you're ready to bake, let the dough come to room temperature for a couple hours, then shape it and place it in a banneton for its final proof. Once it’s puffy and ready, bake as directed. 2. Overnight Room Temp Bulk + Cold Final Proof:
After your folds, let the dough bulk ferment at room temperature overnight. In the morning, shape it, place it into a banneton, and move it directly into the fridge for the final proof. When you're ready to bake, you can take it straight from the fridge to the oven. No need to bring it to room temp first.
Greta
Thank you so much to explain it to me exactly what I have to do to make the perfect sourdough as a beginner.
Bev
Thank you for this recipe! It was the perfect way to get started on making sourdough!
Elizabeth
I have been looking for an easy sourdough bread recipe, and this is it! The bread is delicious, and I look forward to making this recipe again.
Jaleah Kendrick
This sourdough recipe was so delicious!! Very easy to follow as well.
Lathiya Shanmugasundaram
Thank you for the detailed post. It was really helpful for a beginner like me in sourdough baking.