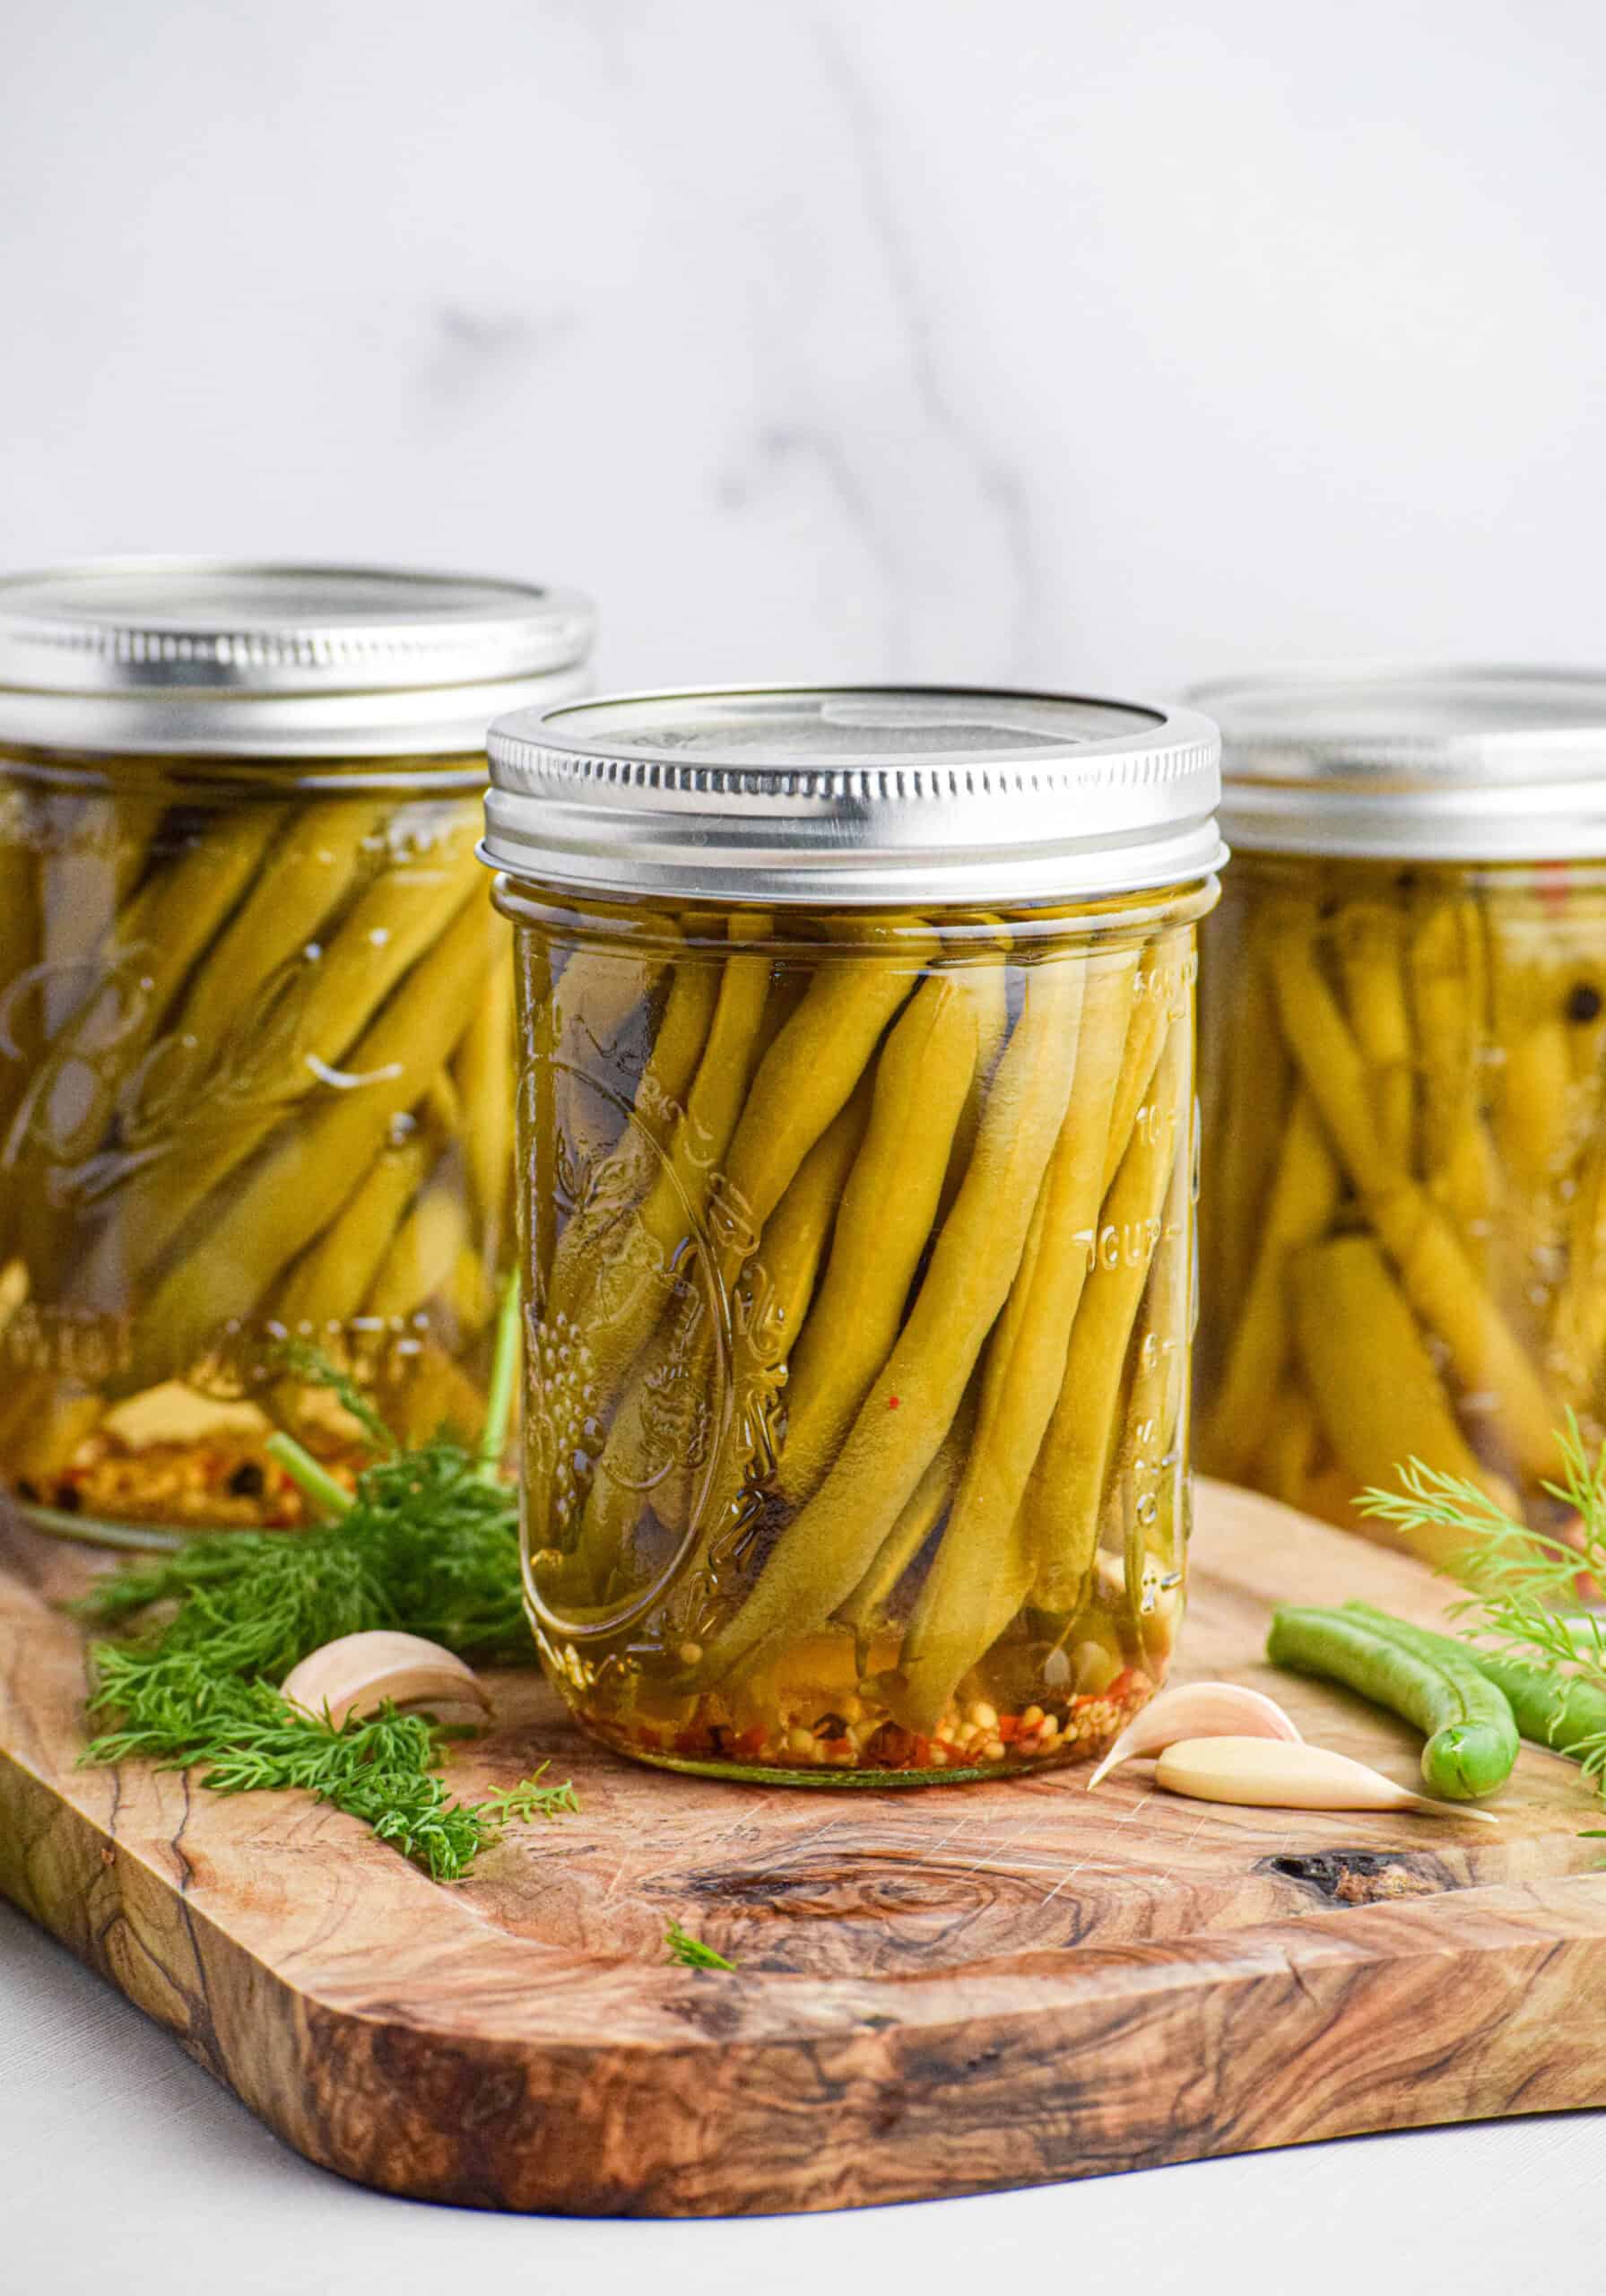
These pickled green beans are the perfect crunchy, tangy and spicy bite for snacking, charcuterie or garnishing a bloody Mary. Infused with fresh dill, garlic, and a kick of heat from fresh chiles, they are packed with bold flavors that will have you making them again and again.
These Spicy Dilly Beans are safe for water bath canning and make a great gift for friends and family!

If you love a crunchy pickle with a bold kick then these pickled green beans will be right up your alley! Crisp, tangy and packed with dill and garlic, these green beans get just the right amount of heat from the addition of fresh Serrano peppers and red pepper flakes. Not only are these beans great for snacking but they look beautiful on an antipasto platter or charcuterie board and make a great addition to cocktails.
Whether you're a seasoned canner or new to preserving, this easy recipe is a great way to preserve green beans year round!
Jump to:
What is water bath canning?
Canning is simply the process of applying adequate heat to high acid food that is sealed in jars for the allotted time necessary to kill off bacteria and micro-organisms that cause food spoilage. During heating, oxygen is driven out of the jars, causing a vacuum seal to form when the jars cool down. This prevents any outside micro-organisms and oxygen from getting back into the food. When done correctly, canning preserves food safely for at least a year, although probably much, much longer.
You can check out my guide on How to Safely Water Bath Can at Home more resources on safe home preserving.
Safe canning resources.
If you are new to canning you can find great resources, recipes and tutorials at Ball Canning and the National Center for Home Food Preservation.
More preserving recipes for you to enjoy.
Equipment
For the Pickled Green Beans:
- Large pot
- Cutting board and knife
- Measuring cups and spoons
For water bath canning:
- Mason jars: Make sure the jars are clean and that the lids are brand new. You cannot reuse canning lids. I personally prefer using wide mouth mason jars for pickles, but regular also work.
- Large pot with rack OR Electric Canner: If you only can once in a while using a large pot with a canning rack works just fine. As someone who personally does a lot of canning and I absolutely LOVE my Ball FreshTech Electric Canner.
- Jar lifter: You will need a jar lifter to remove the hot jars from the water bath.
- Funnel: I personally love this canning funnel because it also allows you to measure the headspace easily.
- Ladle: This Prepworks Canning Scoop is my favorite.
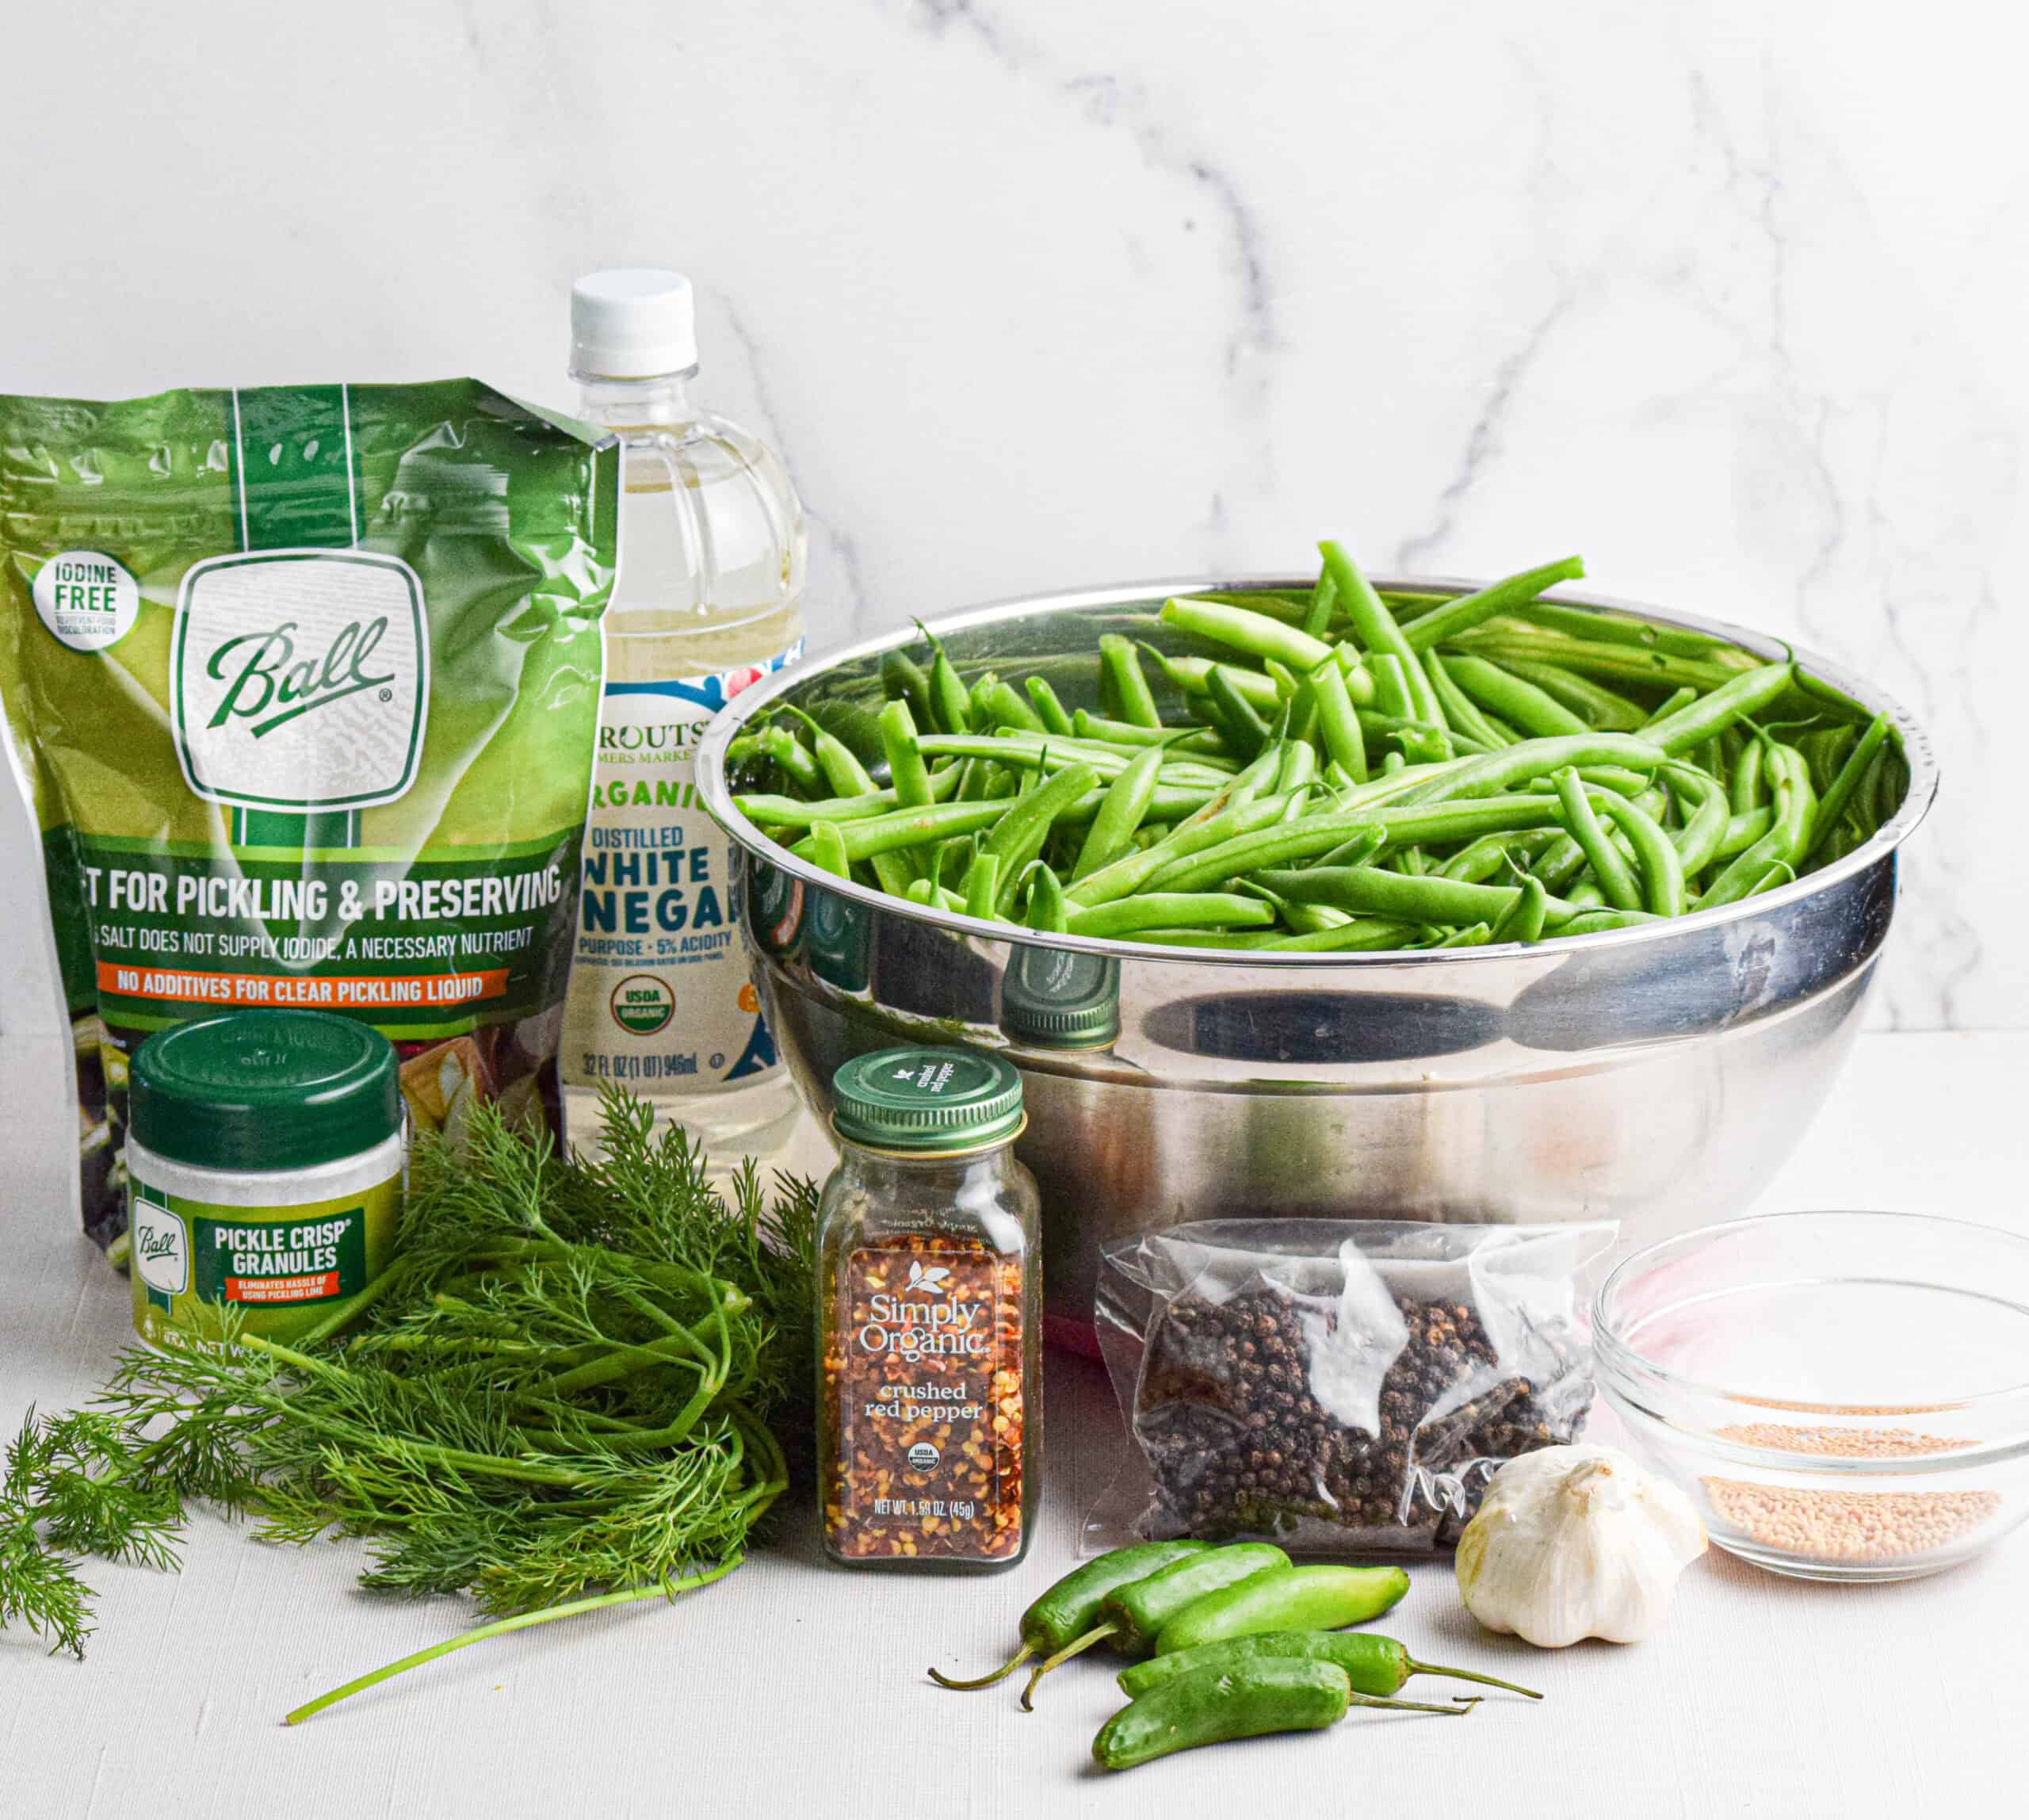
Ingredients & Substitutions.
- Green beans: You'll need to use fresh, not frozen, for this recipe.
- White vinegar: I recommend using distilled white vinegar but if you prefer you could also use a combination of vinegars such as apple cider or red wine vinegar.
- Salt: I recommend using a canning and pickling Salt.
- Red pepper flakes: Feel free to omit these for a milder pickle.
- Mustard Seeds
- Fresh garlic: I highly recommend using fresh garlic for this recipe.
- Fresh chile: I like using Serrano peppers, but you could also do jalapenos, cayenne peppers, or Thai chiles. Feel free to omit for a milder pickle.
- Black peppercorns
- Fresh dill
- Pickle Crisp (optional)
What is "Pickle Crisp"?
Pickle crisp is basically calcium chloride, an additive commonly used in home canning to keep pickled vegetables firm and crunchy. It strengthens the cell walls of vegetables, preventing them from getting soft during processing. You can absolutely omit this from the recipe but your green beans will be a bit softer than if you did use it.
Recipe FAQs
I'd give them at least 2-3 days to really let the flavors meld before eating.
There are several reasons your green beans might turn out softer than you wanted them. Here are some questions to ask yourself:
1. Did you use pickle crisp (aka calcium chloride)?
2. Were your green beans old or overripe?
3. Did you over-process the green beans while canning?
To prevent sogginess, be sure to use crisp, fresh green beans, do not process them in the water bath for longer than the recipe calls for and utilize a little Pickle Crisp to ensure ultimate crunchiness.
That is entirely up to you! As written, this recipe has a good kick to it but nothing that will blow your head off. If you prefer milder pickles you can omit the red pepper flakes and chile peppers. If you'd like a spicier pickle feel free to increase red pepper flakes and add more chiles.
Yes, to an extent. You can change the seasoning, herbs, types of vinegar (so long as it's at least 5% acidity) as long as you retain the 1:1 vinegar/water ratio. That is one part water to one part vinegar.
Made these Pickled Green Beans? Let me know what you think in the comments!
Recipe
Pickled Green Beans
Equipment
- Large pot
- Measuring cups and spoons
- 8 pint sized mason jars
Ingredients
- 4 lb fresh green beans
- 4 cups white vinegar
- 4 cups water
- ¼ cup picking salt
- 8 sprigs of fresh dill
- 2 teaspoon red pepper flakes
- 2 teaspoon mustard seeds
- 2 teaspoon black peppercorns
- 8 cloves of garlic
- 4 Serrano or Cayenne peppers, sliced in half
- 1 teaspoon Pickle crisp
Instructions
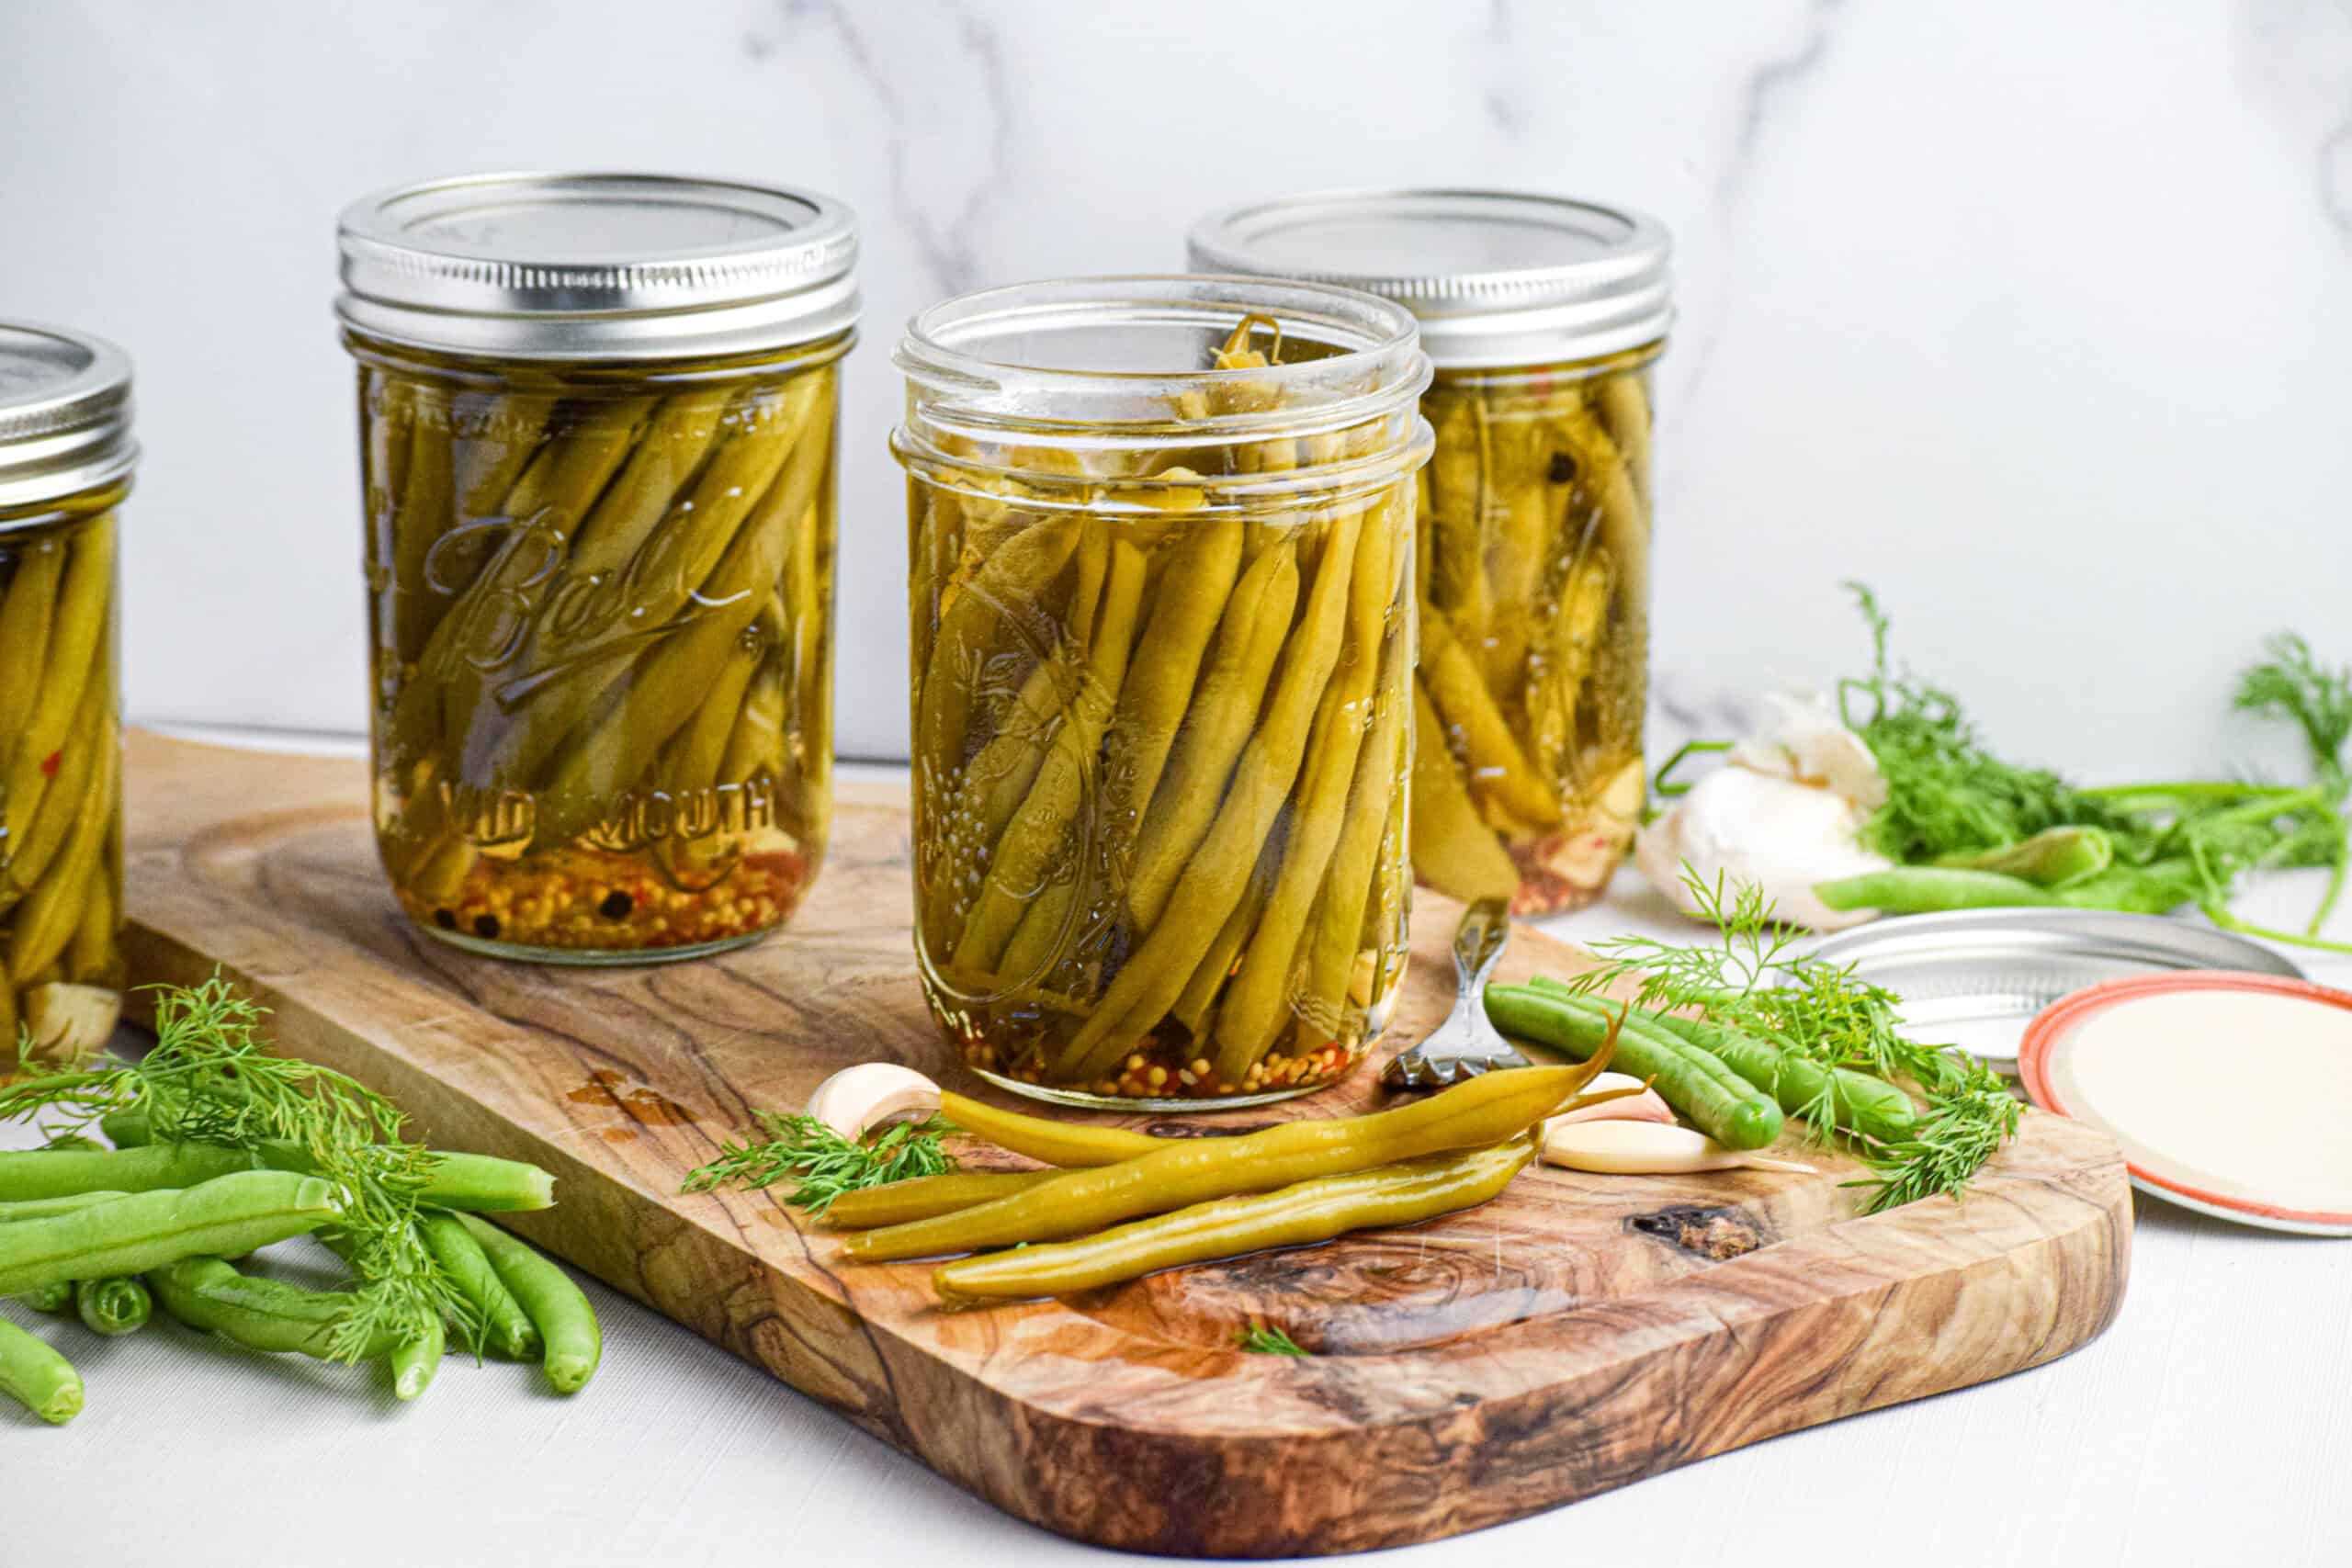
Prepare your ingredients and jars.
- Line up 8 pint sized mason jars. To each jar add: 1-2 sprigs of fresh dill, ¼ teaspoon each of red pepper flakes, mustard seeds and black peppercorns, 1 clove of garlic, half a small Serrano or Cayenne pepper and ⅛ teaspoon of Pickle Crisp. Wash your green beans and cut any long ones to fit the height of your mason jars. Tightly pack the green beans into the jars, leaving as little space as possible without any beans poking over the tops of the jars. *Note* You may get more or less than 8 jars depending on the size of your green beans and how tightly you pack them.
Make the brine.
- In a large stainless steel pot, combine water, vinegar and salt. Bring to a boil over high heat, stirring to dissolve the salt. Then remove from the heat.
Assemble your pickles.
- Carefully ladle the hot pickling liquid into the jars, covering the green beans. Leave around ½ inch of headspace and use a knife or chopstick to remove any air bubbles. Wipe down your jar rims before placing on clean lids and bands.
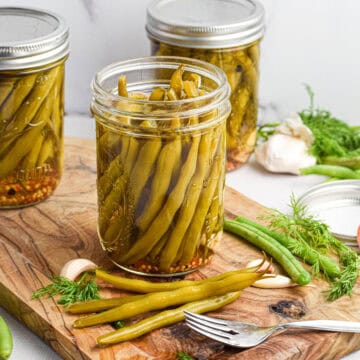
Water bath canning.
- Place jars on a rack in a large pot and cover with water at least 1-2 inches above the top of the jars. Bring the water to a full rolling boil and boil the jars in the water bath for 10 minutes (adjusting time for altitude).Turn off the heat and allow the jars to rest in the warm water for 5 minutes before removing and placing on a towel on the counter (do not place directly on the counter).Allow the jars to cool undisturbed for about 24 hours until all the lids have sealed.Store sealed jars in a cool dry place for 12-18 months for best quality. *Note* If any of the jars do not seal simply store in the refrigerator and consume within 6 weeks.Enjoy!


Ashley
These are so good and you gave me a great idea for homemade Christmas gifts! Thanks for the recipe!
Lora
Very easy to make and makes a great gift for the holidays! I will be making again end of summer!
Elizabeth
These pickled green beans are so easy to make. I included them in a charcuterie board this week, and everyone loved them. The perfect crunch!
Claudia
Just finished a batch of pickled green beans—crunchy, tangy, and perfect for snacking or adding to a salad! ??