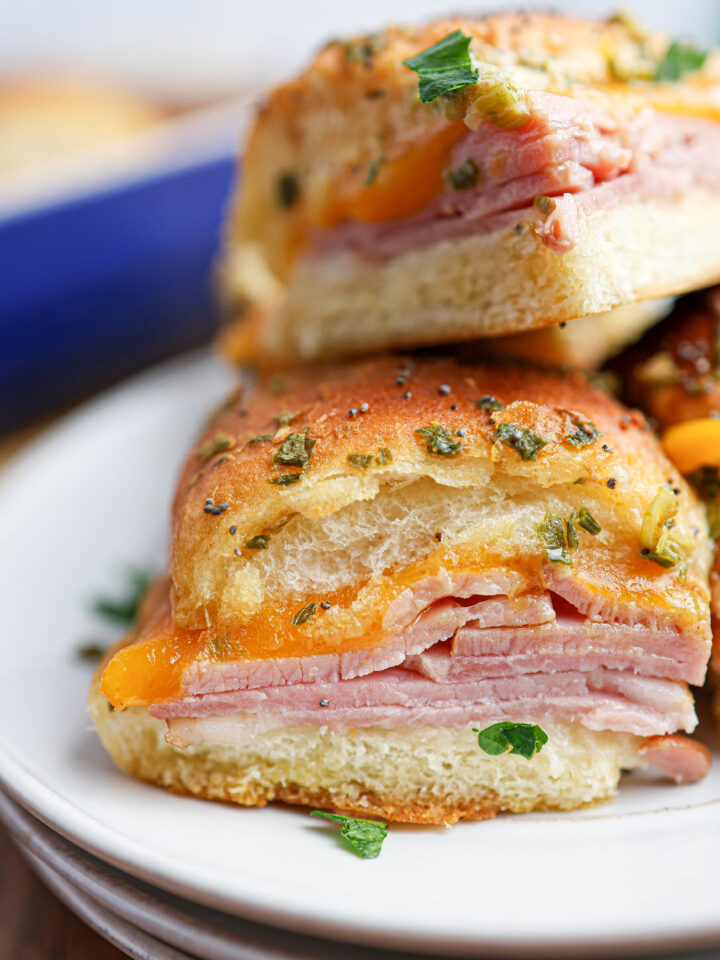
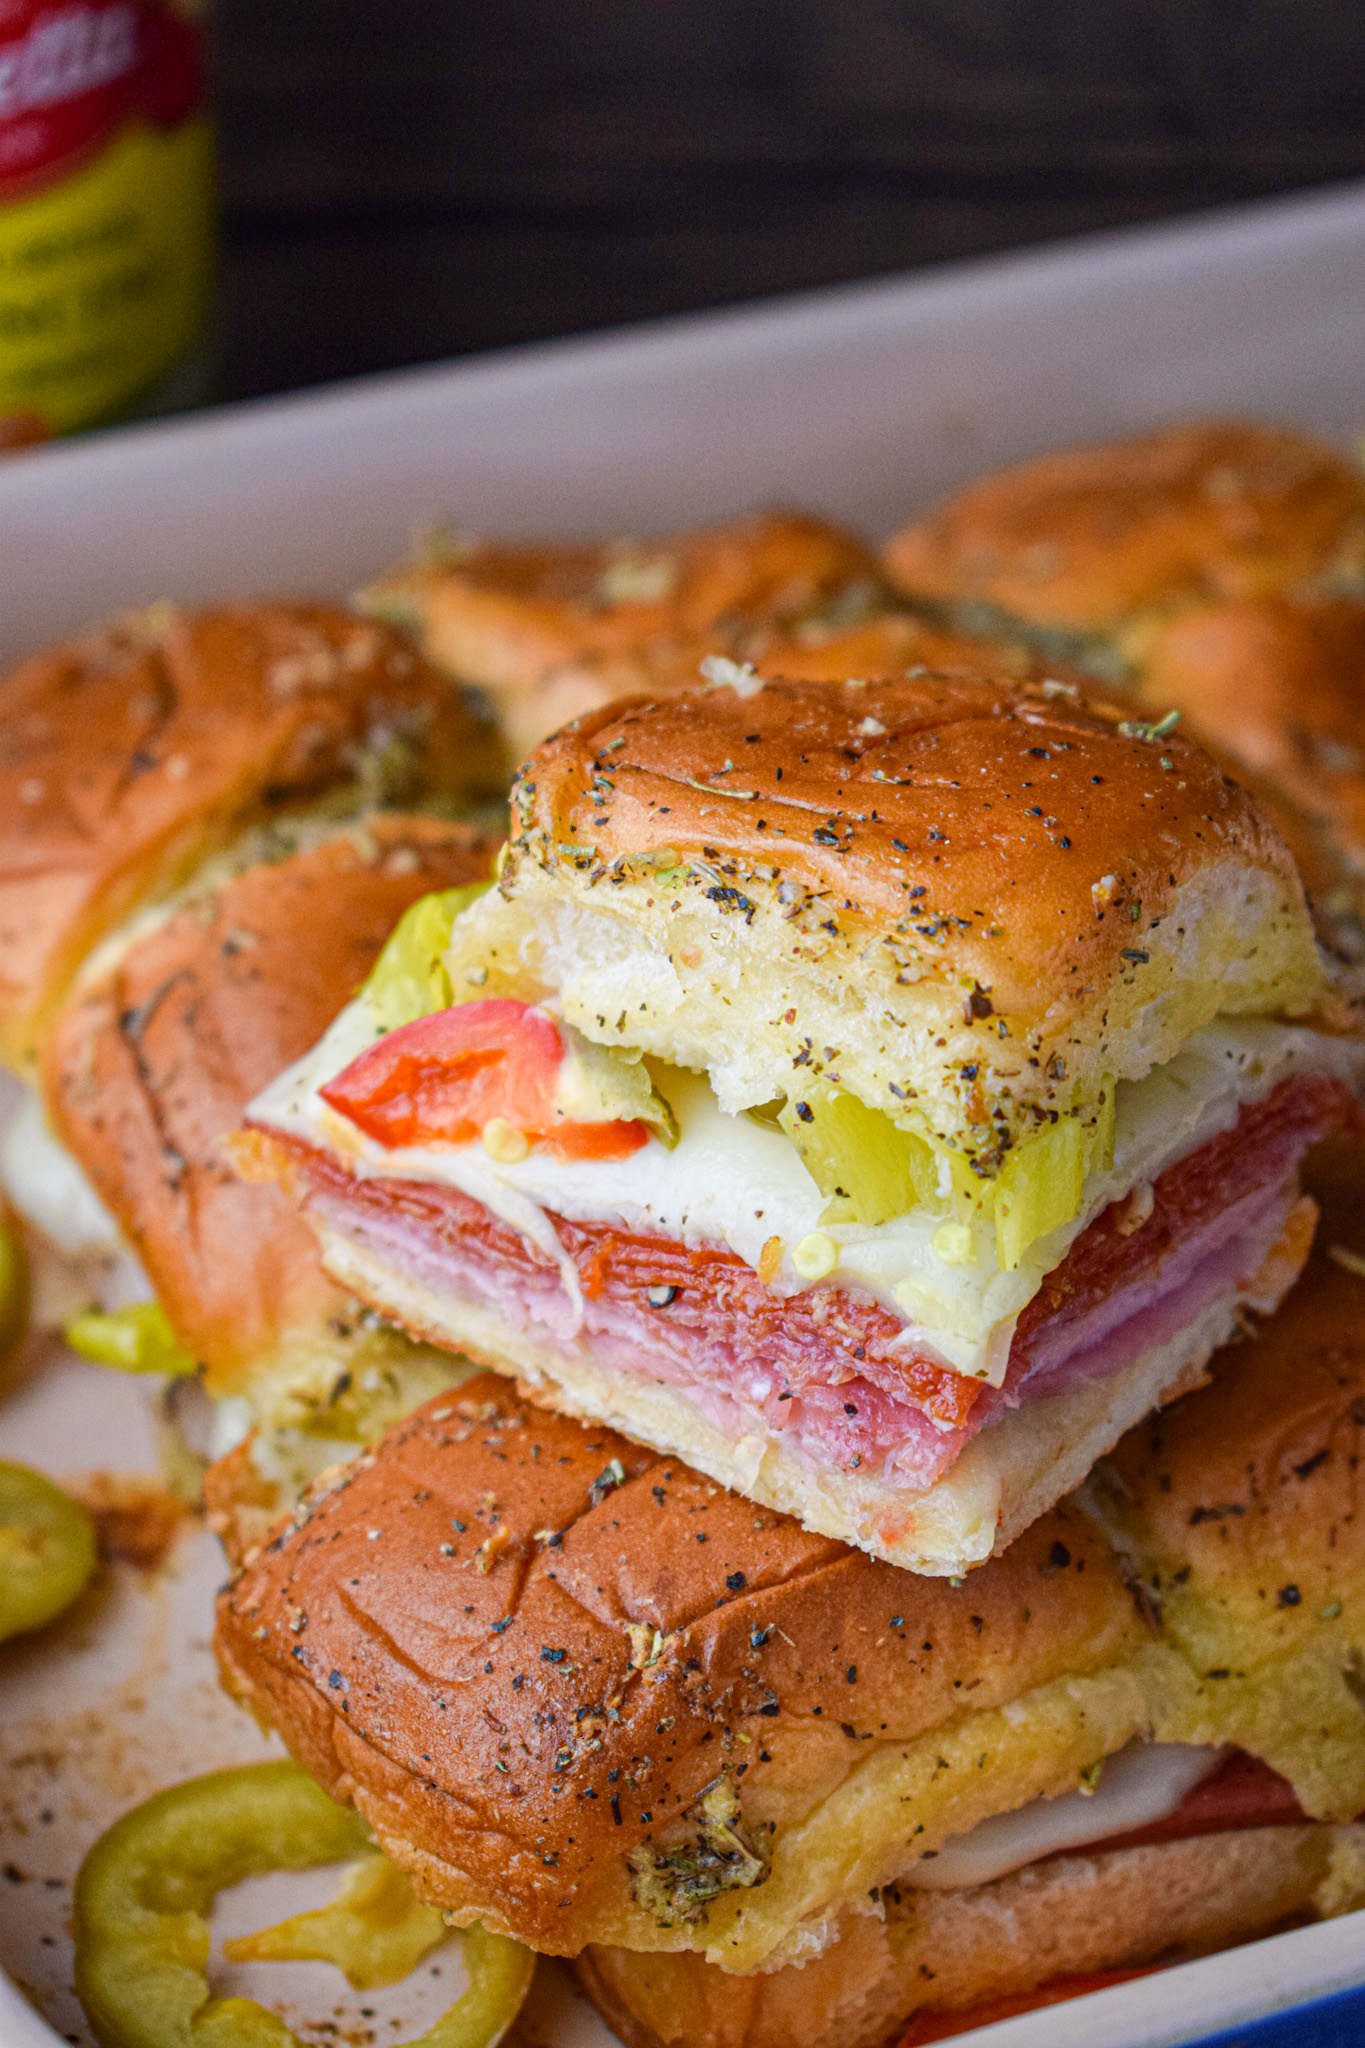
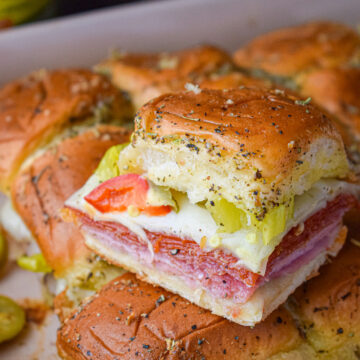
These Hot Italian Sub Sliders are the ultimate crowd-pleaser, warm, cheesy, and packed with all your favorite deli flavors in one easy bite. Perfect for game day, parties, or an easy weeknight dinner. They bake up golden and buttery in just 30 minutes and are great served with your favorite marinara for dipping.
With football season starting up again and the holidays upon us I am on a search for delicious recipes that come together easily and are perfect for entertaining. And these Hot Italian Sub Sandwiches fit that bill flawlessly.
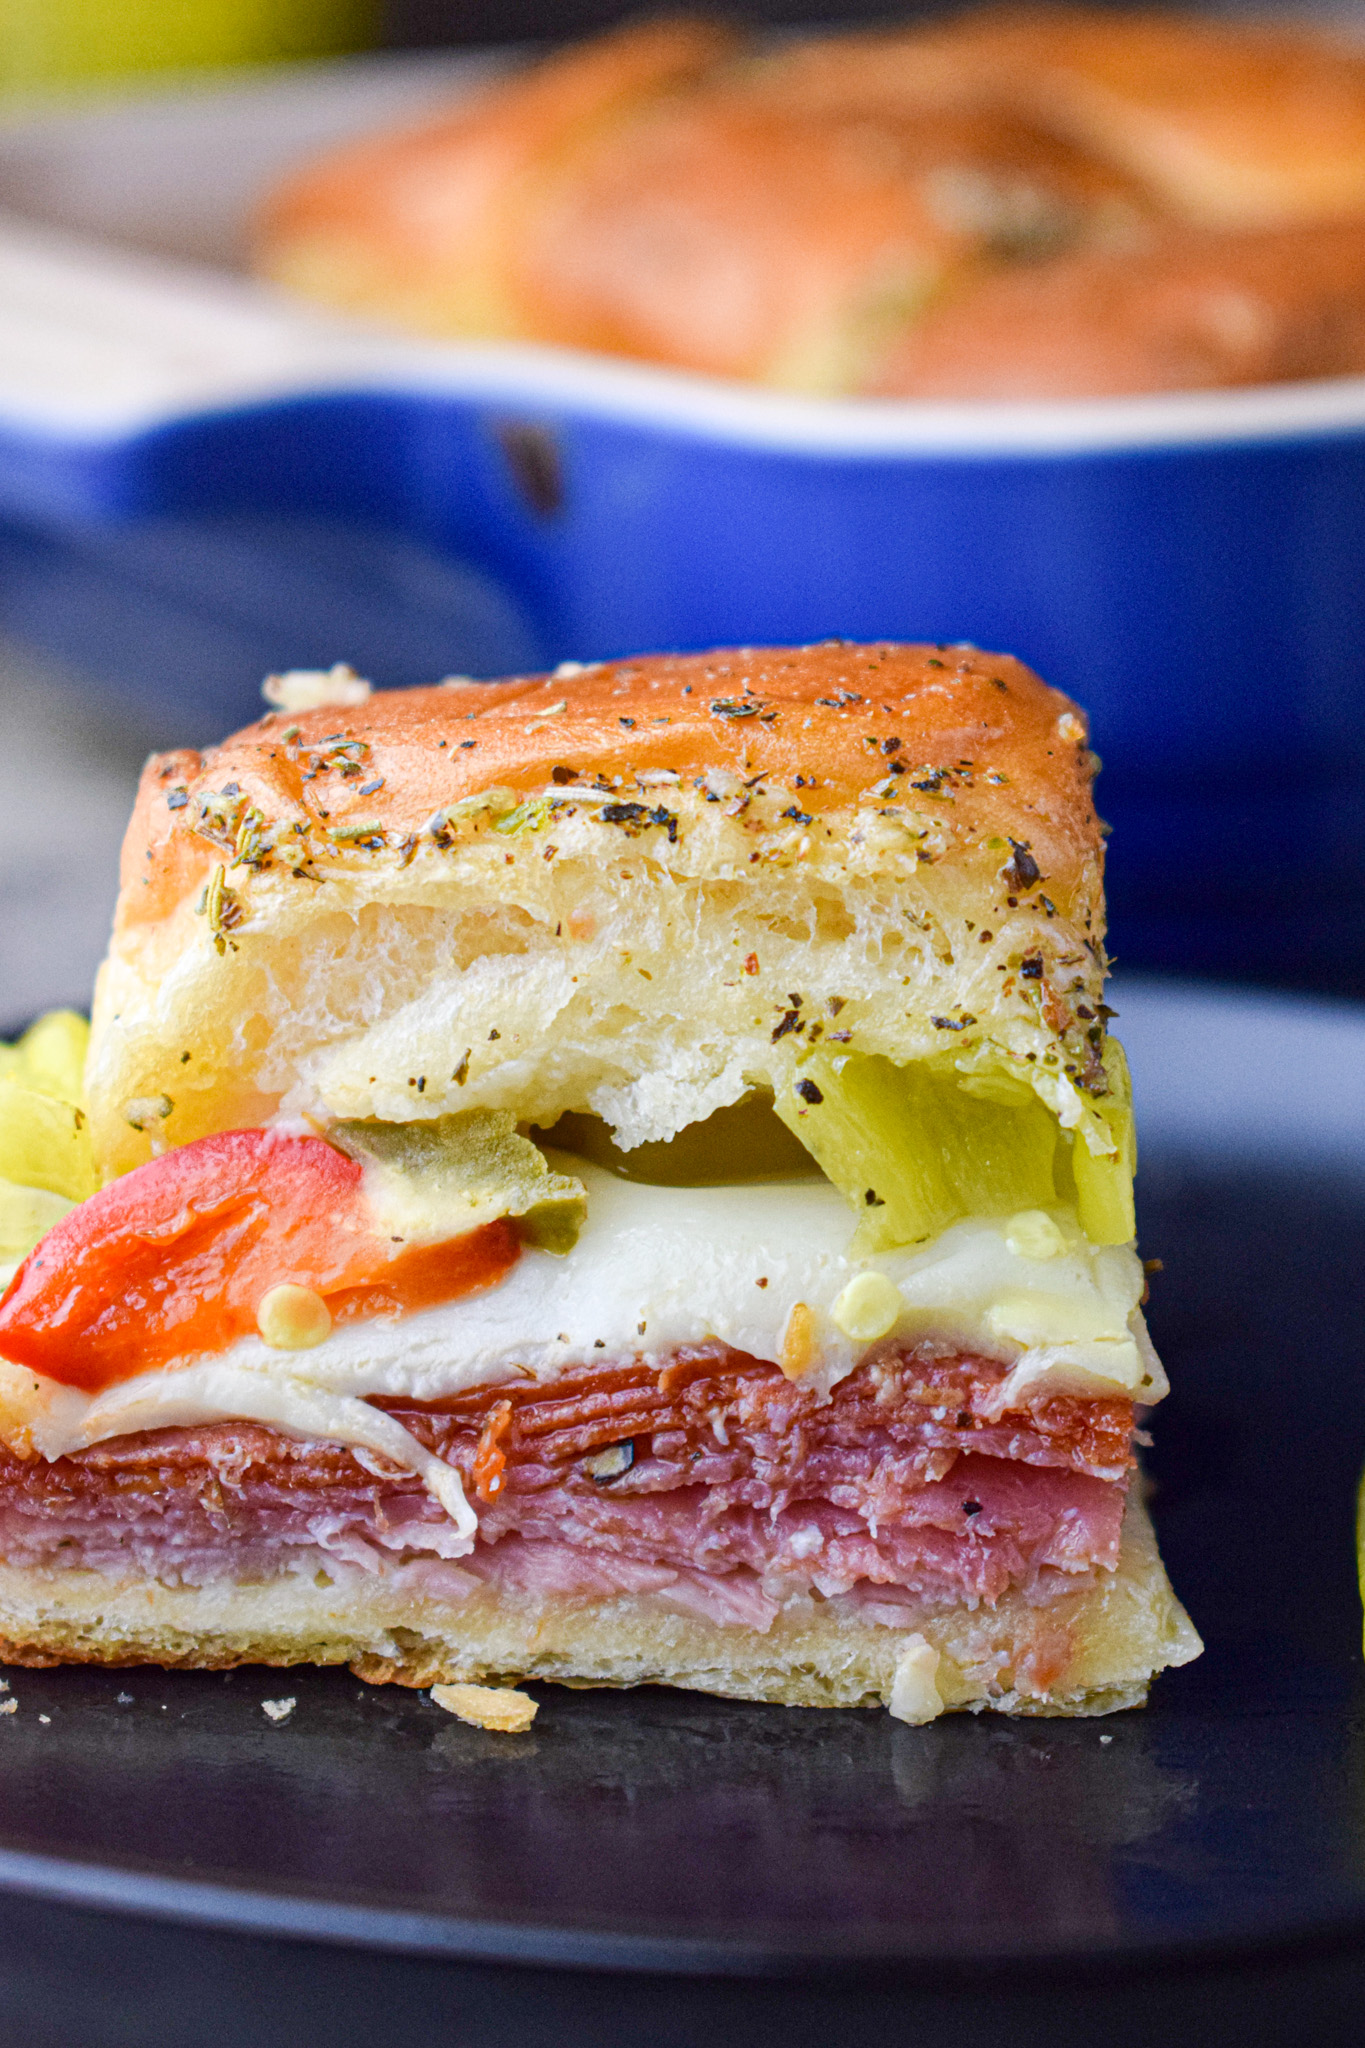
These sliders are piled high with my favorite Italian deli meats, cheese and slices of Mezzetta peperoncini and hot cherry peppers. You can make them more or less spicy by subbing out peperoncini for jalapenos. Or add roasted red pepper in place of the hot cherry peppers.
These sliders are delicious on their own or I like to serve them with a side of marinara for dipping. I hope you enjoy these sandwiches as much as we do!
Jump to:
More tailgating recipes you will love.


Equipment
- Baking sheet or other rectangular pan
- Small bowl and pastry brush: I love this silicone pastry brush set from Amazon.
Ingredients & Substitutions
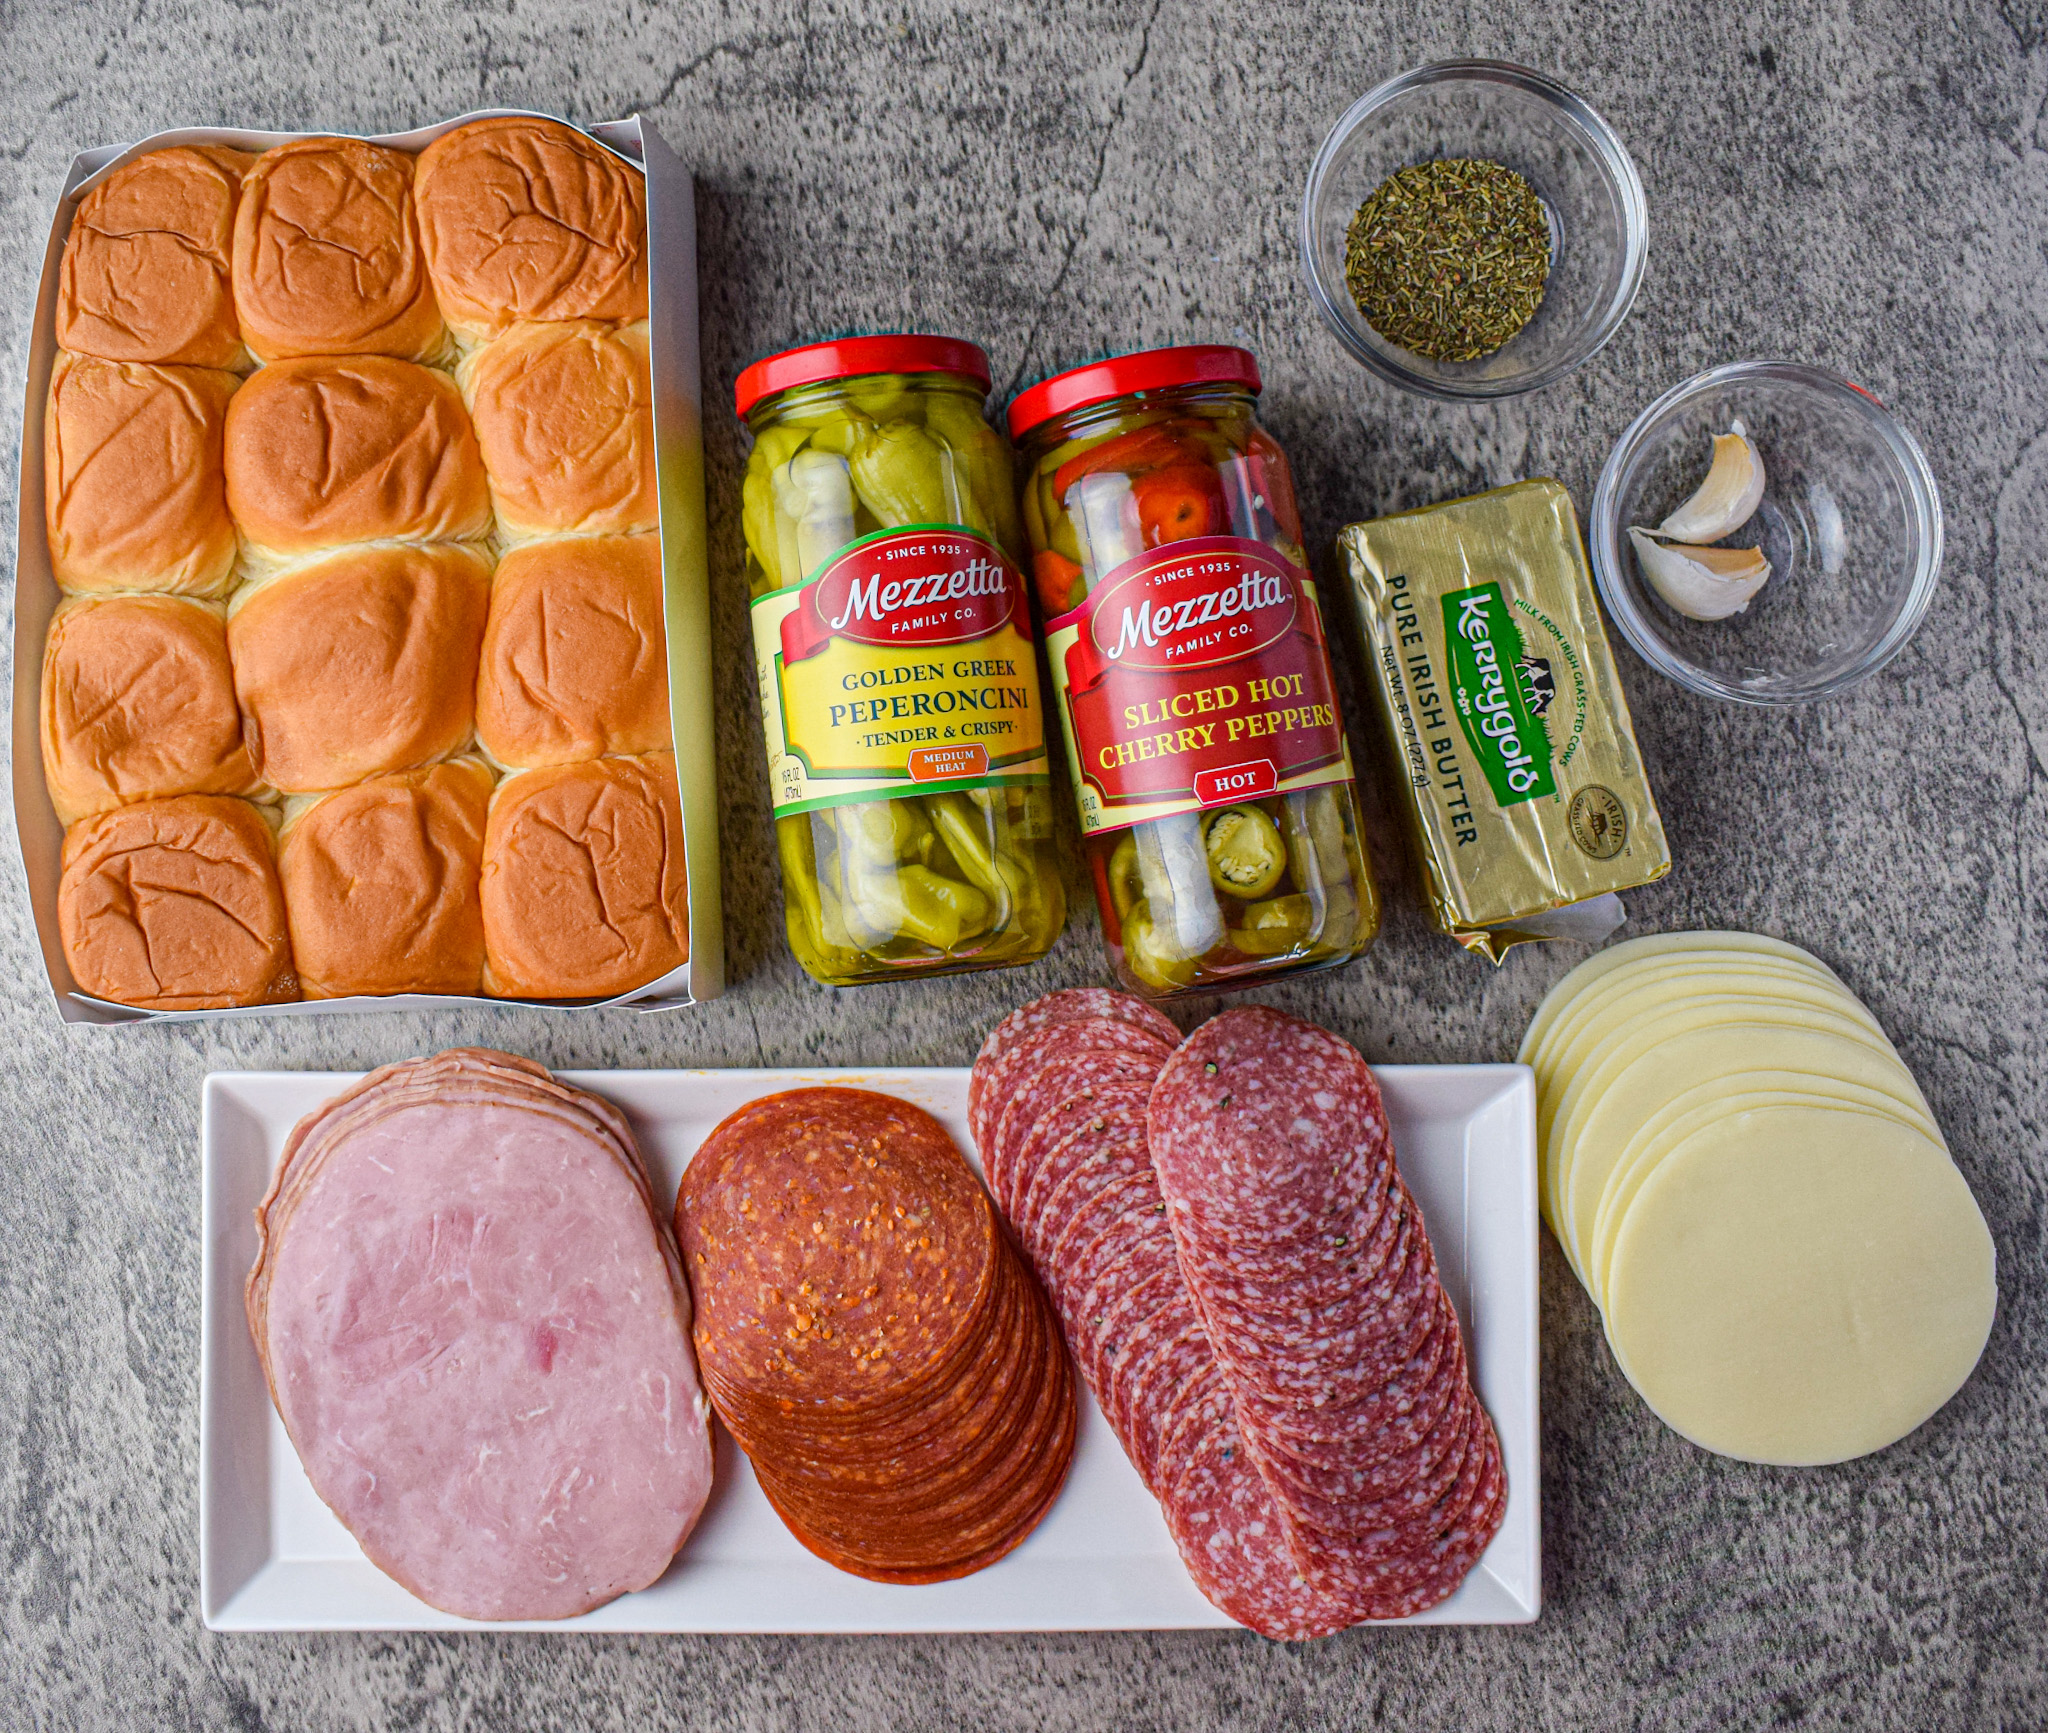
- Hawaiian rolls: I recommend Kings Hawaiian rolls. If you can't find Kings then any slider roll or even a sturdy dinner roll should work.
- Deli ham: I love this Applegate Black Forest Ham but your favorite brand will do.
- Salami: This Columbus Italian Dry Salame is my favorite. You could also use a different Italian cured meat if desired, such as a mortadella.
- Sliced pepperoni: I highly recommend this Applegate pepperoni.
- Sliced provolone - You could also use mozzarella, havarti or even a mild white cheddar if preferred.
- Hot cherry peppers: I love the flavor of these but if you can't find them you can just add some extra pepperoncini, or substitute with sliced jalapeno or other pickled peppers.
- Peperoncini: You can get these in a variety of heat levels, ranging from mild to pretty hot.
- Butter: I love using Kerrygold salted butter.
- Italian seasoning
- Fresh garlic - I highly recommend using fresh rather than jarred for the best flavor.
- Marinara sauce (optional) - I love serving these with some Rao's Marinara Sauce for dipping.
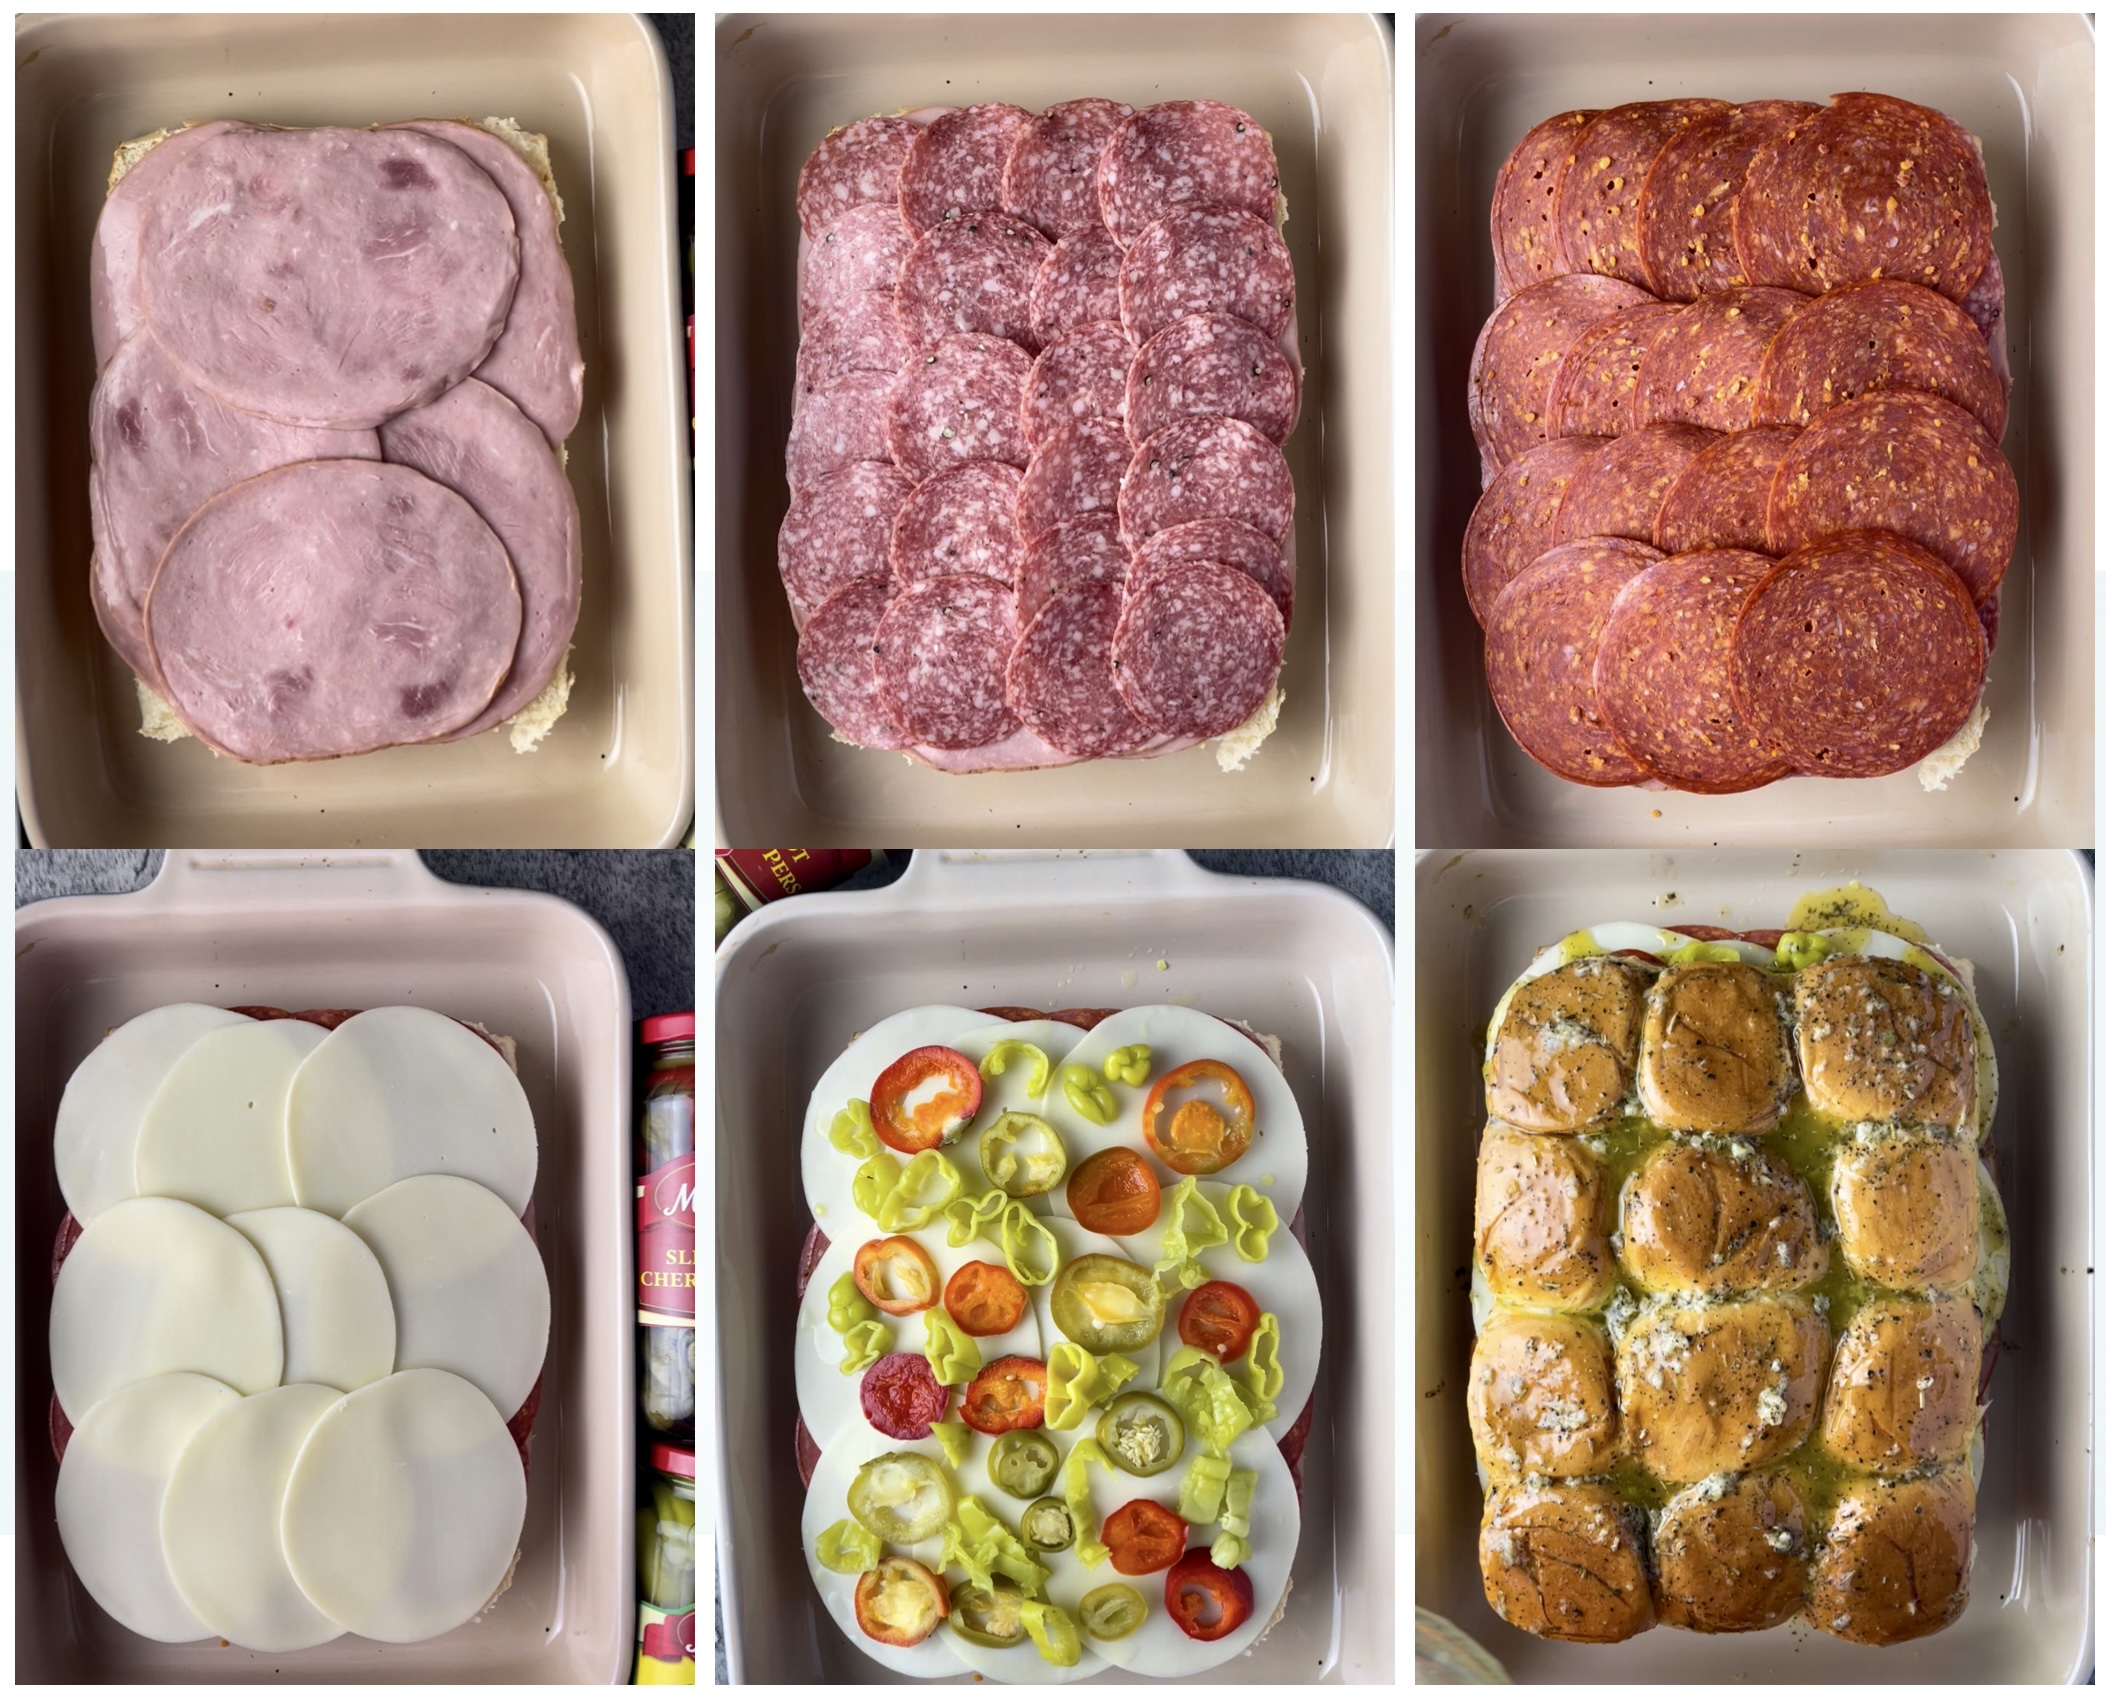
Step-by-Step Photos
Recipe FAQs
These sliders definitely have kick from the hot cherry peppers and pepperoncini but I wouldn't call it overly spicy. If you prefer a more mild dish then you can substitute the pepperoncini for mild banana peppers and the cherry peppers for roasted red peppers.
If you want more of a kick then add extra peppers or include a few sliced habaneros or other chiles.
Absolutely! This is a great recipe to make for a crowd because it is so easy to double. If available, Kings makes 18 packs and even 24 packs of their Hawaiian rolls to make it extra simple.
Yes! You can assemble the sliders up to the point of adding the butter mixture, then cover them tightly with foil and refrigerate until you're ready to bake. When it's time to cook, brush on the seasoned butter. Then cover again with foil, and bake as directed. You may need to add an extra 5-10 minutes if they're espeically cold from the fridge.
Yes. After baking, let them cool completely, then wrap tightly in foil and freeze. When ready to eat, reheat in the oven (still wrapped) at 350°F until warm all the way through.
The oven or air fryer are your best bets for keeping the bread crisp and the cheese melty. Reheat in a 350 F oven for about 10 minutes (covered with foil if you don't want them to brown more) or pop them in the air fryer at 325-350 F for 3-5 minutes until warmed through.
More recipes to check out.
Made these Hot Italian Sub Sliders? Let me know what you think in the comments!
Recipe
Hot Italian Sub Sliders
Equipment
- Baking pan
- pastry brush
- Small mixing bowl
Ingredients
- 12 pack rolls, halved lengthwise I recommend Kings Hawaiian rolls
- 6 oz package of ham, thinly sliced
- 5 oz package of salami, thinly sliced
- 5 oz package of pepperoni, thinly sliced
- 9 slices provolone cheese
- ⅓ cup pepperoncini, sliced
- ⅓ cup pickled hot cherry peppers, sliced
- ¼ cup salted butter, melted
- 1 teaspoon Italian seasoning
- 2 cloves garlic, crushed I recommend fresh over jarred.
To Serve (optional)
- 1 cup marinara sauce
Instructions
- Preheat the oven to 350 degrees F.
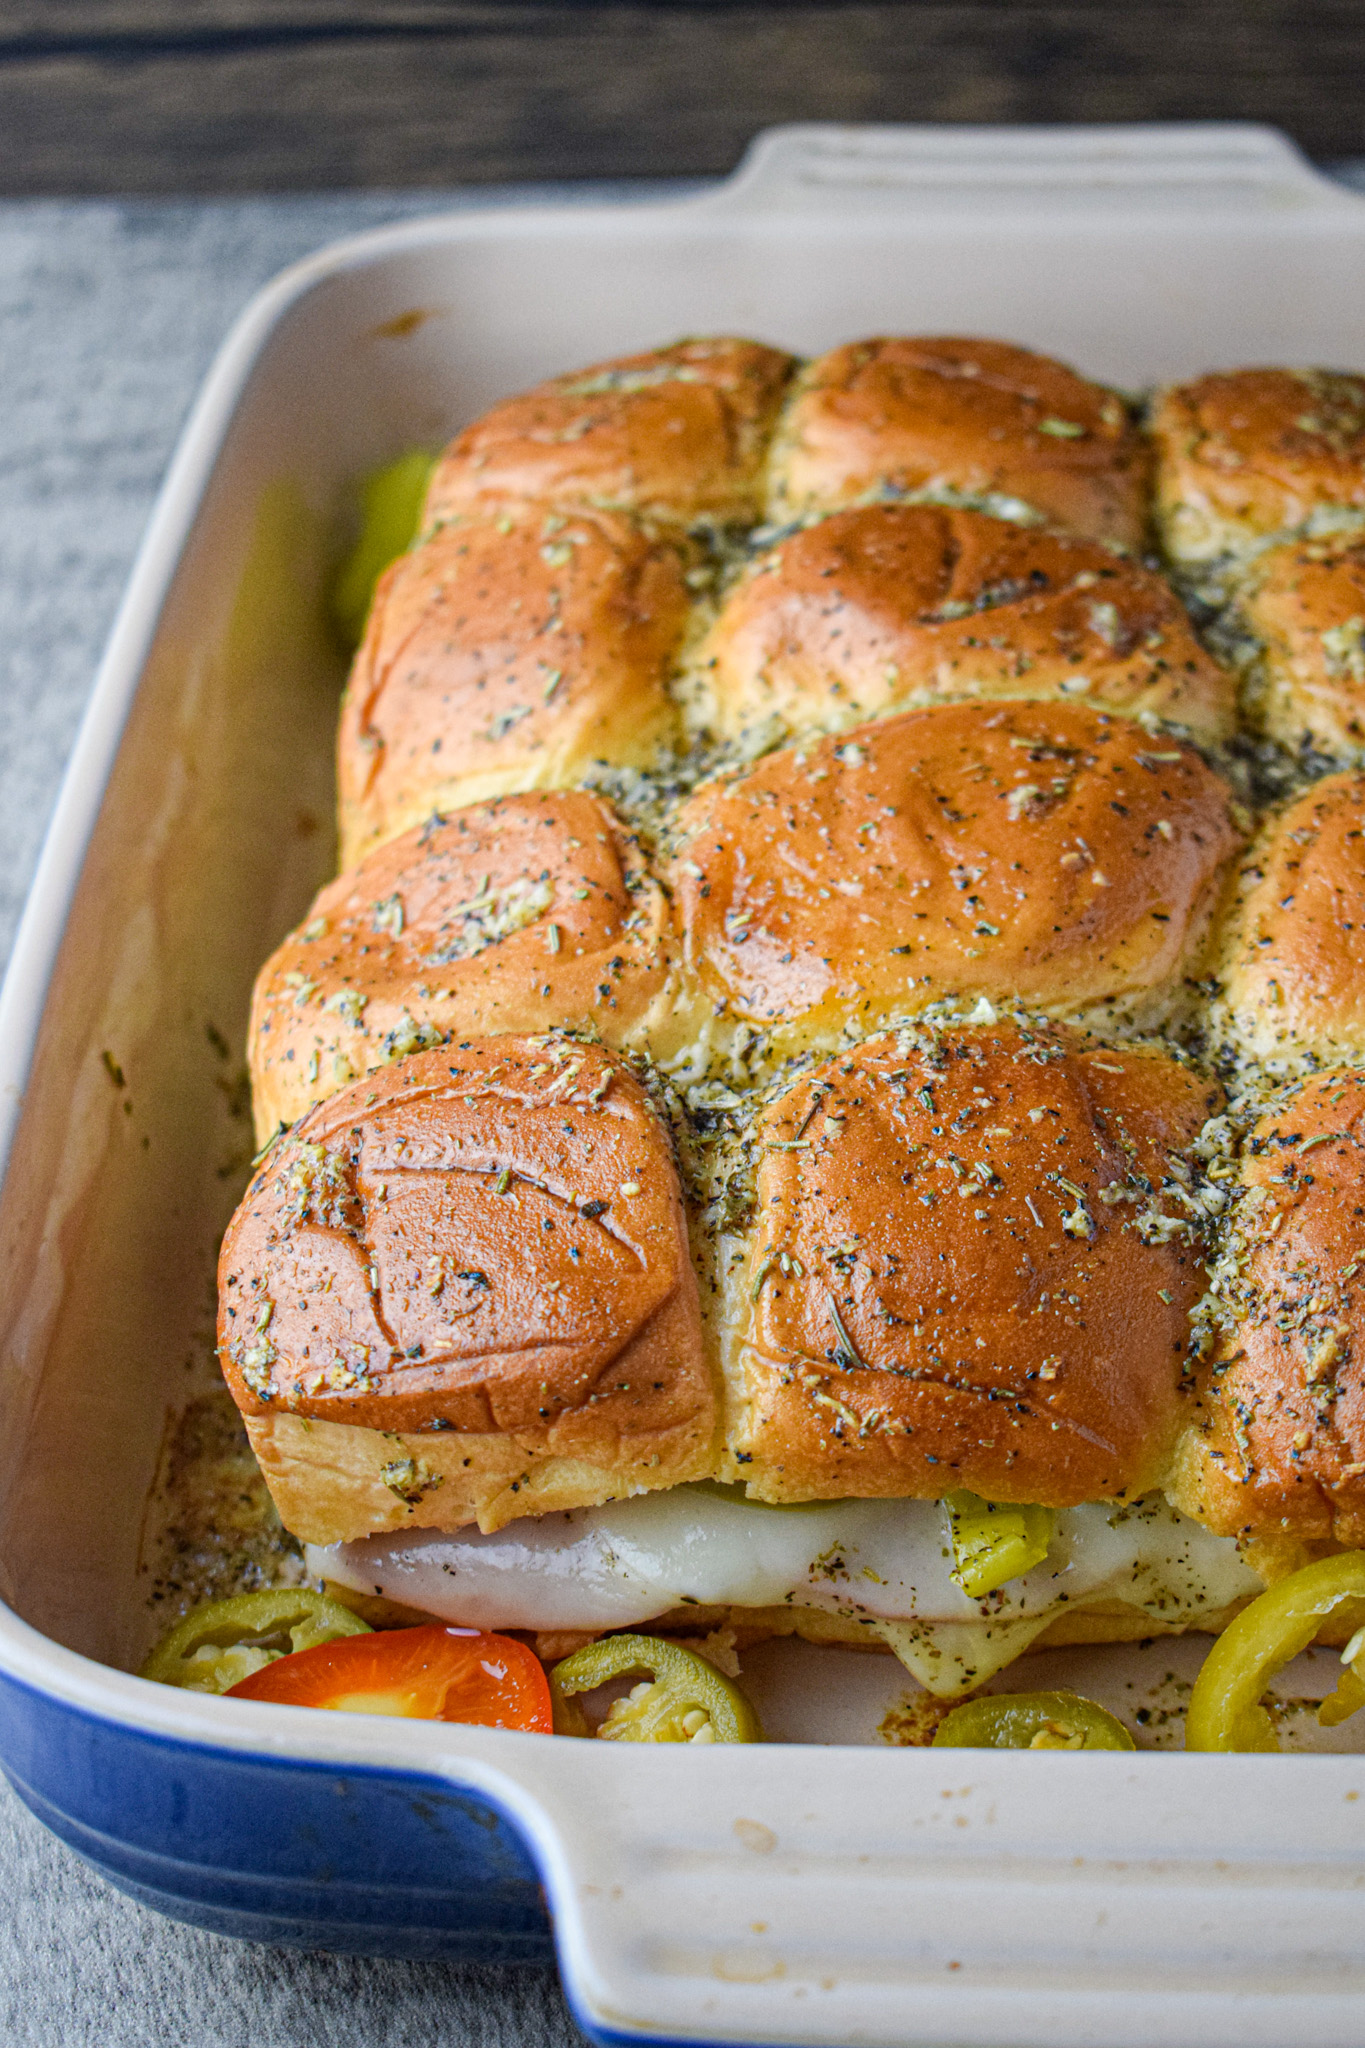
- Lay the bottom half of the rolls on a baking sheet or pan. Layer on slices of ham, then top with salami, a layer of pepperoni and a layer of provolone. Then layer on sliced hot cherry peppers and sliced peperoncini. Replace the top bun and set aside. In a small bowl combine melted butter with Italian seasoning and crushed garlic. Mix to combine. Then brush the seasoned butter mixture over the top of the sliders, being sure to coat all the nooks and crannies.
- Cover the sliders with foil then bake at 350 degrees F for about 30 minutes until golden brown. Remove from the oven then slice and enjoy! *I recommend serving with a side of your favorite marinara sauce for dipping.*


Mary
This was a big hit with the whole family and that doesn't happen often! Definitely making this regularly.
jamjarkitchen
Yay! So glad y'all enjoyed! 🙂
Barbara
Loved this, I had to modify slightly, I didn't have ham, but used a good quality Italian beef, thinly sliced, it was excellent. Thank you for sharing this!
Patricia Taylor
Can I skip putting them in the oven? Just serve cold?
jamjarkitchen
Hi Patricia - You could serve them cold but it would change the end result pretty significantly. If you do decide to to it I would recommend leaving off the butter topping as that really does need to bake. And they might seem a bit dry without the butter and melted cheese so maybe dress some lettuce and place that on top of the meat or add a spread like mayo for moisture. Hope this helps!
Darlene
Just found this recipe…I am making it for a Women’s Retreat at my church…I will be doubling the recipe though. Thank you soooooo much for posting this amazing sounding recipe!
Lisa
Question, since you're overlapping the meat do you have to cut the sandwiches instead of pulling them apart? Looks yummy!
jamjarkitchen
Hi there! Yes, I typically use a large knife to cut and then serve. Hope you enjoy!
Amanda
Awesome and easy recipe! Definitely a crowd pleaser.
Ruth
This is so smart! I see people making ham and cheese sandwiches with the Hawaiian rolls but this was an amazing take! We love making Italian subs in our house but they always take so long. This was a great way to make a ton at once! We had a bunch left over I ended up giving 2 to our carpet cleaning guy that came over the next day after our family party! He said it was the best lunch break he's ever had on the job, ha!
Linda
My only mistake was not making more. I made 2 dozen. Didn’t have enough for my grandsons lunch the next day. I used mozzarella instead and left out the cherry pepper. Will definitely do again.
Hanna
For anyone reading this, please make it! It was so quick to put together and everyone loved it. For how quick it was, the amount of flavor was incredible! Not too spicy and so pretty to serve. Definitely will be making again!
Mary Beth
I just made these tonight and we were so impressed! Definitely adding this to the rotation. It will be so good with soups this fall and winter too!!
Jeanne L
My bottom buns were burnt black! Followed the recipe to the letter.
jamjarkitchen
Hi Jeanne - Sorry about the burnt buns! I'm not entirely sure why as I and many others have made this recipe a ton of times. Do you have a fan oven perhaps? Sometimes those can get much hotter than a conventional convection oven. Let me know what you think.
Carolyn
Made these made a Calabrian chilie aoli to go on it as well so goodn
jamjarkitchen
Sounds delicious!
Jamie
First time making these(just for the fam) and they were delish! Will make these again next time we host a party!
Cindy
These little sliders are a huge hit and so easy to make.
jamjarkitchen
So glad you liked them!
Laurette Sharpe
Do you think these could be heated on a barbecue at the beach instead of the oven?
jamjarkitchen
I think it would work with a charcoal closed lid BBQ no problem. My only concern would be it burning a bit on the bottom but you can check for that and adjust the heat accordingly. Please let me know if you try it and how it comes out. 🙂
Christy
Would these freeze well? My husband is going on a hunting trip and wants to bring something for lunch. I was thinking of making them, covering in foil and freezing for a few days. He could then thaw and bake (they'll have an oven where they're going).
jamjarkitchen
Hi Christy - I haven't frozen them myself but I don't see why it wouldn't work. You could even individual portion them to make it easier.I recommend thawing in the fridge overnight and reheating at 325 for 20-30 minutes. Hope this helps!
Amy
I’m trying these for our work snack day, I only have banana peppers! Do you think they’ll be too spicy or not flavourful enough? I’m not familiar with the other type and my neighbourhood grocer didnt have them!
jamjarkitchen
Hi Amy - Yes, banana peppers should work for this recipe. You can get some that are mild to pretty spicy so be sure to look out for how hot you want the sliders to be. Hope you enjoy!
Jen
Amazing! My new favorite easy night food for sure. So simple yet has such a great depth of flavor. I was very skeptical because I do not like salami, but the combination of everything together was wonderful! This will definitely go into a permanent rotation at our house! I served them with mozzarella cheese, sticks, and marinara…yummy ! Thanks for the recipe!
jamjarkitchen
Hi Jen- So glad you liked them!
Cynthia Perry
I’m trying these for my Galentines party tomorrow. Can I make ahead and bake them with the sauce the next day?
jamjarkitchen
Absolutely!
Deja
Do we need to grease pan before?
jamjarkitchen
Hi Deja - I typically do not but it wouldn't hurt if you did. Hope you enjoy!