• Skip to primary navigation
  • Skip to main content
  • Skip to primary sidebar
The Jam Jar Kitchen
  • Search Recipes
    • Main Course
    • Side Dishes
    • Dessert
    • Drinks
    • Preserves and Pickles
    • Soups & Stews
    • 4th of July
  • Travel
  • Shop
  • Our Mission
  • About Me
    • Contact
  • Subscribe
    • Facebook
    • Instagram
    • Pinterest
    • RSS
    • Snapchat
    • Twitter
  • Home
  • Search Recipes
    • Breakfast & Brunch
    • Main Course
    • Side Dishes
    • Dessert
    • Drinks
  • Travel
  • Shop
  • Events
  • About
    • About Me
    • Our Mission
    • Contact
    • Privacy Policy and Disclaimer
  • Subscribe
menu icon
go to homepage
search icon
Homepage link
  • Search Recipes
    • Main Course
    • Side Dishes
    • Dessert
    • Drinks
    • Preserves and Pickles
    • Soups & Stews
    • 4th of July
  • Travel
  • Shop
  • Our Mission
  • About Me
    • Contact
  • Subscribe
    • Email
    • Facebook
    • Instagram
    • Pinterest
  • ×
    Home » Preserves and Pickles » Pickled Beets {for canning}

    Pickled Beets {for canning}

    Published: Jul 28, 2022 · Modified: May 5, 2025 by jamjarkitchen · This post may contain affiliate links · 23 Comments

    Jump to Recipe

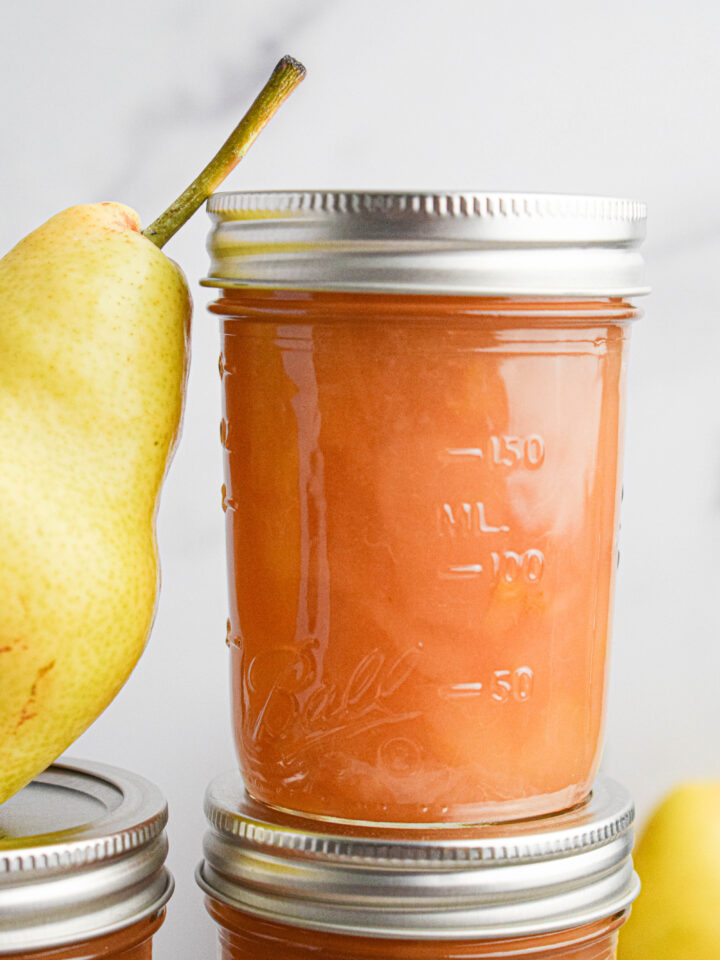
    If you're looking for a simple and delicious way to preserve beets, this pickled beets recipe is the perfect solution. With just a few ingredients and easy steps, you can make tangy, vibrant pickled beets you can enjoy all year long. Whether you're a seasoned canner or a beginner, this recipe will guide you through the process to create a pantry staple that's perfect for salads, sandwiches, or as a snack.

    A close-up shot of a jar filled with vibrant red pickled beets, showcasing the crisp, cut pieces stacked inside the jar. A metal spoon is visible in the jar, and the beets are submerged in their pickling liquid. The jar sits on a rustic surface with a soft, blurred background.

    Beets are one of those vegetables that tend to spark strong opinions, people either love them or can't stand them. Personally, I absolutely adore them, and this pickled beets recipe is one of my all-time favorite ways to enjoy them. The combination of earthy, tender beets with a sweet, tangy brine is simply irresistible.

    Why you will love this pickled beets recipe.

    What makes this recipe stand out is the balance of flavors, it's sweet without being overly sugary, with just the right amount of tang and spice to make each bite a perfect burst of flavor. Plus, it's a tried-and-true method that's safe for water bath canning, meaning you can make a big batch and store it to enjoy year-round. Whether you're a beet lover or just looking to try something new, these pickled beets are the ideal recipe to add to your canning routine.

    The flavor only improves as they sit, and they're incredibly versatile, perfect for topping salads, pairing with roasted meats, or just snacking straight from the jar. If you've never canned before, this is the perfect introduction, and if you're already a seasoned canner, it's sure to become a staple in your pantry!

    Be sure to follow safe canning practices as outlined by the National Center for Home Food Preservation.

    Jump to:
    • What is water bath canning?
    • Safe canning resources.
    • More preserving recipes for you to enjoy.
    • Equipment
    • Pickled Beets FAQs
    • More recipes for you to enjoy.
    • Recipe
    A close-up image of vibrant red pickled beets, cut into thick chunks and placed in a small white bowl. The deep red color is vivid and glossy, with a slight pink stain visible around the edges of the bowl.

    What is water bath canning?

    Canning is simply the process of applying adequate heat to high acid food that is sealed in jars for the allotted time necessary to kill off bacteria and micro-organisms that cause food spoilage. During heating, oxygen is driven out of the jars, causing a vacuum seal to form when the jars cool down. This prevents any outside micro-organisms and oxygen from getting back into the food. When done correctly, canning preserves food safely for at least a year, although probably much, much longer.

    You can check out my guide on How to Safely Water Bath Can at Home more resources on safe home preserving.

    Safe canning resources.

    If you are new to canning you can find great resources, recipes and tutorials at Ball Canning and the National Center for Home Food Preservation.

    More preserving recipes for you to enjoy.

    • A slice of bread with carrot cake jam sits on a white plate next to a jar of jam and a spoon, with fresh carrots and more jam jars in the background.
      Carrot Cake Jam
    • A glass jar filled with light orange pear preserves sits next to a fresh pear, with another sealed jar partially visible underneath.
      Old Fashioned Pear Preserves {for canning}
    • A jar and a small bowl of slow cooker applesauce are on a wooden board, surrounded by fresh apples and cinnamon sticks. A spoon is placed in the bowl.
      Slow Cooker Applesauce {Canning Safe}
    • A small white ramekin with blueberry compote and granola, a glass jar of blueberry compote, scattered blueberries, and a spoon rest on a wooden board with a striped cloth in the background.
      Blueberry Compote
    A flat-lay image featuring fresh beets, a large bottle of organic white vinegar, and small bowls of ingredients for pickling. The bowls contain salt, sugar, and a mix of spices including cloves, black peppercorns, and bay leaves. The beets are arranged at the back, with the vinegar and bowls of spices in the foreground.

    Equipment

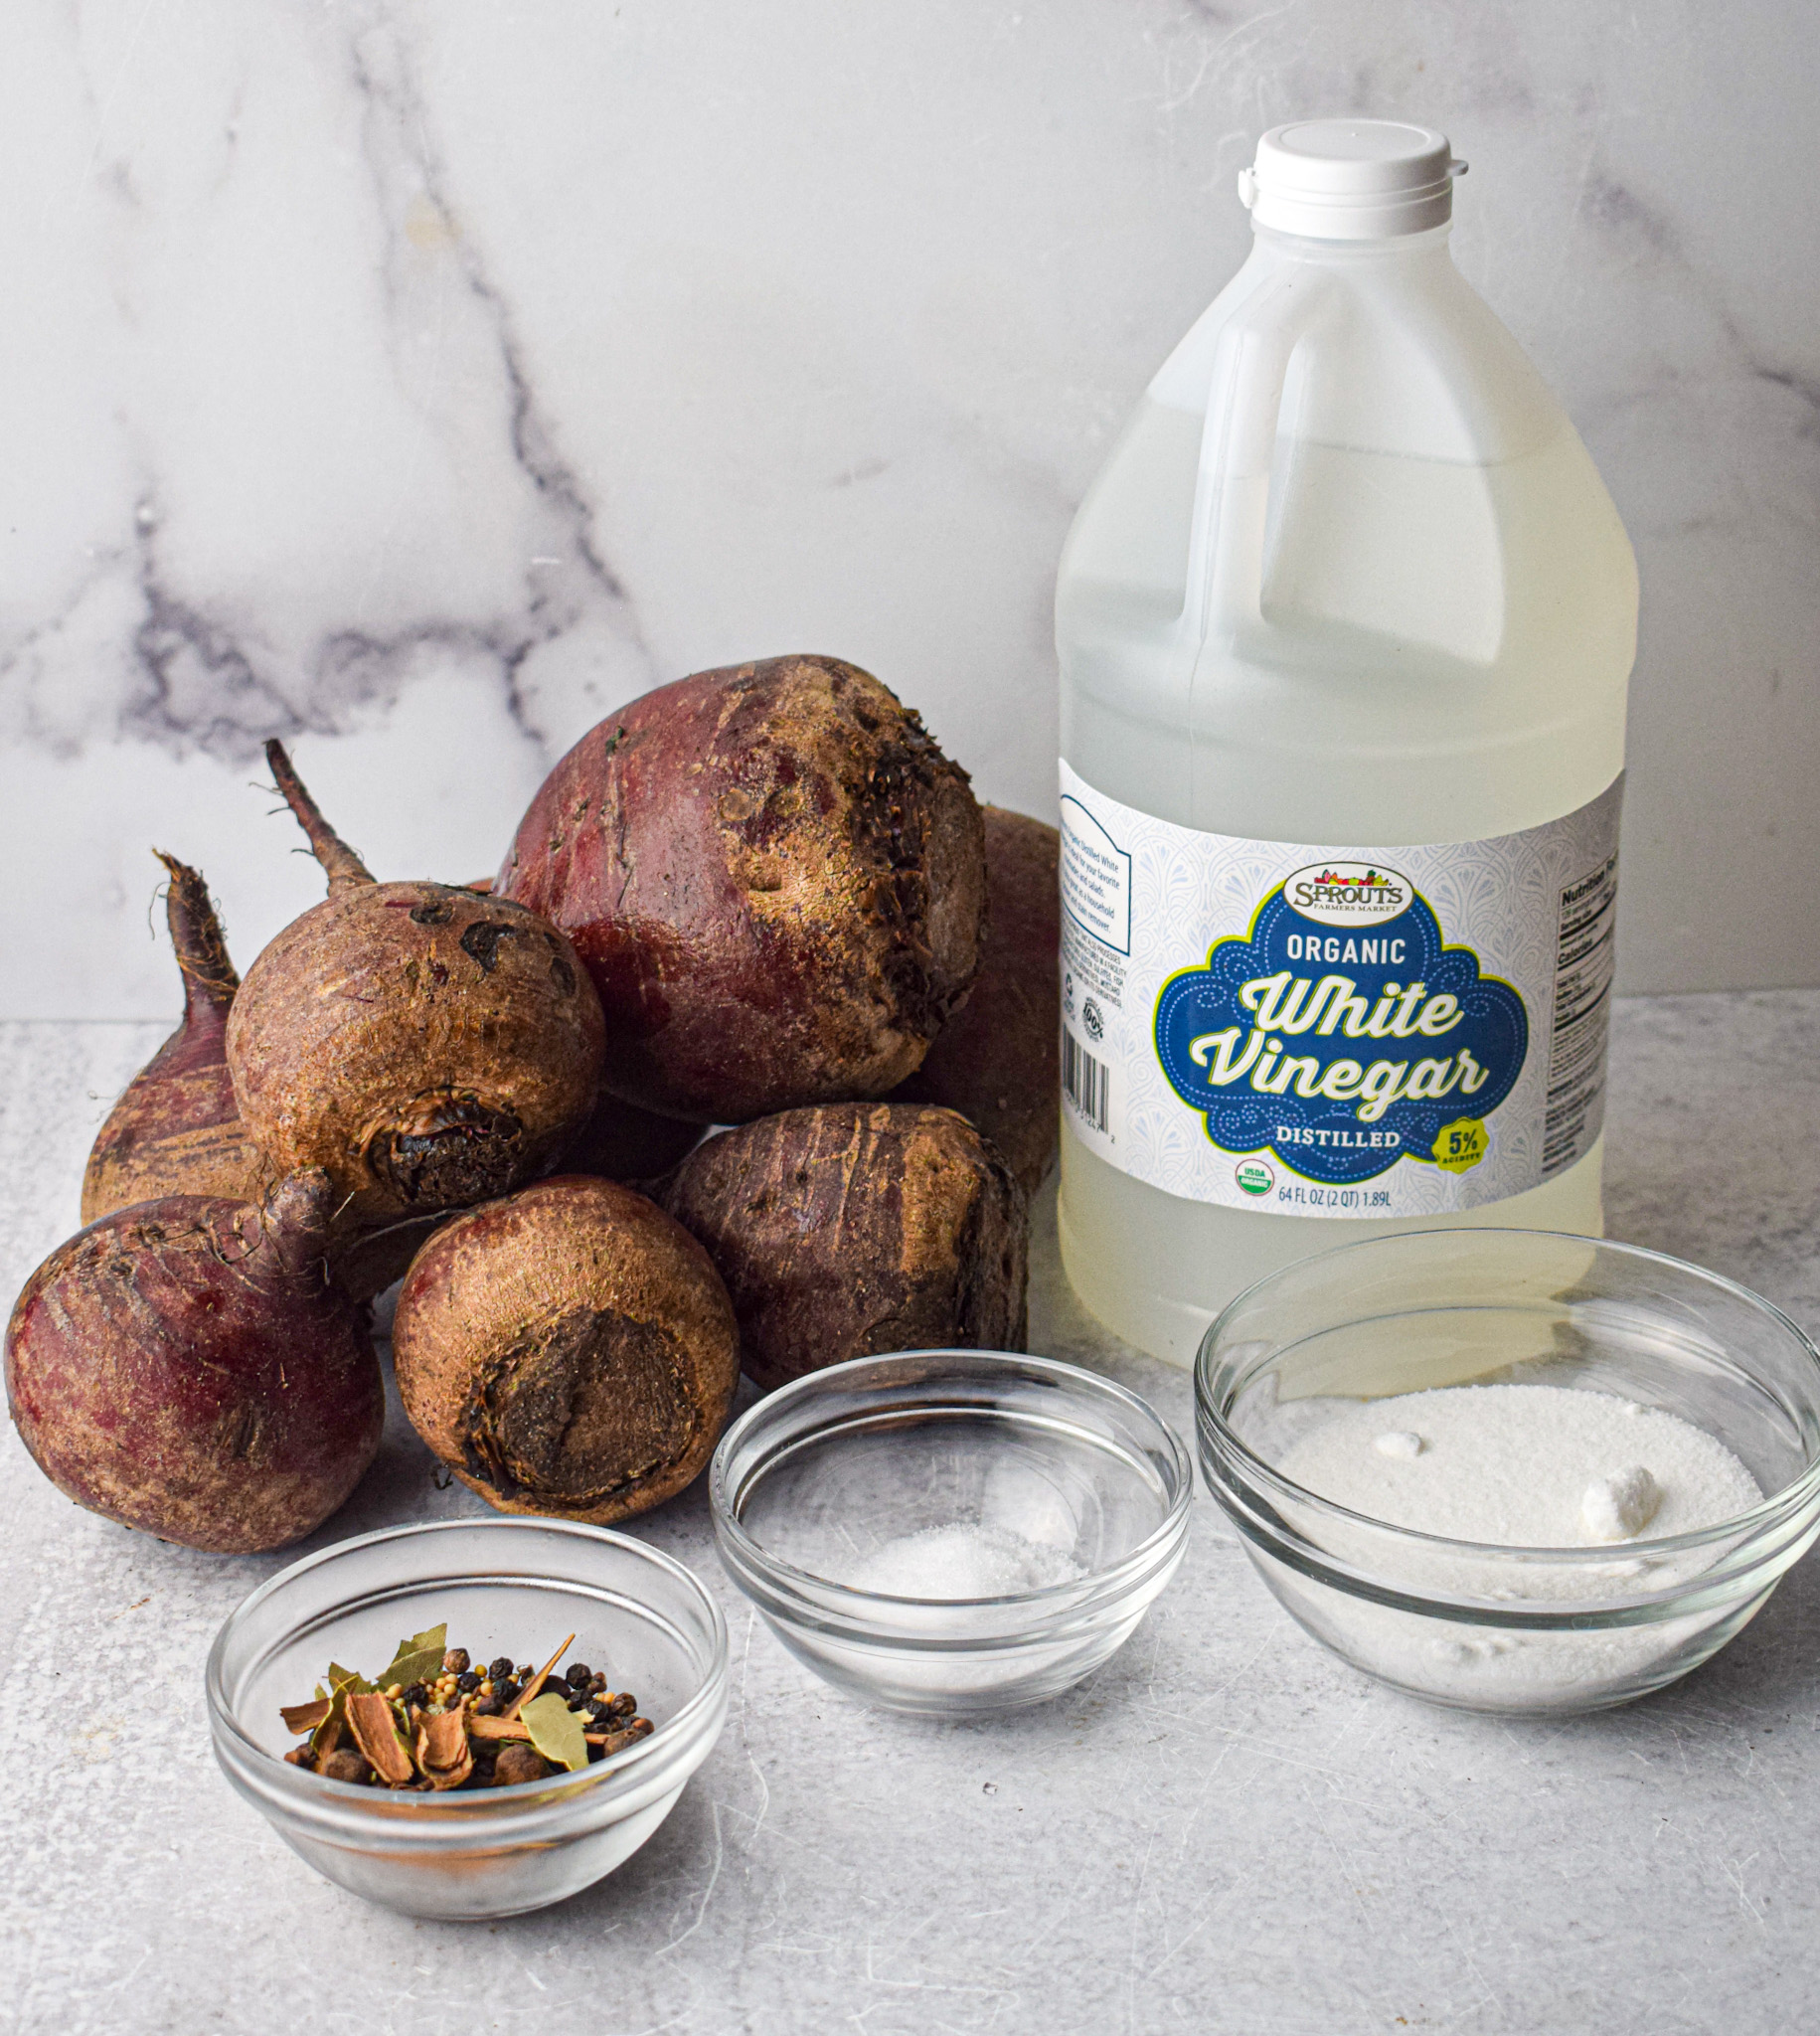
    For the Pickled Beets

    • Large pot
    • Cutting board and knife
    • Measuring cups and spoons

    For Water Bath Canning

    • Mason jars: Make sure the jars are clean and that the lids are brand new. You cannot reuse canning lids.
    • Large pot with rack OR Electric Canner: If you only can once in a while using a large pot with a canning rack works just fine. As someone who personally does a lot of canning and I absolutely LOVE my Ball FreshTech Electric Canner.
    • Jar lifter: You will need a jar lifter to remove the hot jars from the water bath.
    • Funnel: I personally love this canning funnel because it also allows you to measure the headspace easily.
    • Ladle: This Prepworks Canning Scoop is my favorite.
    Several glass canning jars filled with vibrant pickled beets, with spices and beet pieces visible inside. A red funnel sits nearby, ready to assist in filling another jar. The background features other jars of pickled beets and a few drops of beet juice on the surface.

    Pickled Beets FAQs

    What type of beets are best for pickling?

    Most varieties of beets will work well for this recipe, but red beets are the most commonly used due to their vibrant color and sweet flavor. Golden beets can also be used if you prefer a milder taste and less staining

    How long do these pickled beets last?

    When properly water bath canned, these pickled beets can last up to 18 months if stored in a cool, dark place. Once opened, they should be refrigerated and consumed within 1-2 months. If you notice any off smell of visible signs of mold or deterioration do not consume.

    Can I use a different type of vinegar?

    I personally like using white vinegar for pickling beets, but some people like using apple cider vinegar. You can use any vinegar with an acidity level of 5% or more for safe canning and do not change the ratios of vinegar used.

    Can I add other vegetables or spices?

    Yes! Pickled beets are very versatile. Feel free to add onions, garlic, or spices like cinnamon, cloves, mustard seeds, and bay leaves to create unique flavor combinations. Adjust the spice level according to your taste.

    When will my beets be ready to eat?

    After canning, allow the pickled beets to rest for at least 48 hours to allow the flavors to develop. They are best enjoyed after 1-2 weeks of marinating, though they can be eaten sooner if desired.

    More recipes for you to enjoy.

    Balsamic Onion Jam

    Tomato Chutney

    Pickled Green Beans

    Made these pickled beets? Let me know what you think in the comments!

    Recipe

    the best pickled beets recipe

    Pickled Beets

    These Pickled Beets are the perfect combination of sweet, tangy and spice! This recipe is safe for water bath canning and is my favorite way to preserve fresh beets to enjoy year round.
    4.87 from 111 votes
    Print Recipe SaveSaved! Pin Recipe
    Prep Time 10 minutes mins
    Cook Time 45 minutes mins
    Canning Time 30 minutes mins
    Total Time 55 minutes mins
    Course Snack
    Cuisine American
    Servings 6 pints

    Ingredients
      

    • 4 lb beets
    • 1 cup water
    • 2 cups white vinegar at least 5% acidity
    • ½ cup white granulated sugar
    • 2 tablespoon pickling spice
    • 2 teaspoon kosher salt

    Instructions
     

    Prepare the beets

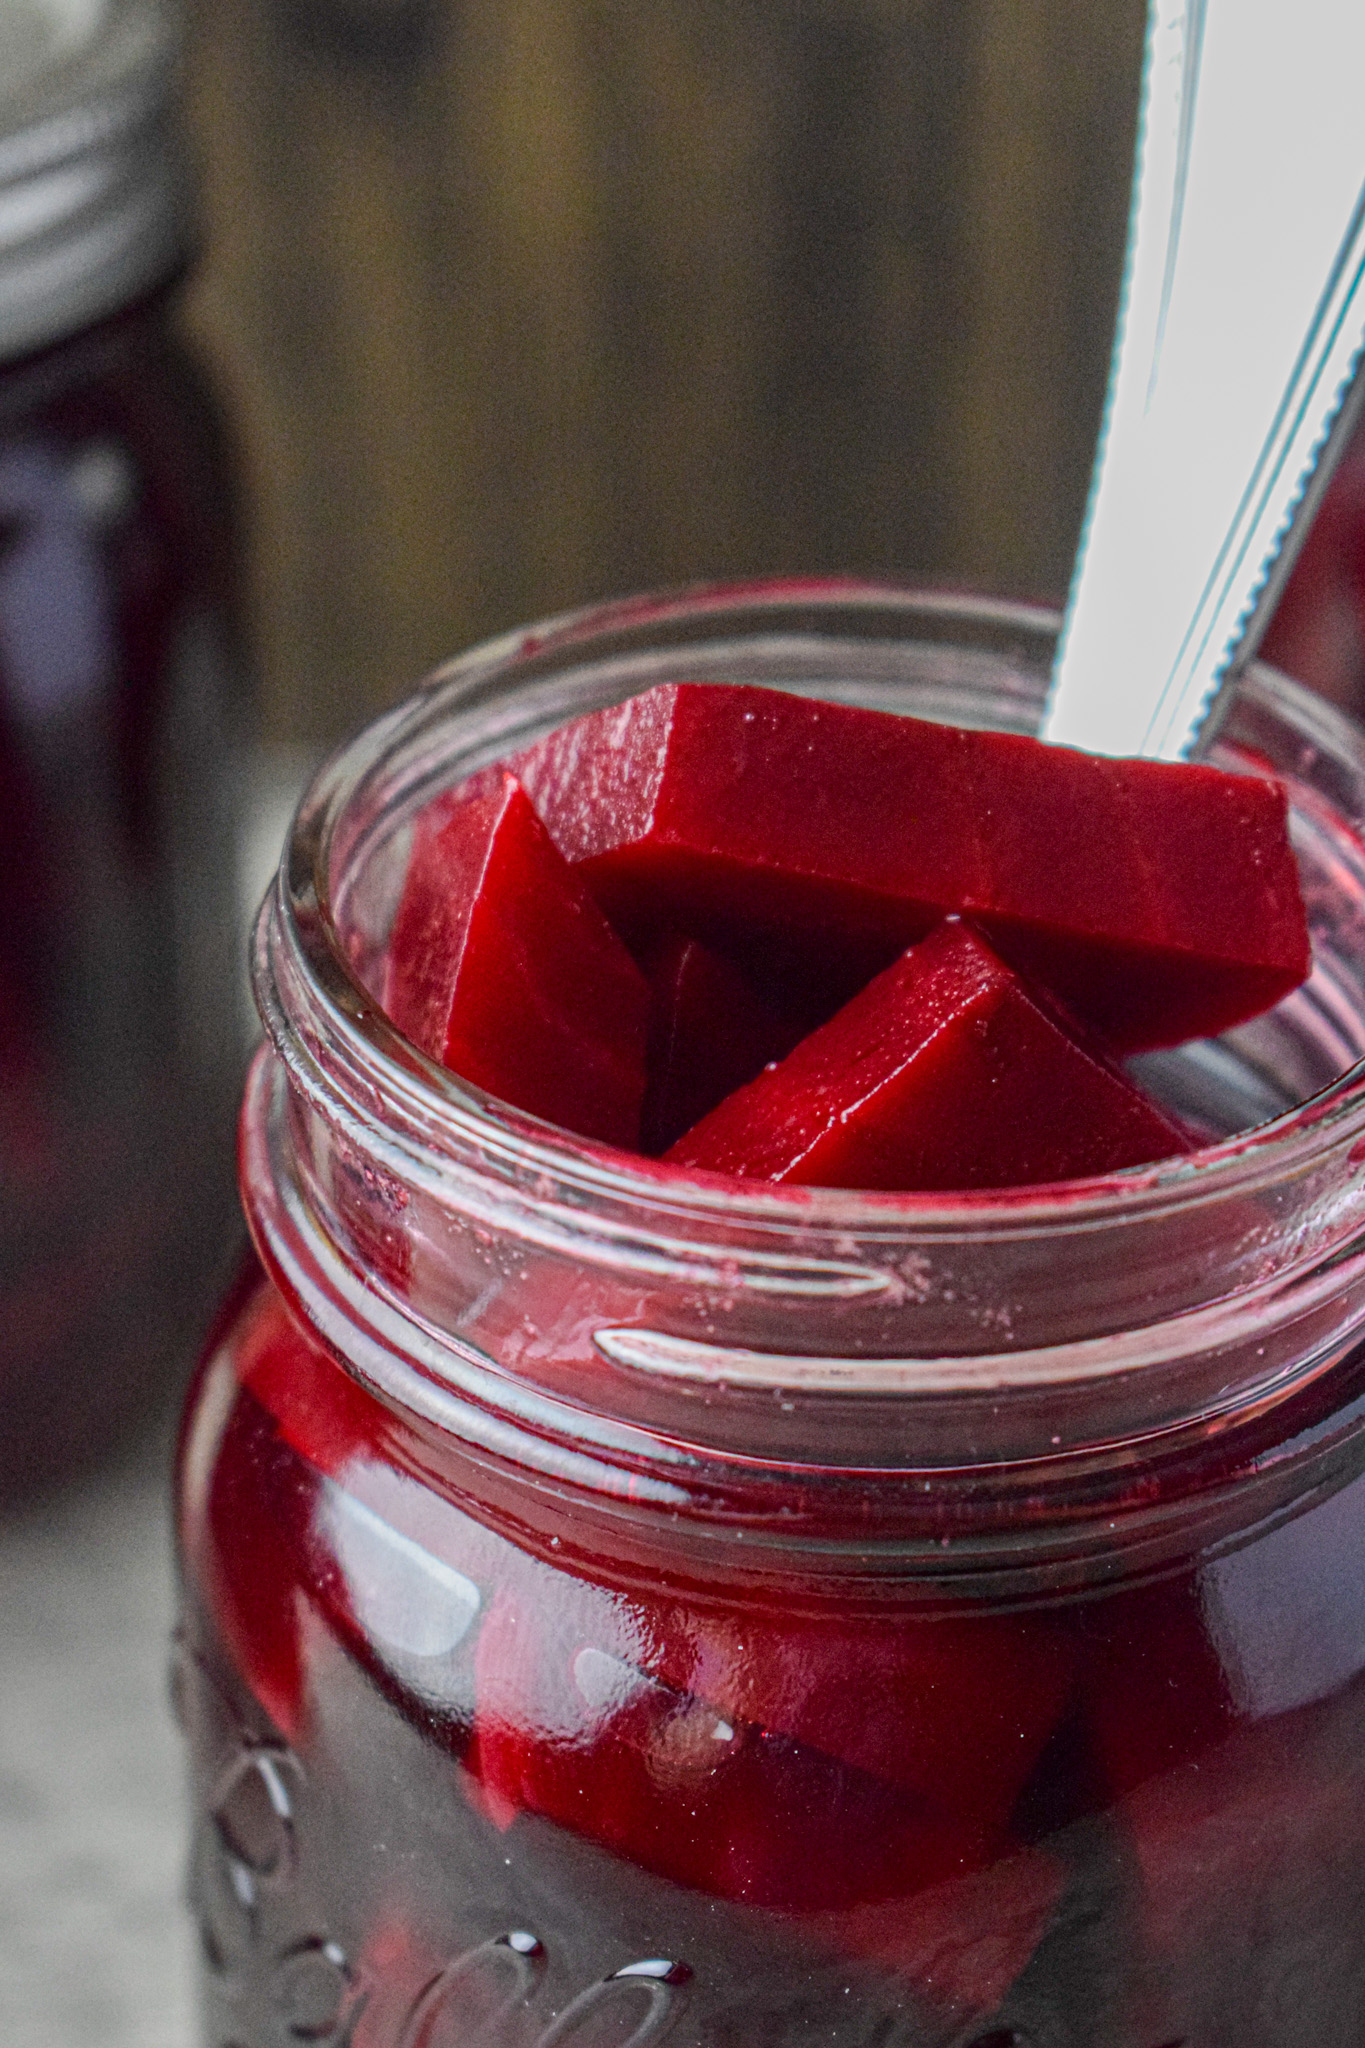
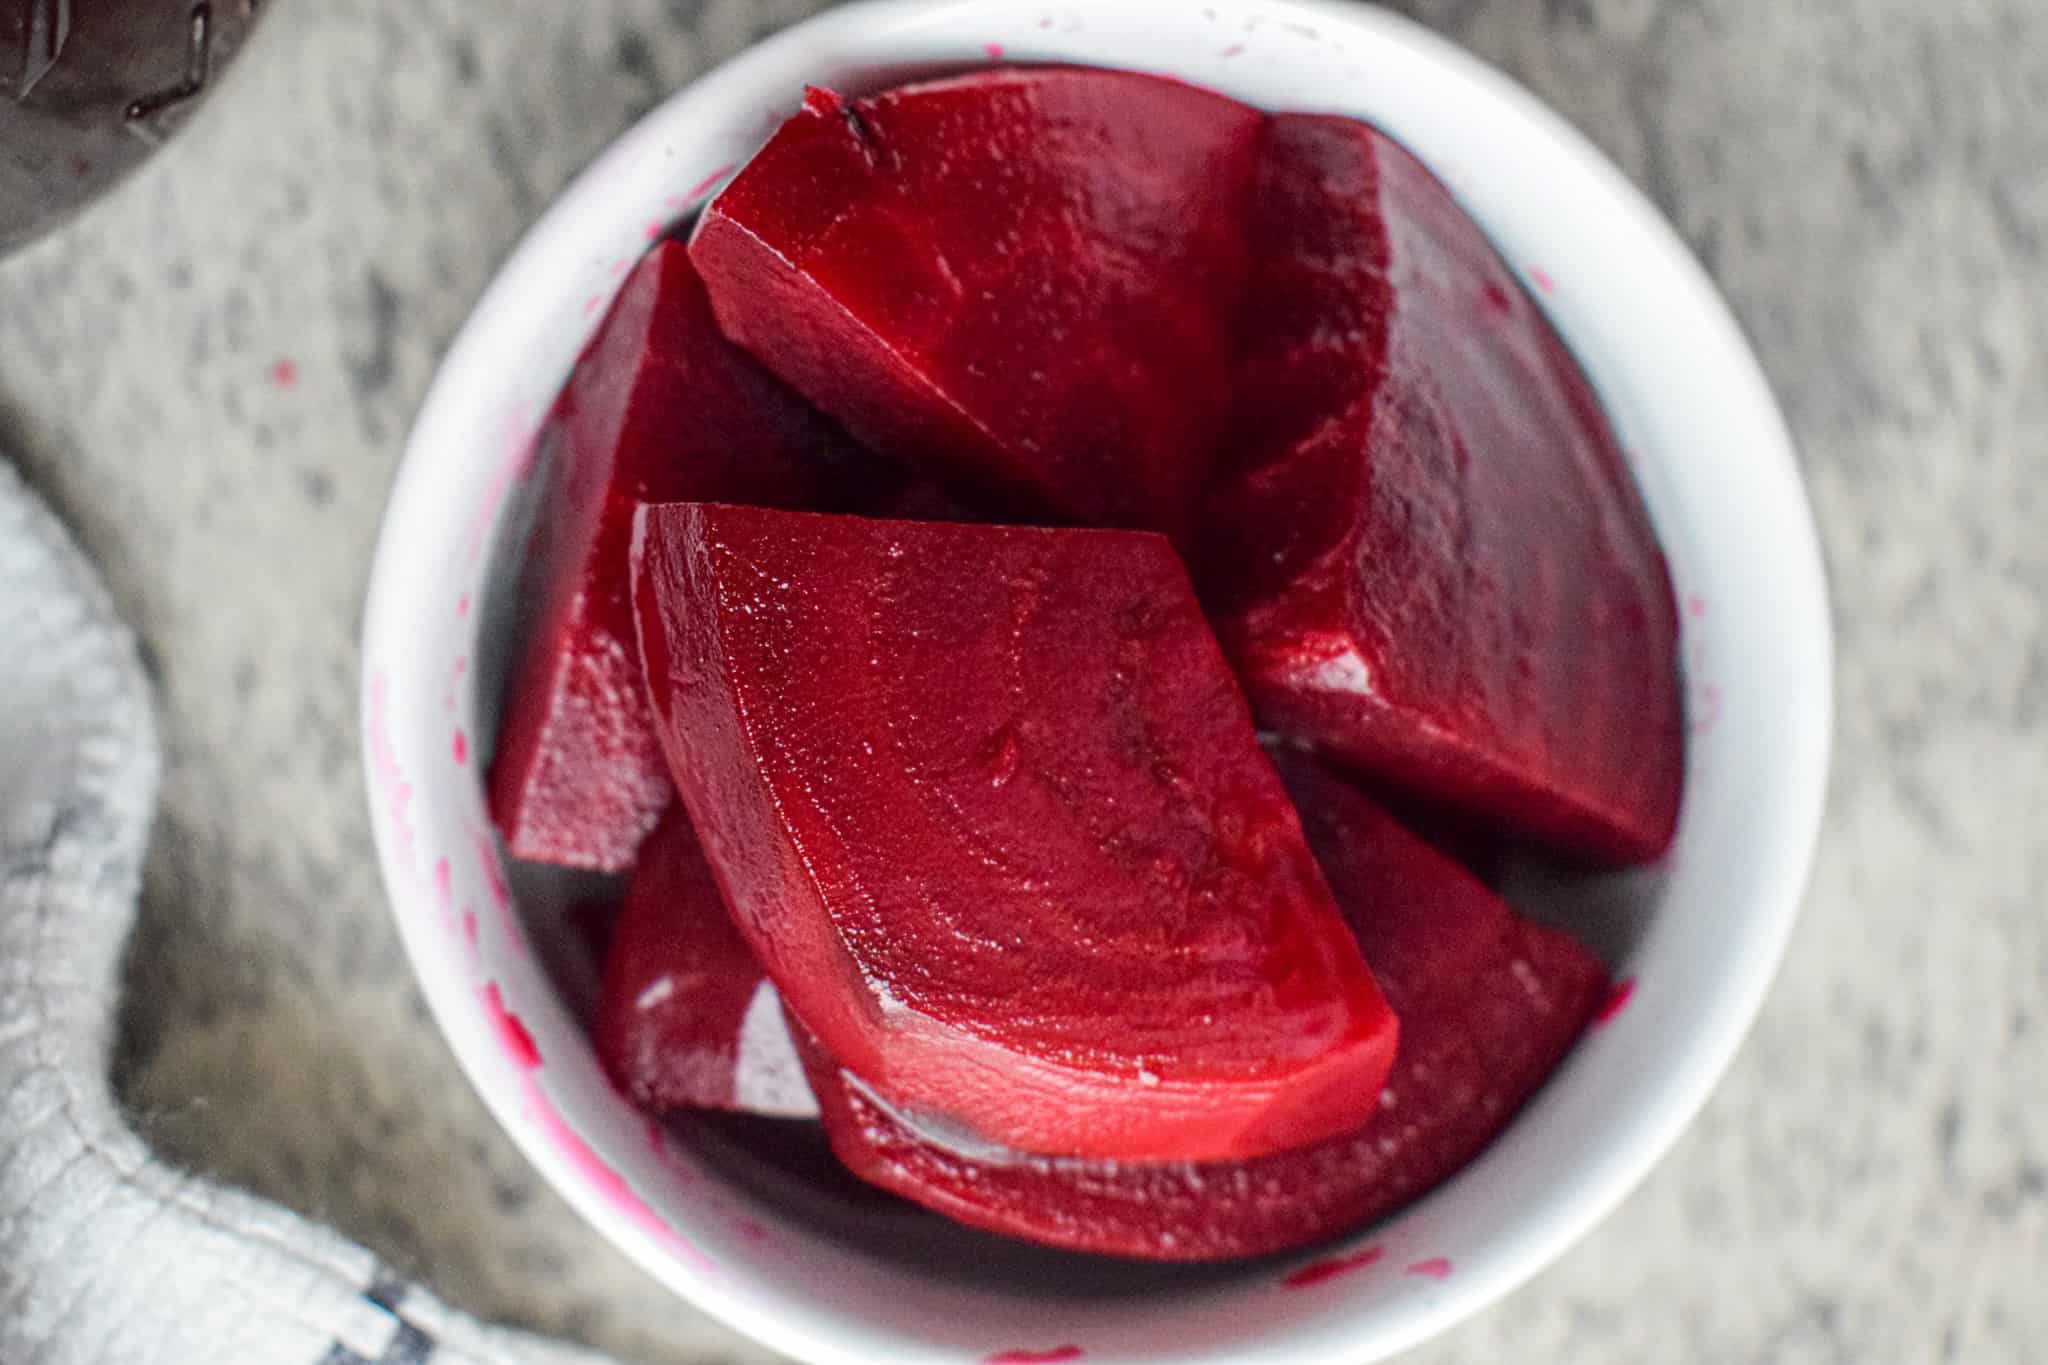
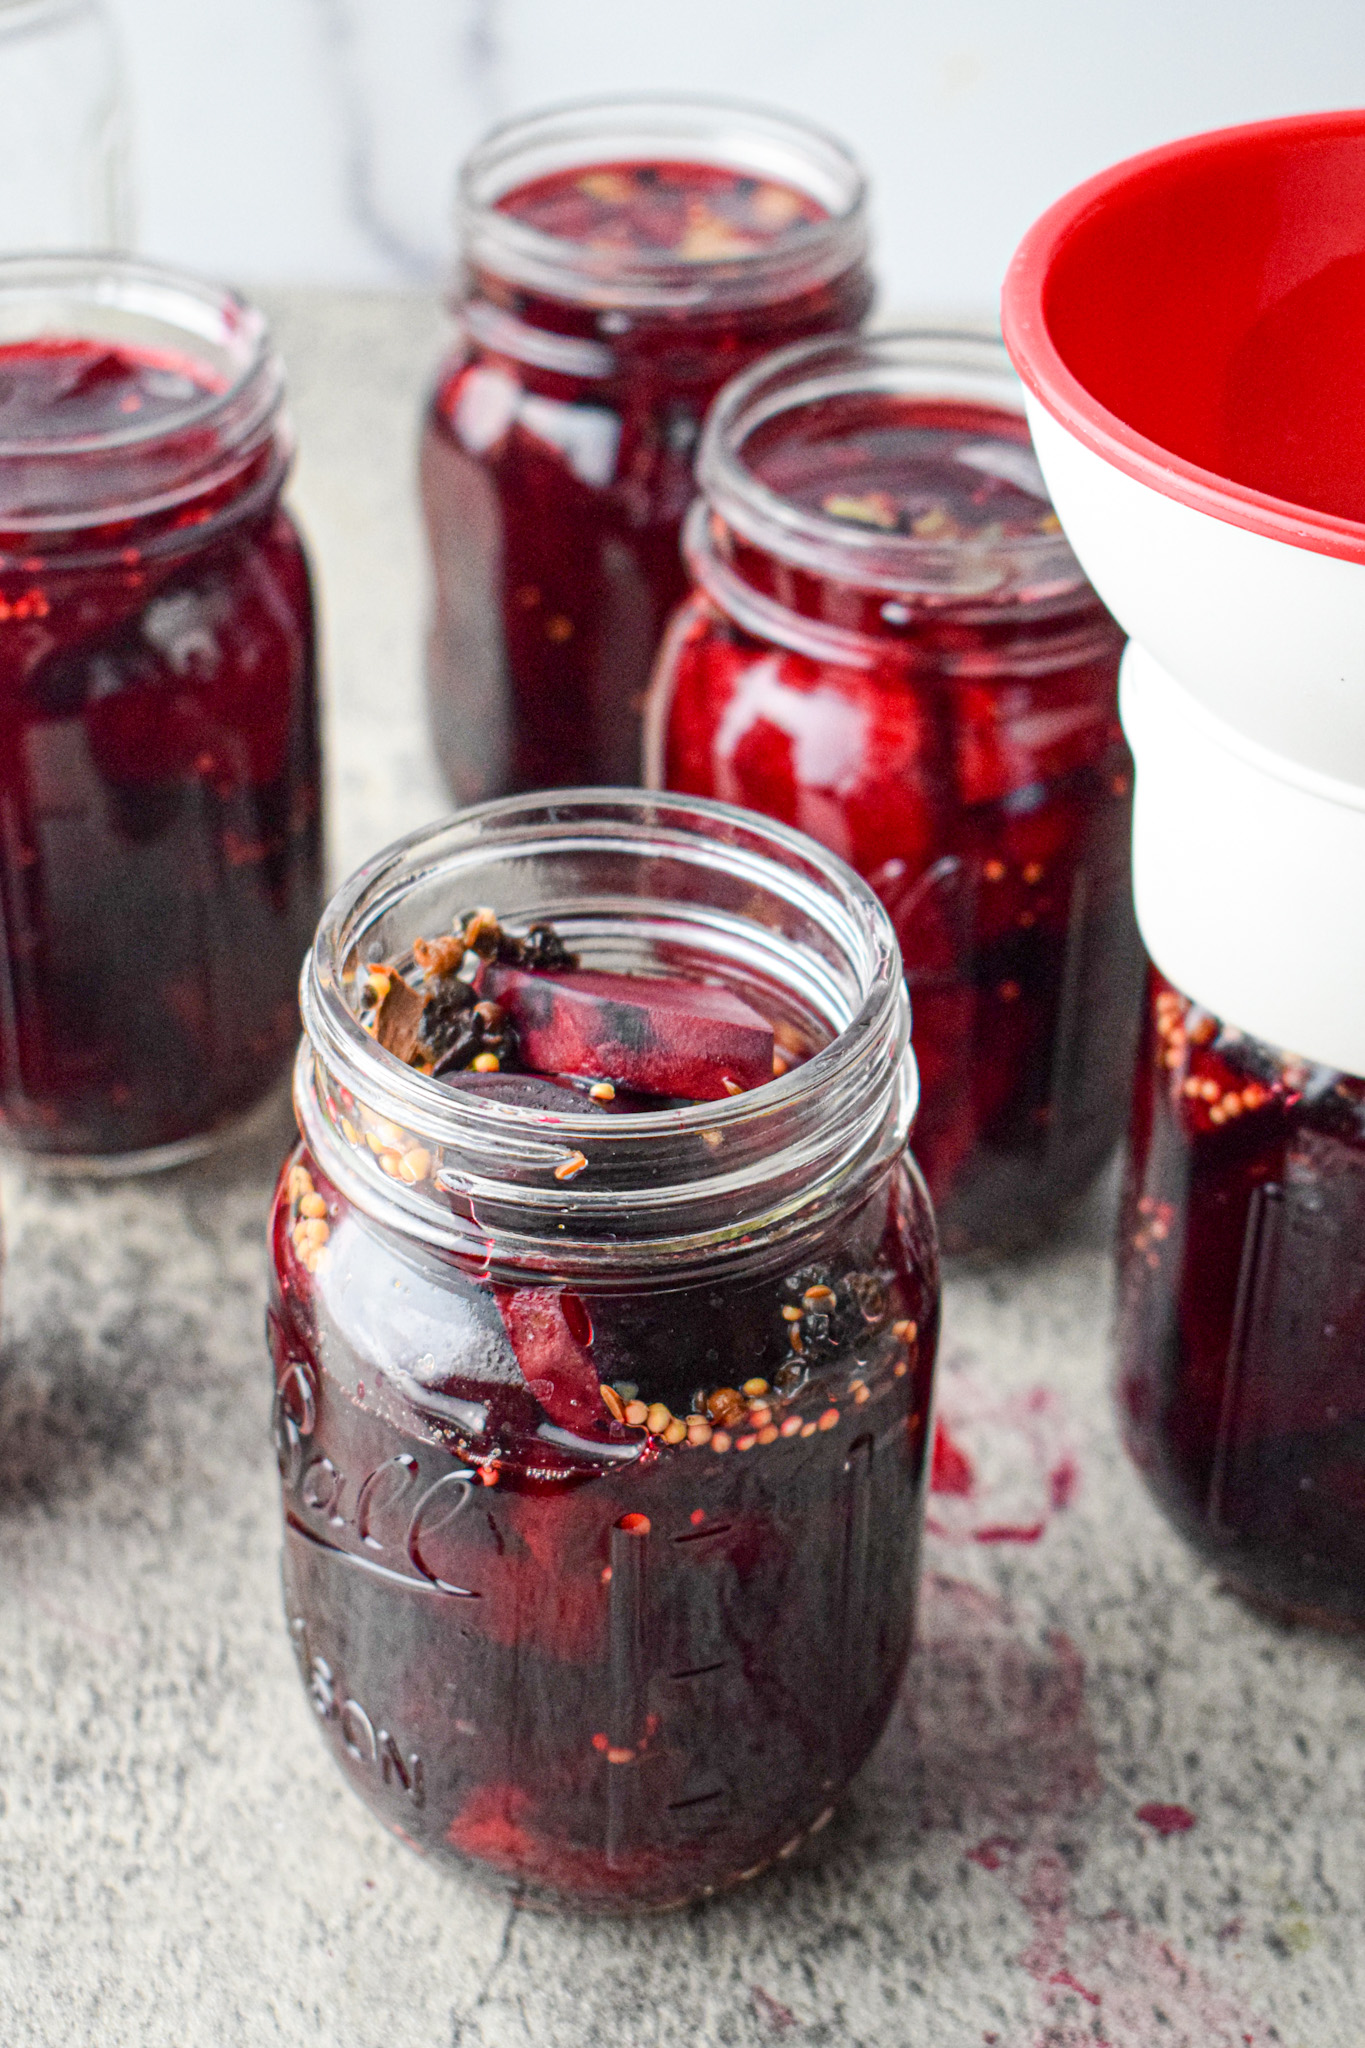
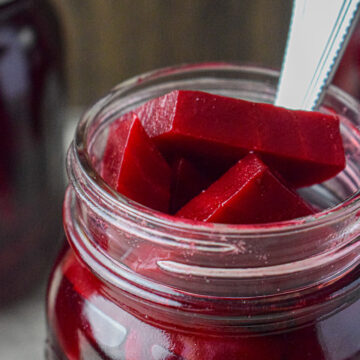
    • Wash the beets and trim off the beet tops. Then place in a large pot and add water until the beets are just covered.
      Bring the water to a boil, then reduce heat to a simmer and cook for around 30 minutes until the beets are knife tender.
      Remove the beets and allow to cool slightly before peeling and cutting into ⅓rd inch slices.
      Place jars on top of a towel on the counter then tightly pack the beet slices into the jars.

    Prepare the brine

    • In a sauce pan add water, vinegar, sugar, pickling spice and salt. Bring the mixture to a boil and then turn the heat down to low for 3-5 minutes until the sugar and salt have dissolved. Then remove the pan from the heat.

    Fill the jars

    • Using a funnel, ladle the brine in the jars leaving ¼ to ½ inch headspace. Then use a knife or chopstick to remove the bubbles.
      Wipe down the jar rims then add clean lids and rims.
      At this point you can either place the beets inn the fridge and wait at least one week to allow them to pickle before enjoying.
      Or you can process them in a water bath and they will be shelf stable for 12-18 months. See instructions below.

    Water Bath Canning Instructions

    • Place jars on a rack in a large pot and cover with water at least 1-2 inches above the top of the jars. Bring the water to a full rolling boil and boil the jars in the water bath for 20 minutes (adjusting time for altitude).
      Turn off the heat and allow the jars to rest in the warm water for 5 minutes before removing and placing on a towel on the counter (do not place directly on the counter).
      Allow the jars to cool undisturbed for about 24 hours until all the lids have sealed.
      Store sealed jars in a cool dry place for 12-18 months for best quality.*Note* If any of the jars do not seal simply store in the refrigerator and consume within 6 weeks.
    Keyword canning, pickles
    Tried this recipe?Let us know how it was!

    More Preserves and Pickles

    • A jar of the delicious, simple blackberry preserves sits on a wood cutting board next to bread covered in jam.
      Blackberry Preserves {for canning}
    • A blue plate has a block of cream cheese topped with raspberry jalapeno jam and surrounded by crackers and sliced fresh peppers, and there are several jars of homemade preserves.
      Raspberry Jalapeño Jam {for canning}
    • An open jar of pickled green beans sits on a wooden cutting board.
      Pickled Green Beans {for canning}
    • mixed berry jam with strawberries, blueberries, raspberries and blackberries.
      Mixed Berry Jam {for canning}
    Add us as a trusted site on Google

    Reader Interactions

    Comments

    1. Gina

      November 10, 2022 at 12:47 pm

      I'm going to try this recipe for the first time but am puzzled as to how many pints I might expect. Did I miss this info or has it not been included anywhere?

      Reply
      • jamjarkitchen

        November 10, 2022 at 2:25 pm

        Hi Gina- Just updated that in the recipe. I usually get around 5-6 pints depending on how tightly I pack the jars. Hope you enjoy!

        Reply
        • George Zirnite

          September 14, 2024 at 4:32 pm

          Thanks for this update! I have beets cooking on the stove and needed to know how many jars!

    2. Judith

      November 14, 2022 at 4:20 pm

      Gina- Your recipe has a much higher vinegar to sugar ratio. I just want to make sure 2 cups vinegar to 1/2 C sugar is accurate. thanks.

      Reply
      • jamjarkitchen

        November 14, 2022 at 4:41 pm

        Hi there- yes, it's 2 cups of vinegar to 1/2 cup of sugar. Beets are naturally pretty sweet so I prefer this ratio for a nice sweet and tangy flavor. Let me know what you think!

        Reply
        • Megan

          July 06, 2025 at 2:33 pm

          Hi there - wondering if it's okay to halve the recipe? I suppose I could make the brine with those then just use whatever I need to fill for the small amount I have. Thoughts?

        • jamjarkitchen

          July 07, 2025 at 1:49 pm

          Hi Megan - Yes, it's absolutely fine to halve the recipe. You just want to be sure to keep the vinegar to water ratio and cover the beets fully. Hope you enjoy!

        • Melissa

          January 20, 2026 at 12:22 pm

          Hi, can I swap out the sugar and replace with honey?

        • jamjarkitchen

          January 23, 2026 at 10:33 am

          Hi Melissa - From a canning safety perspective that should be fine. I recommend using about 1/4th cup of honey (about half the amount of the sugar), and be sure not to decrease the amount of vinegar. I personally haven't tried this version so I'm not sure about the flavor but if you give it a go let me know how it turns out. Hope you enjoy!

    3. Dee

      March 11, 2023 at 1:52 pm

      Can I substitute the sugar? I would prefer to add none. Is that possible? Or for a bit of sweet an I add honey

      Reply
    4. Joe Reinhart

      April 12, 2023 at 3:35 am

      Having tried more than a few recipes looking for my ma's southern cooking flavor, yours comes up the winner. I admit I add one dried small red chili pepper at canning time, but otherwise, the flavor is just right. Prep...just like I remember. Ma did chunk-style but that's just...knife-work!
      I think this is the third ofnyour recipes I have used and they were all great. No-nonsense presentation, and I can skip the peramble if I want.
      And I always do! I am always focused on the cooking, not the history or FDA scare-tactics. You make good food, and that is my goal; Good food now.
      From Japan,
      Thank you.

      Reply
    5. Jennifer O'Neill

      September 15, 2024 at 7:02 pm

      This recipe is so close to the one I use to do with my grandma but have a question. How do I know what altitude to do the beets? I live in Gibbons alberta Canada. What is your altitude compared to ours? We’re at 643 m or 2110 ft?

      Reply
      • jamjarkitchen

        September 16, 2024 at 12:54 pm

        Hi Jennifer - The general rule of thumb is that you add 1 minute of processing time for every 1,000 feet above 1,000 feet above sea level. So at 2110 feet I'd recommend adding an additional 2 minutes to the boiling time just to be safe. Hope this helps!

        Reply
    6. Margaret walker

      August 09, 2025 at 12:46 pm

      Ahi JJ after removing the air bubbles do I add more of the brine to cover the beets?

      Reply
      • jamjarkitchen

        August 13, 2025 at 9:53 am

        Yep! You'll want to make sure the beets are submerged. Hope you enjoy!

        Reply
    7. LA

      September 27, 2025 at 2:54 pm

      This recipe was perfect! I saw gorgeous beets at the farm market and my daughter directed me to this recipe! My grandmother would be proud!

      Reply
      • jamjarkitchen

        September 29, 2025 at 3:24 pm

        So glad you liked the recipe!

        Reply
        • Michael D Gilbertson

          October 07, 2025 at 5:26 pm

          I'm guessing they will taste good but over 4 lbs. of beets just filled 5 pints and the prepared liquid barely filled 3 pints.

        • jamjarkitchen

          October 08, 2025 at 1:01 pm

          You’re absolutely right, the amount of pickling liquid can vary quite a bit depending on how tightly the jars are packed and the size of the beet pieces. I tend to pack mine pretty snugly, which means they need less liquid than you might expect. If your jars are more loosely packed, I recommend doubling the brine ingredients to make sure you have plenty to cover everything. Hope they turn out delicious!

    8. Jennifer O'Neill

      October 18, 2025 at 12:10 pm

      5 stars
      I love this recipe but have a question. Could you use the brine for other veggies?? I have baby carrots in about to pull and thought this might be good for pickled carrots???

      Reply
      • jamjarkitchen

        October 20, 2025 at 11:16 am

        Yes, you can definitely use this brine for other veggies! The flavor will obviously shift a bit depending on what you pickle, but it will still be canning safe. I think baby carrots would be delicious with it. Let me know how they turn out!

        Reply
    9. Karen

      December 27, 2025 at 7:04 am

      Working on this now! Does anyone reuse the brine?

      Reply
      • jamjarkitchen

        January 03, 2026 at 3:37 pm

        Hi Karen - I don’t recommend reusing the brine for canning, since the acidity can change once it’s been used. That said, it’s great for quick fridge pickles! you can pour it over sliced onions, cucumbers, or even hard-boiled eggs and keep it in the fridge for a week or two. Hope you enjoy!

        Reply
    4.87 from 111 votes (110 ratings without comment)

    Leave a Reply Cancel reply

    Your email address will not be published. Required fields are marked *

    Recipe Rating


    Primary Sidebar

    • Facebook
    • Instagram
    • Pinterest
    Elizabeth Jordan-Flight of Jam Jar Kitchen smiling in her home kitchen while preparing a rhubarb dessert, wearing a cozy cream sweater and striped apron surrounded by baking ingredients.

    Hi, I'm Elizabeth!

    I’m a self-taught home cook, preserving enthusiast, and mama of two sharing approachable, flavor-packed recipes made with love. I believe food should be joyful, a little messy, and always worth gathering around.
    Welcome to my Jam Jar Kitchen. I’m so glad you’re here!

    • A glass dessert cup filled with rich cookies and cream ice cream, topped and surrounded by crunchy chocolate sandwich cookies.
      Cookies and Cream Ice Cream
    • A delicious bowl of broccoli bacon salad with dried cranberries, sunflower seeds, and a creamy dressing, served with a spoon.
      Broccoli Bacon Salad
    • A bowl of creamy shrimp salad with herbs, garnished with fresh dill, surrounded by rectangular crackers on a white surface.
      Shrimp Salad
    • A steaming bowl of borscht with shredded beets, a dollop of sour cream, and a sprig of dill, as a spoon lifts a portion of the vibrant soup from the bowl.
      Borscht

    Our Mission:

    A percentage of all proceeds made by The Jam Jar Kitchen blog are donated to Preserve International to fund empowerment programs for women small-scale farmers in northern Uganda. Join our mission to fight hunger and seasonal poverty through innovative post harvest and food preservation technology and training!

    A group of South Sudanese refugee women trained by Preserve International stand smiling in aprons and headscarves next to a bright green Sparky Dryer, celebrating their success in food preservation and small-scale agribusiness.

    Never miss a recipe!

    Sign up to The Jam Jar Kitchen Newsletter to receive new free recipes every month!

    • A plate of Grilled Bell Peppers, featuring roasted red and yellow peppers with beautifully blackened grill marks on their skins.
      Easy Grilled Bell Peppers
    • A glass jar of Vanilla Bean Panna Cotta topped with pomegranate seeds and a mint sprig, with scattered pomegranate seeds on the white surface nearby.
      Vanilla Bean Panna Cotta
    • A close-up of a spoonful of creamy Baked Mac and Cheese, showing melted cheddar cheese and perfectly cooked elbow pasta.
      Baked Mac and Cheese
    Elizabeth Jordan-Flight of Jam Jar Kitchen smiling in her home kitchen while preparing a rhubarb dessert, wearing a cozy cream sweater and striped apron surrounded by baking ingredients.

    Hi, I'm Elizabeth!

    I’m a self-taught home cook, preserving enthusiast, and mama of two sharing approachable, flavor-packed recipes made with love. I believe food should be joyful, a little messy, and always worth gathering around.
    Welcome to my Jam Jar Kitchen. I’m so glad you’re here!

    • A ramekin of classic Crème Brûlée topped with blackberries, raspberries, and mint sits on a plate, with a spoonful of silky custard resting beside it.
      Crème Brûlée
    • A close-up of a spoon holding several garlic cloves in a bowl of oil, with more garlic cloves visible submerged in the oil, showcasing the rich texture of homemade garlic confit.
      Garlic Confit
    • A slice of Shepherd's pie with ground meat, vegetables, and mashed potato topping is served on a plate with a fork; the rest of this classic Shepherd's pie sits in a baking pan in the background.
      Shepherd's Pie
    • A loaf of sliced Irish soda bread rests on a wooden board, with a dish of butter and a sprig of herbs in the background.
      Traditional Irish Soda Bread

    Our Mission:

    A percentage of all proceeds made by The Jam Jar Kitchen blog are donated to Preserve International to fund empowerment programs for women small-scale farmers in northern Uganda. Join our mission to fight hunger and seasonal poverty through innovative post harvest and food preservation technology and training!

    A group of South Sudanese refugee women trained by Preserve International stand smiling in aprons and headscarves next to a bright green Sparky Dryer, celebrating their success in food preservation and small-scale agribusiness.

    Never miss a recipe!

    Sign up to The Jam Jar Kitchen Newsletter to receive new free recipes every month!

    • A flavorful Grilled Portobello mushroom Burger featuring a juicy portobello cap, roasted red pepper, red onion slices, and fresh leafy greens on a toasted bun.
      Grilled Portobello Mushroom Burgers
    • Three Strawberry & Lime White Chocolate Blondies, studded with white chocolate chunks and pieces of dried fruit, are stacked on parchment paper, with a lime wedge and scattered dried fruit pieces nearby.
      Strawberry & Lime White Chocolate Blondies
    • A bowl of fresh Pico de Gallo made with diced tomatoes, onions, cilantro, and jalapeños, surrounded by tortilla chips and garnished with cilantro.
      Fresh Pico de Gallo

    Footer

    About

    • Privacy Policy

    Sign up for the Newsletter

    Contact

    • Contact

    As an Amazon Associate I earn from qualifying purchases.

    Copyright © 2020 Brunch Pro on the Brunch Pro Theme

    Rate This Recipe

    Your vote:


    A rating is required
    A name is required
    An email is required

    Recipe Ratings without Comment

    Something went wrong. Please try again.