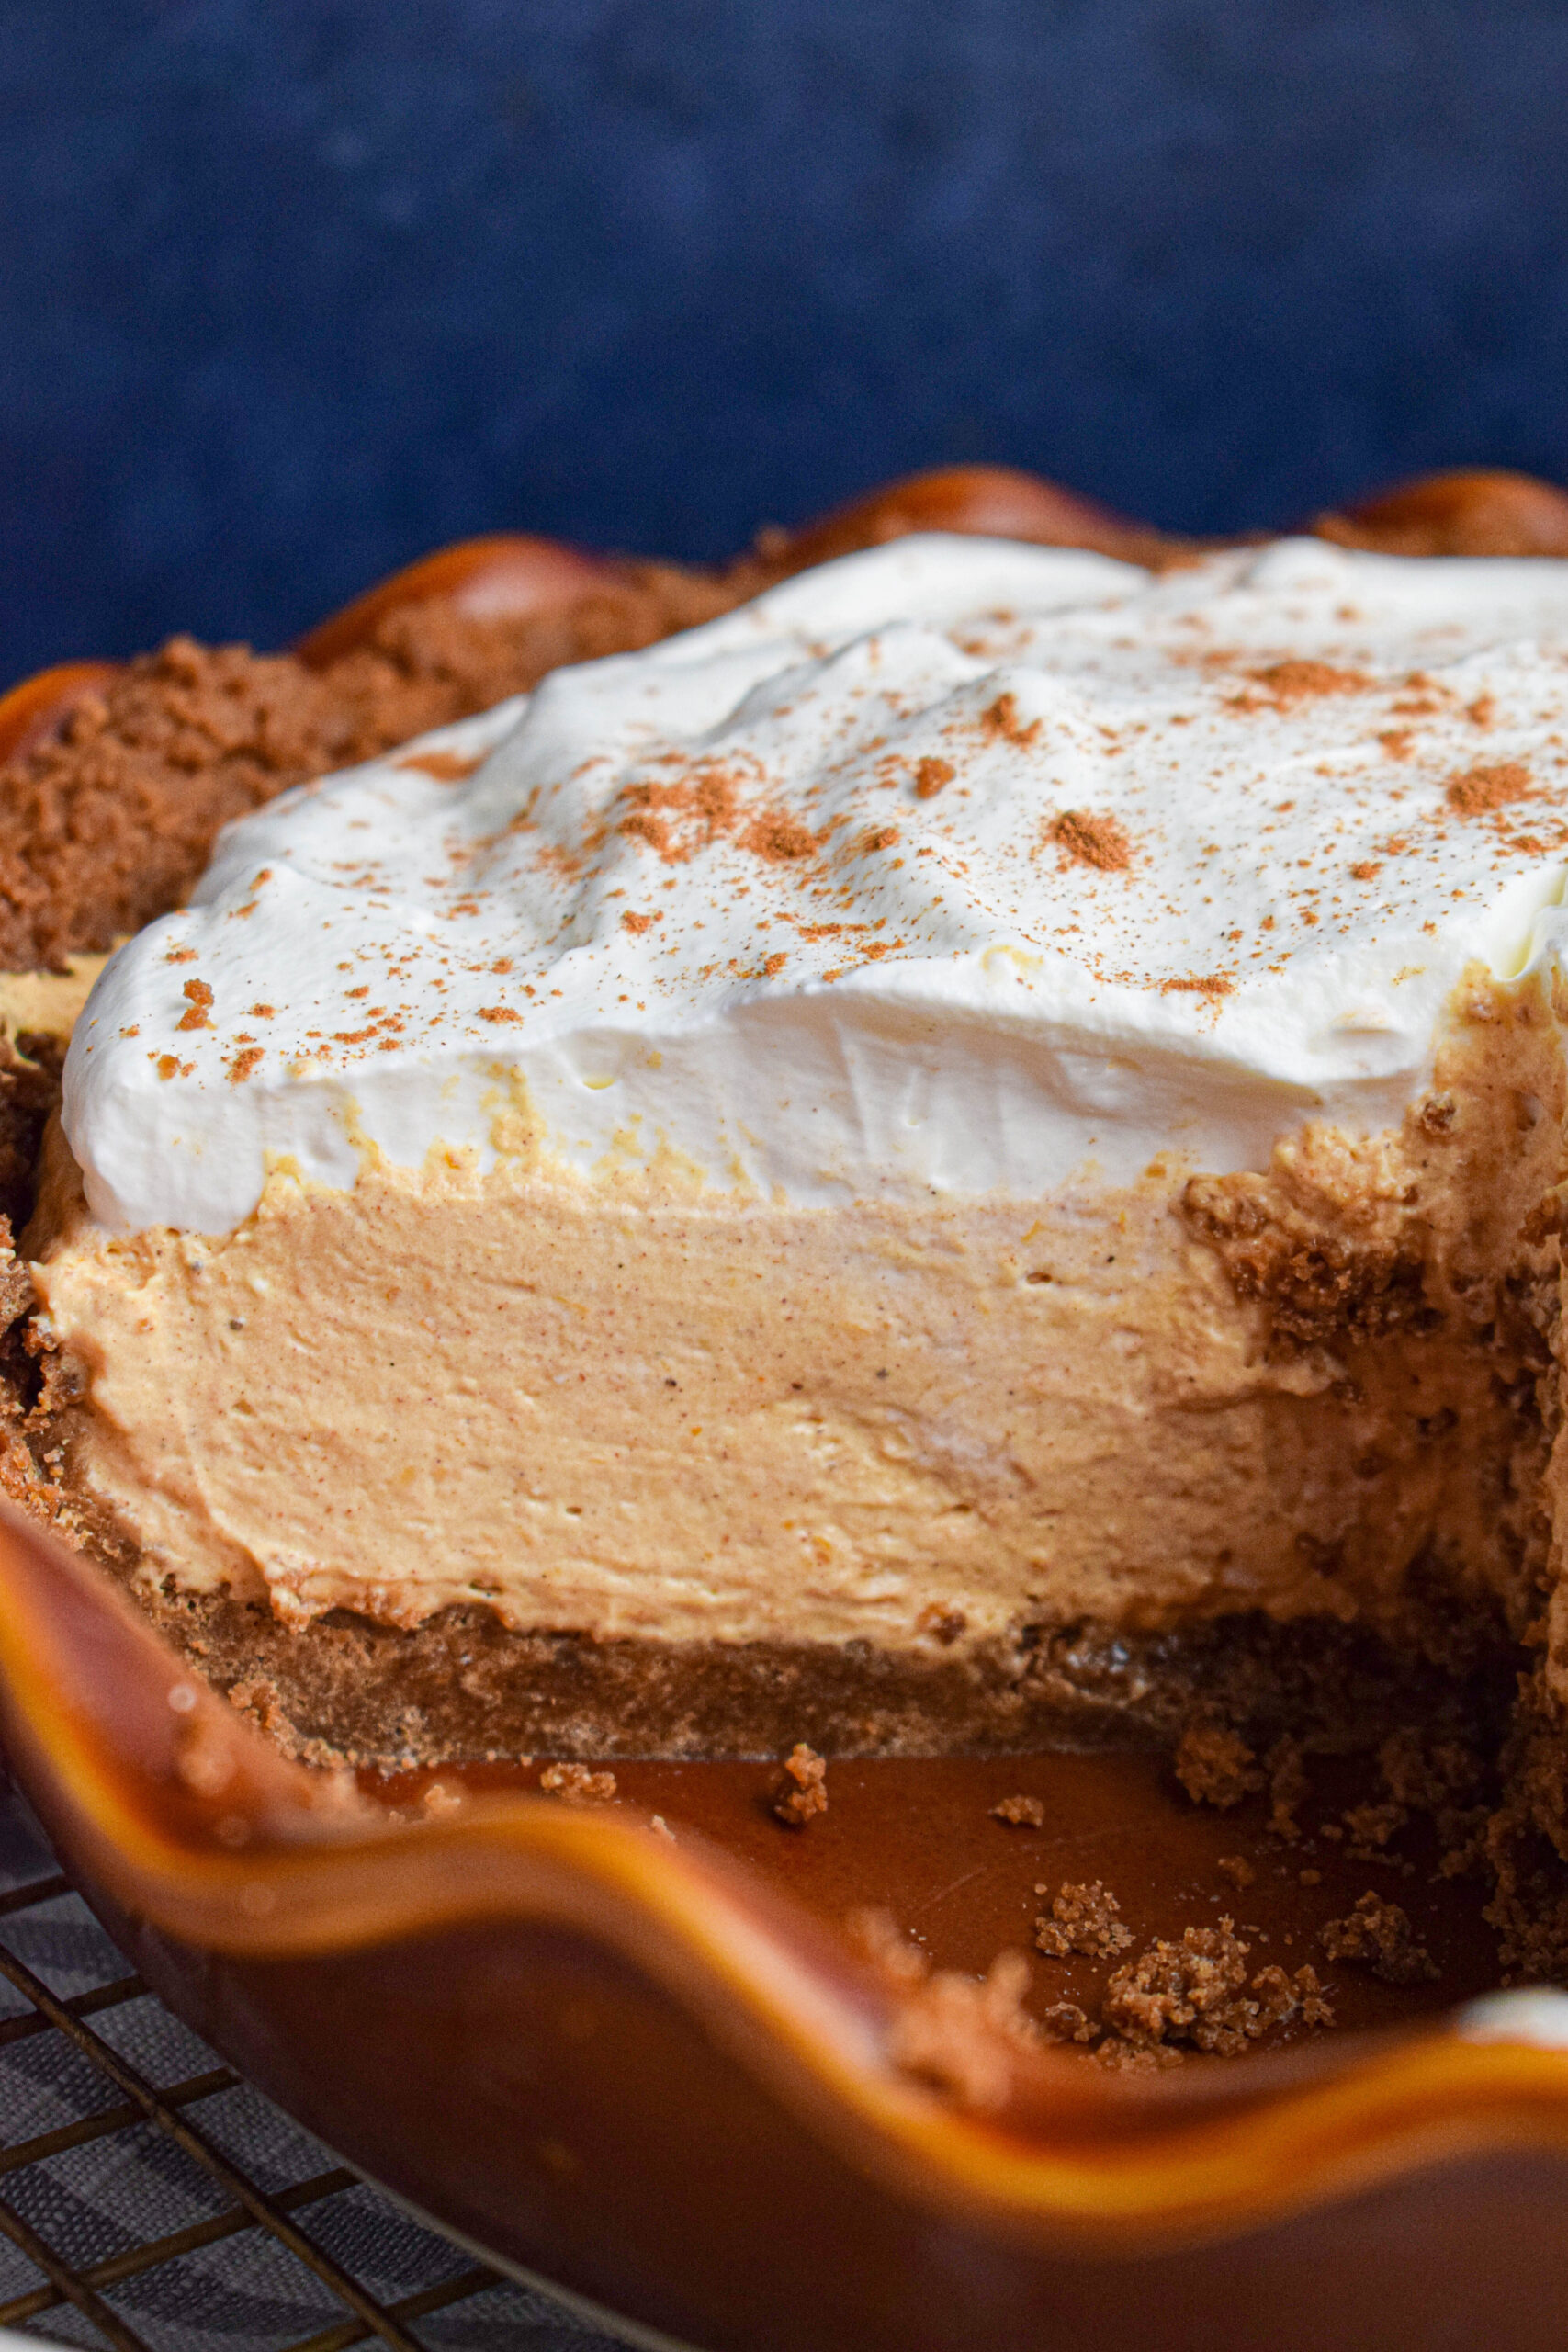
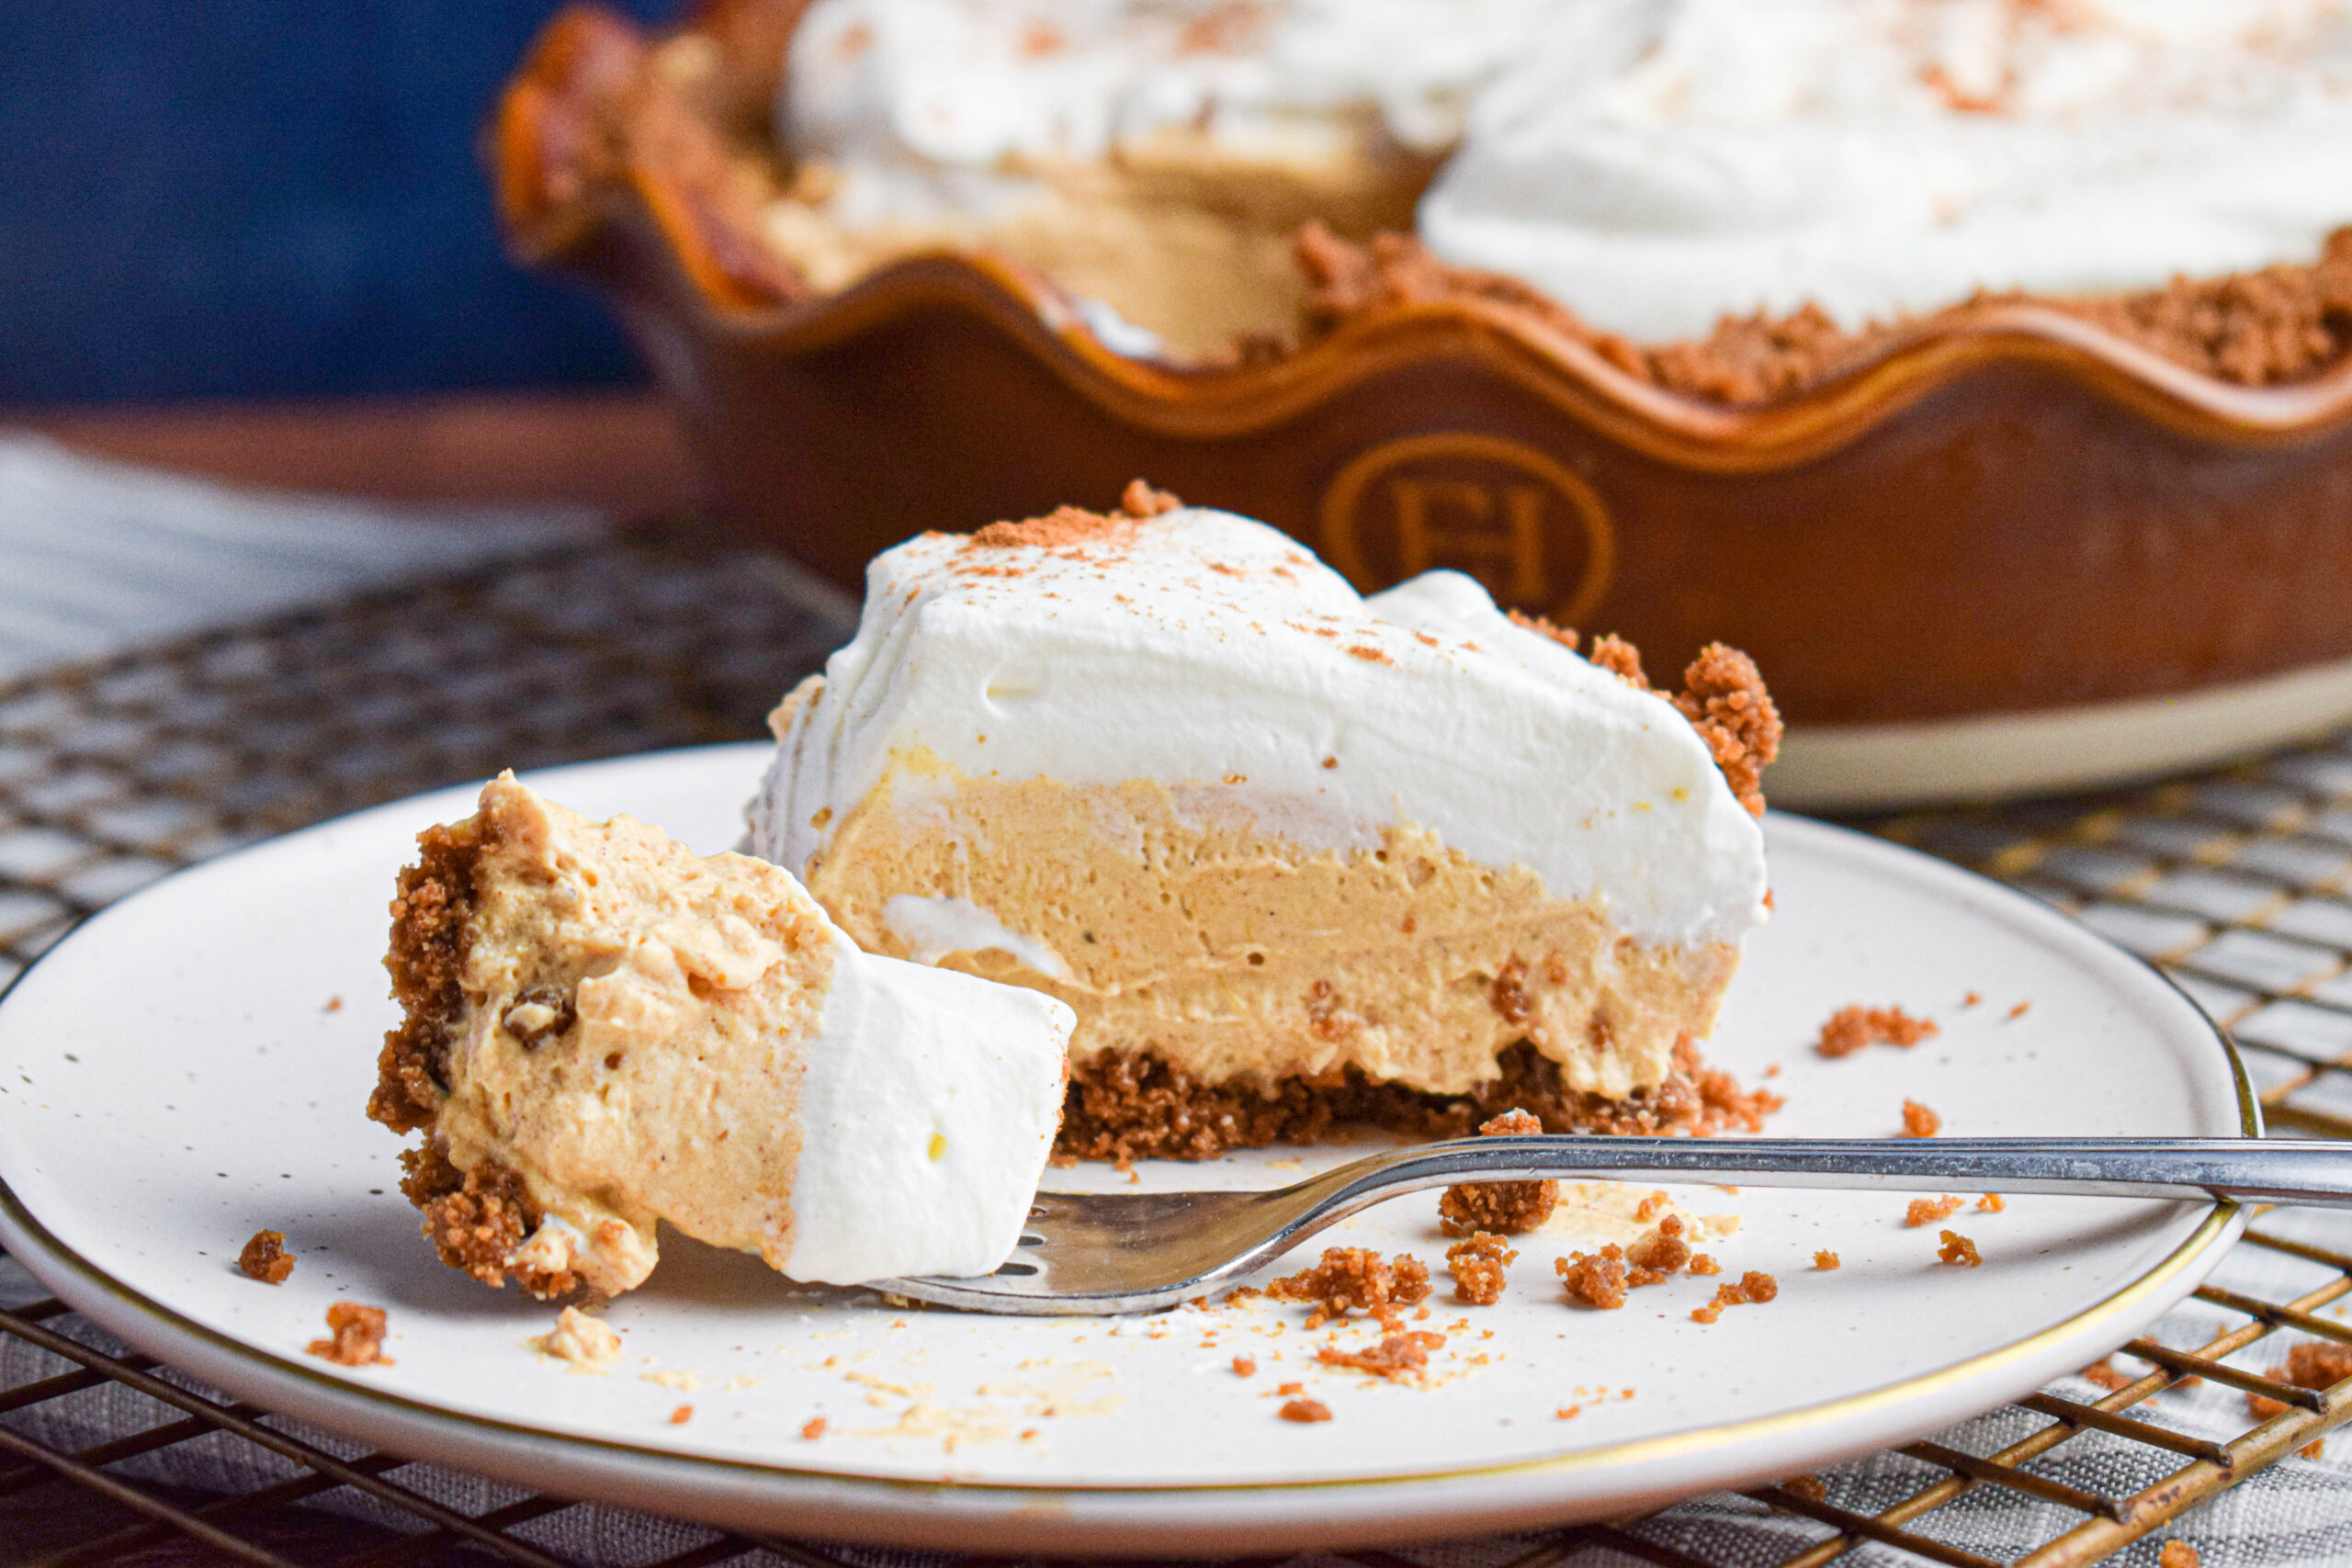
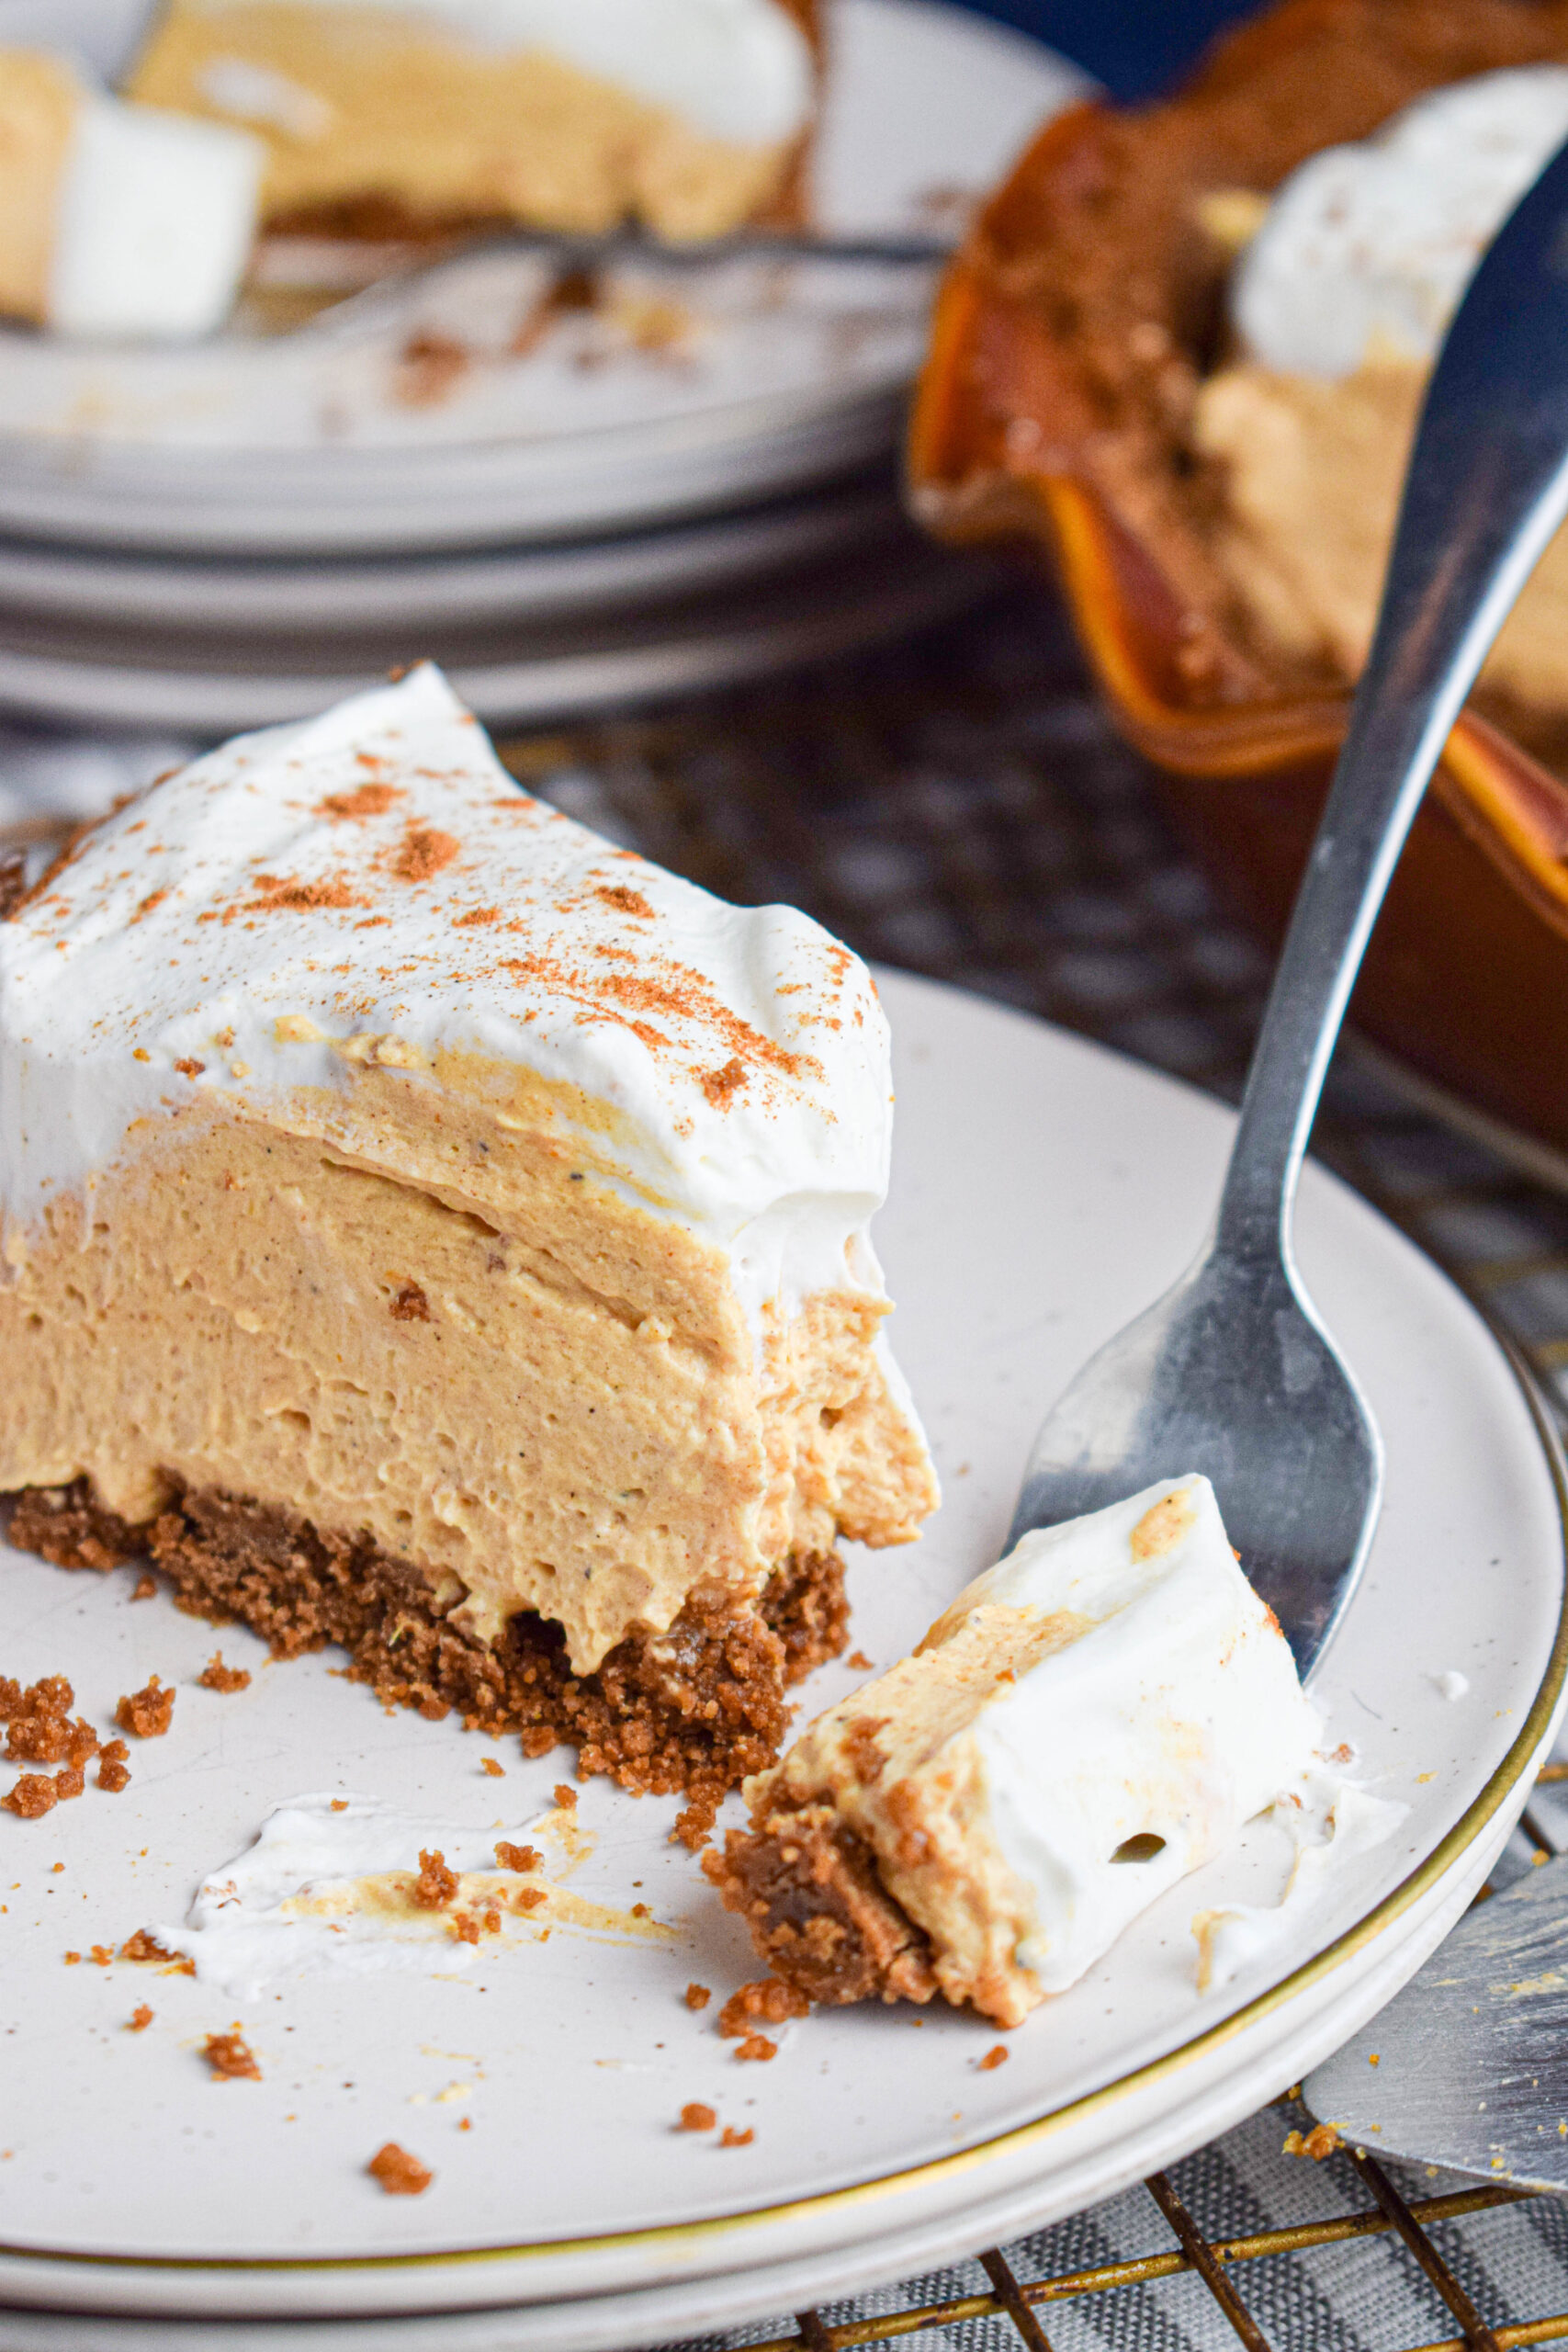
This No Bake Pumpkin Pie has all the flavor of your favorite pumpkin pie with a surprisingly light, mousse like texture you are going to love. Requiring no oven time and using freshly whipped cream, cream cheese and pumpkin puree, this is a delightful update on a classic fall dessert!

Call me basic, but I will unapologetically ride the pumpkin spice train all the way through fall. The only problem? I live in Texas, where October is still flirting with triple digits. So I want all the cozy fall flavor… without turning on the oven.
This No Bake Pumpkin Pie is the perfect solution. It's super easy to throw together, packed with that classic pumpkin spice goodness, and has a light, almost mousse-like texture that makes it dangerously easy to go back for seconds. Plus, it's made without Cool Whip, so you still get that creamy, dreamy filling with a more homemade touch. We make it every year for Thanksgiving, but honestly, it's great anytime you want that autumn vibe without messing with the oven. Hope you enjoy!
Jump to:
No Bake Pumpkin Pie vs. No Bake Pumpkin Cheesecake
You might be thinking, what is the difference between this no bake pumpkin pie and a no bake pumpkin cheesecake? Honestly not that much. The main difference is that no bake cheesecakes are generally richer and a bit firmer set, with a tangier flavor from extra cream cheese. The filling in the this no bake pie is a bit lighter and more mousse like than a typical cheesecake.
More Fall Recipes you will love.


Equipment
For this recipe you will need:
- A stand mixer OR a large mixing bowl with an electric hand mixer: I find it's easier to use my KitchenAid Mixer for this recipe. If you don't have one then a large sturdy mixing bowl with an electric hand mixer will definitely do the trick!
- A 9 inch pie dish
- Measuring cups and spoons
Ingredients
For the Pumpkin Mousse Filling
- Heavy Whipping Cream: See notes below on whipping to stiff peaks.
- Cream Cheese: I recommend using full fat for the best results.
- Canned pumpkin puree: You'll want to use unsweetened, canning pumpkin puree for the best results.
- Powdered sugar
- Light brown sugar
- Sour cream: You can leave this out if you prefer but I like the tang that sour cream gives. Be sure to use full fat.
- Vanilla extract: You can also use vanilla bean paste if you prefer.
- Pumpkin pie spice: Use your favorite brand or homemade pumpkin pie spice.
For the Crust
I love doing a homemade gingersnap crust for this pie. I just think that the flavors go really well together.
- Ginger snap cookies: I pulse these in my food processor to get really fine crumbs. If you can find ginger snap crumbs at the store feel free to use those. Or if you don't have a food processor you can go old school and put the cookies in a double plastic bags and crush with a rolling pin.
- Butter: You can use salted or unsalted depending on your personal preference.
- Light brown sugar
However, you can absolutely use a store bought graham cracker crust and it is still delicious!
Step-by-Step Photos
Time needed: 6 hours and 20 minutes
How to Make No Bake Pumpkin Pie
- Make the crust. (Skip is using a store bought crust.)
Combine ginger snap crumbs, melted butter and brown sugar then press into a prepared pie pan. Freeze for 15-20 minutes before adding the pumpkin filling.
- Prepare the no bake pumpkin mousse filling.
Whip the cream to stiff peaks and set aside.
Then beat together cream cheese, sugar, pumpkin, puree, pumpkin spice, sour cream and vanilla extract until smooth.
Gently fold the whipped cream into the pumpkin cream cheese mixture until no white streaks remain.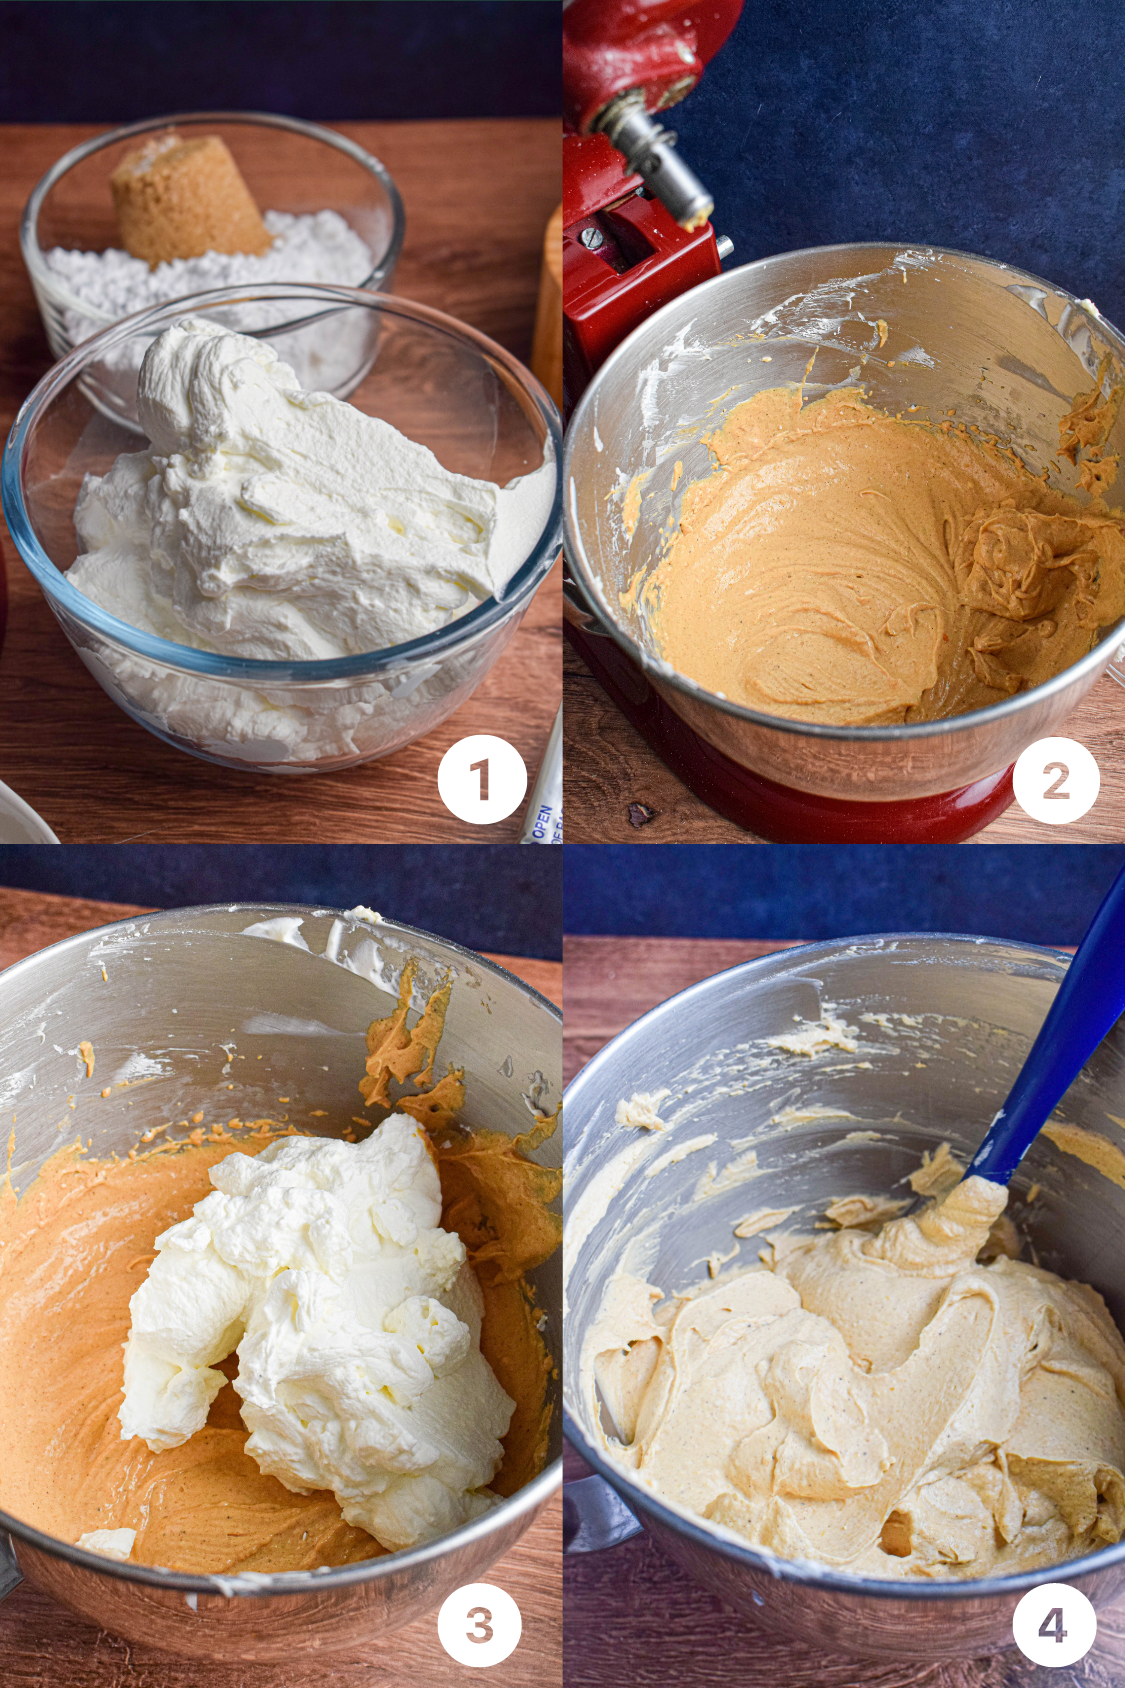
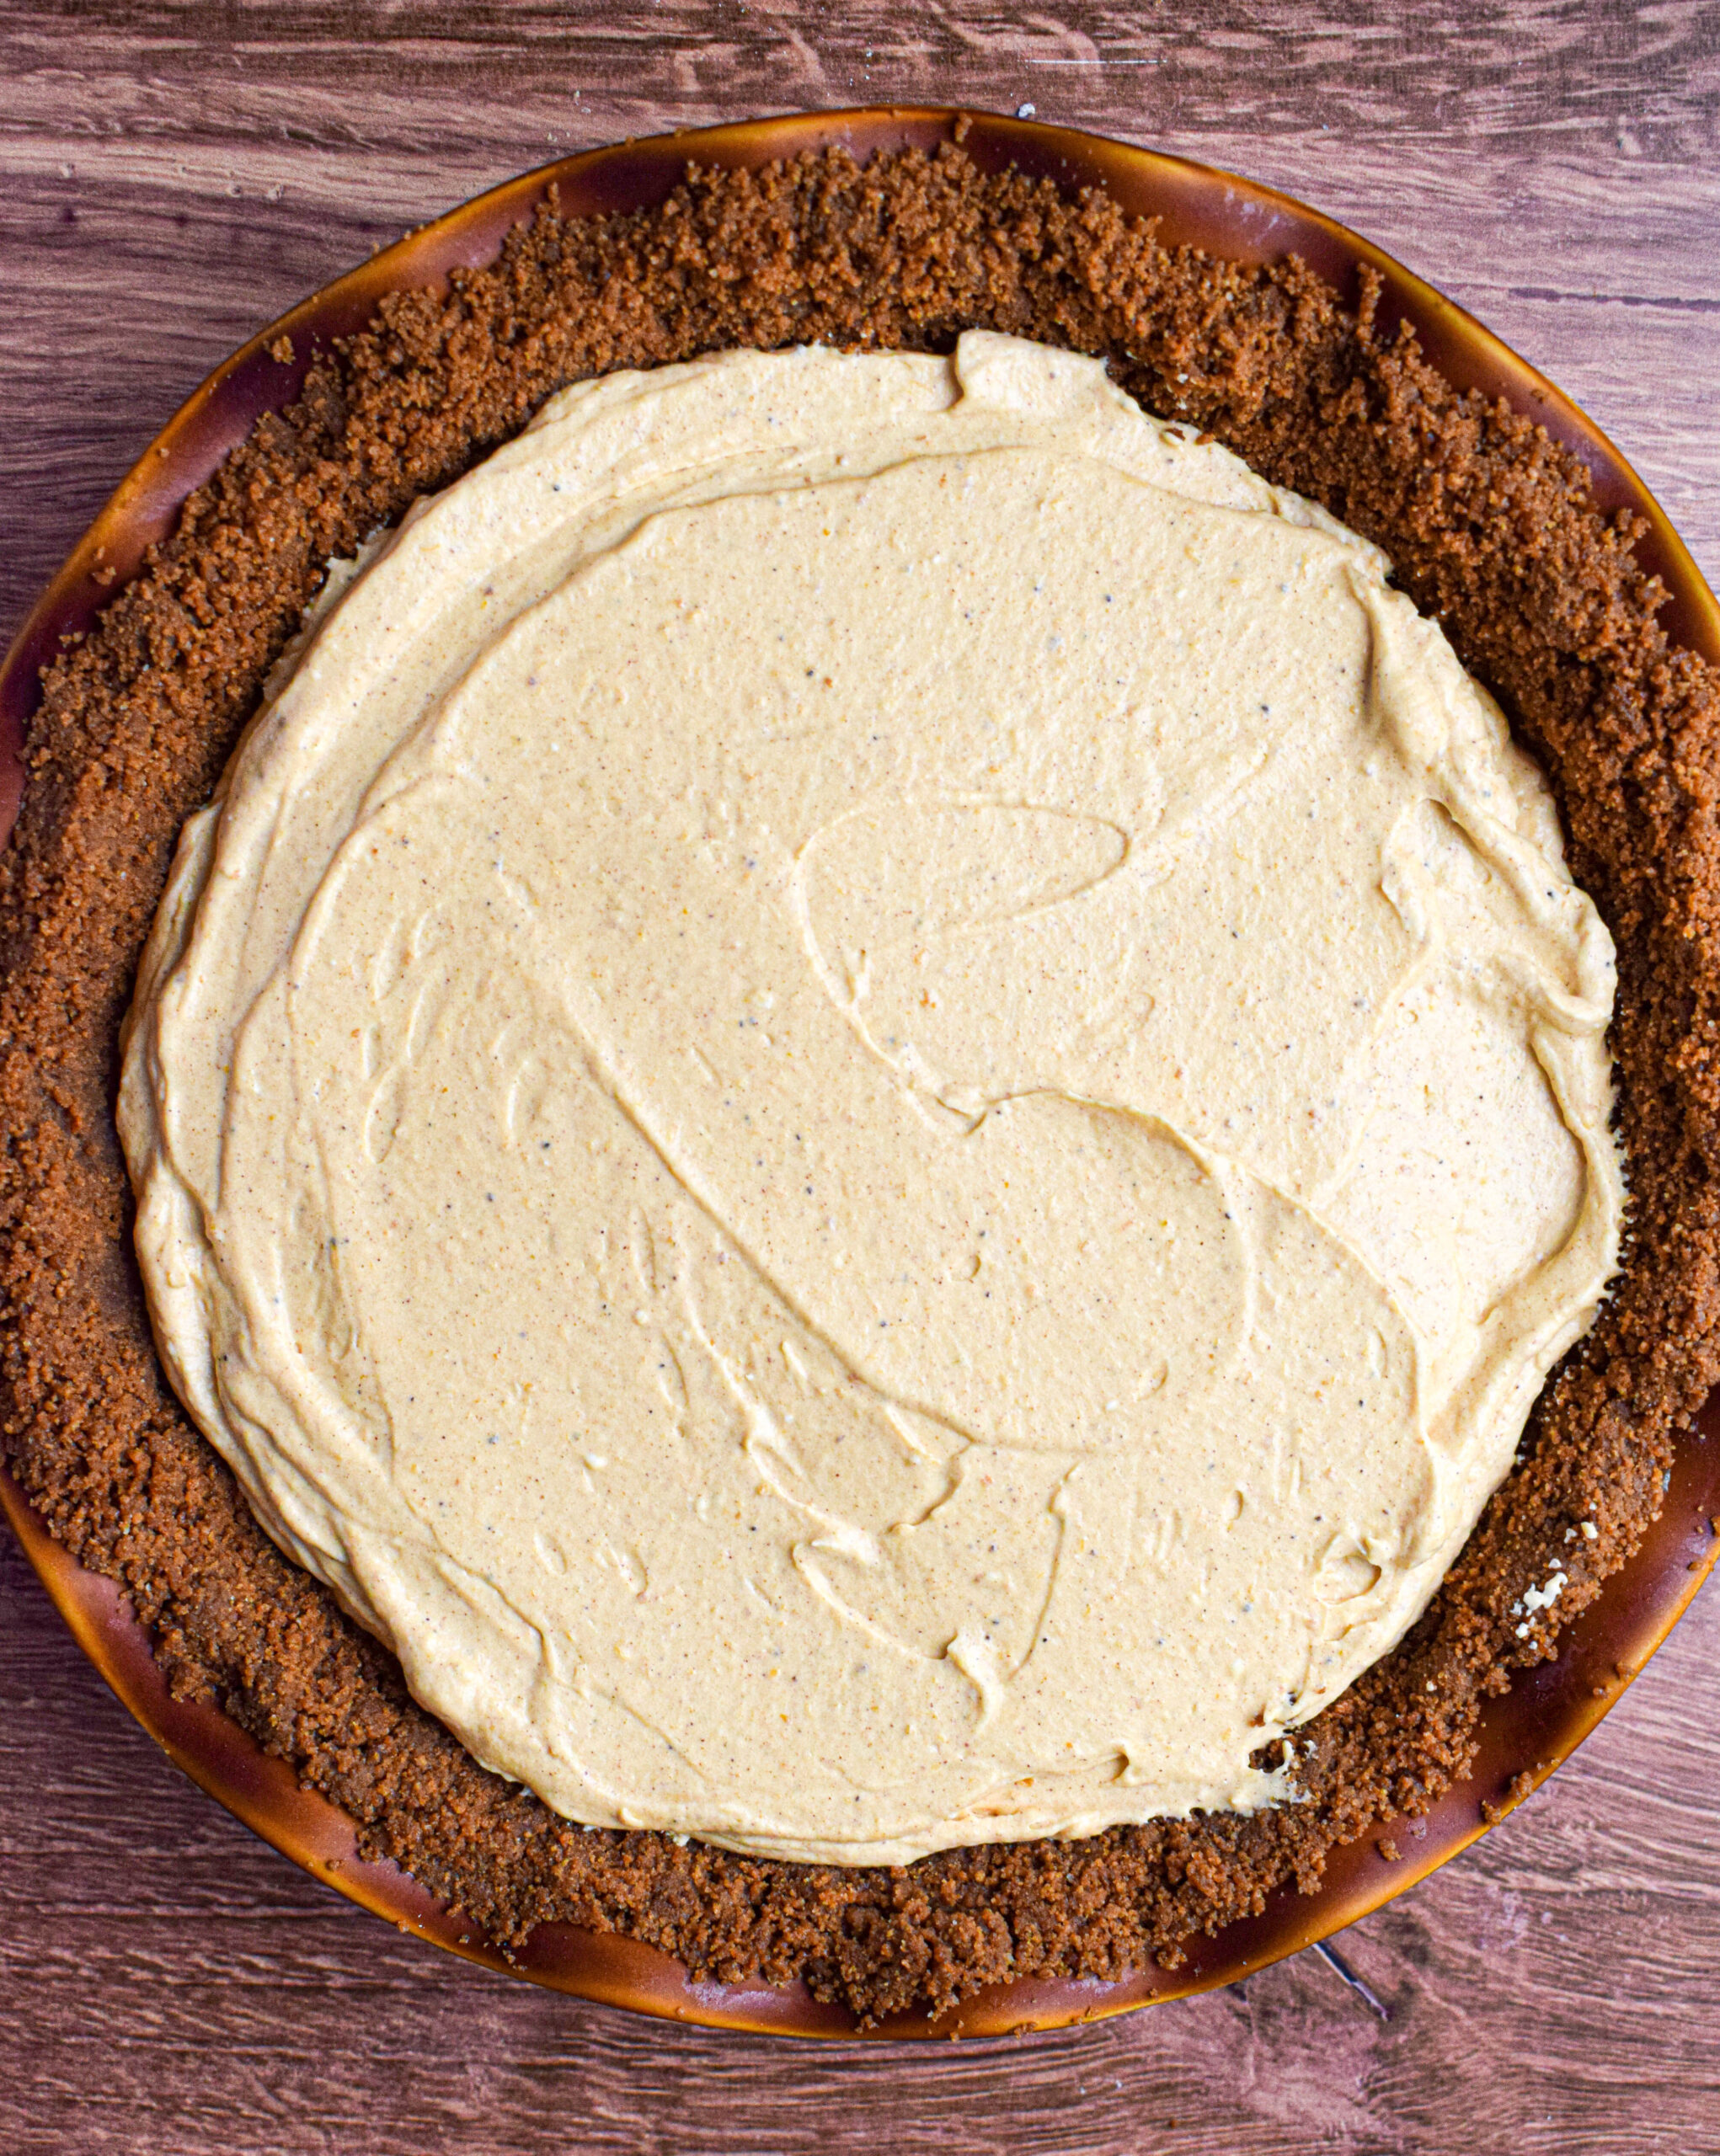
- Assemble the pie and chill.
Pour the pumpkin pie filling into the chilled crust and place in the fridge to set for at least 6 hours, ideally over night.
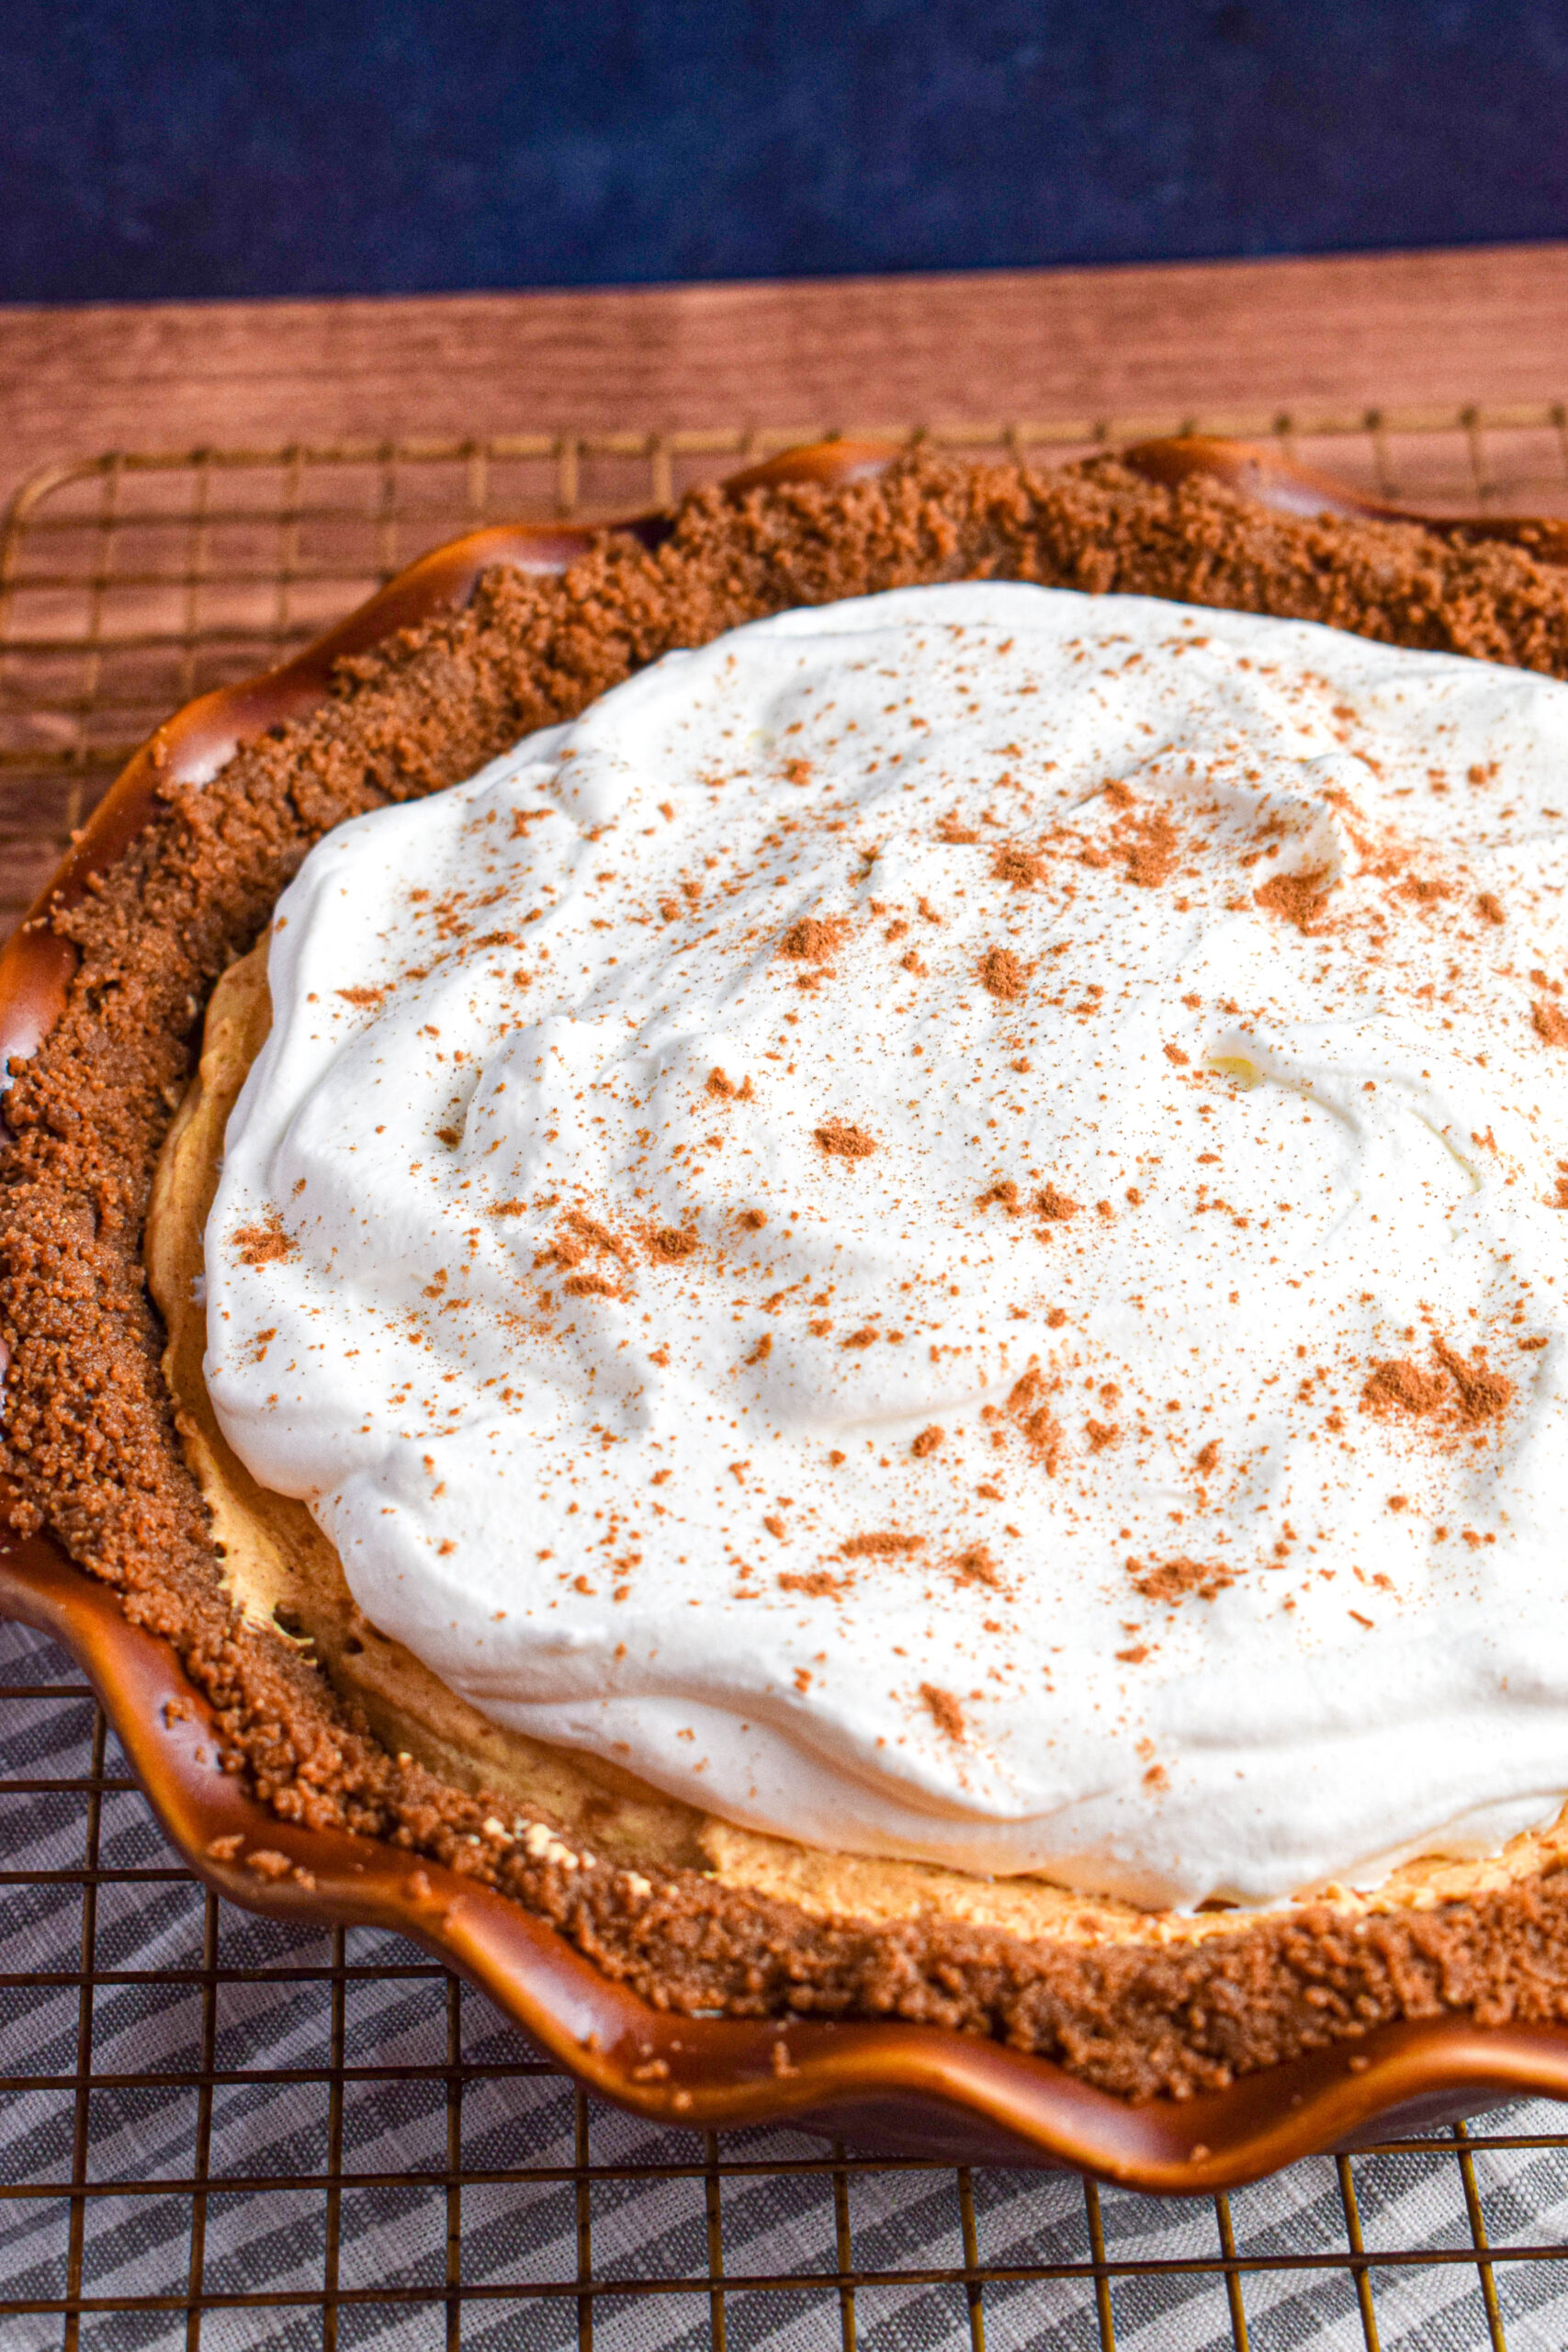
- Top with whipped cream and cinnamon (if desired) and serve!
Important Tip - Whip the Cream to Stiff Peaks
As with all of my no bake pie recipes I opt for freshly whipped cream rather than using Cool Whip to set the filling. This means that you really need to whip that cream into stiff peaks, without over whipping it into butter (which is still delicious not what you need for this recipe).
You'll know that the cream has been whipped enough when you can lift the beater out of the bowl and the whipped cream retains its shape without drooping or pooling.
When you fold that cream into the rest of the filling it's also important to do so gently so as not to knock too much air out. This will give you the deliciously light and airy texture that takes this pie over the top.
Recipe FAQs
I recommend using canned pumpkin puree rather than making it yourself. Homemade pumpkin puree can have varying amounts of liquid present which may prevent the pie from setting properly.
Again, I recommend sticking with the pure, unsweetened canned pumpkin puree for this pie. Pumpkin pie filling is already sweetened and spiced and will mess with the other ingredients measurements.
Yes, this recipe is great to make ahead and freeze. Simply fill the pie crust with the pumpkin mousse filling without topping it with any additional whipped cream. Cover tightly and place in the freeze for up to 3-4 months.
When you are ready to serve let it thaw in the fridge overnight and then top with fresh whipped cream.
As mentioned above in the Note About Whipping the Cream, this recipe relies on freshly whipped cream rather than cool whip to set up. Therefore, it will be a tad bit softer than other no-recipes that utilize a more artificial whipped base.
To prevent the pie from being runny be sure to whip the cream into stiff peaks. Fold it in gently, to prevent knocking any air out. And make sure you give the pie enough time to set up before serving. I recommend making this a day ahead of time for the best results.
I also recommend sticking with full fat cream cheese and heavy whipping cream rather than choosing lower fat options.
The pumpkin mousse filling will be soft but should not ooze out when cut.
Absolutely! I love using the homemade gingersnap crust because I think the flavors go so well together. But I have also used a store bought graham cracker crust and it's also delicious. Use what works best for you!
While I do think that a dairy free version of this recipe is possible, I have not tested the ingredients so I do not know for sure if using dairy free alternatives would work.
You can. A tub of cool whip should be interchangeable with the freshly whipped cream in this recipe if that is what you prefer.
Made this No Bake Pumpkin Pie recipe? Let me know what you think in the comments!
Recipe

No Bake Pumpkin Pie
Equipment
- 9 or 10 inch pie dish
- stand mixer or large mixing bowl with an electric hand mixer
- mixing bowl
- Measuring cups and spoons
Ingredients
For the gingersnap crust (skip if using a store bought graham cracker crust)
- 2 cups ginger snap cookies crumbs choose a firm ginger snap cookie and pulse to fine crumbs
- 6 tablespoon melted butter
- 2 tablespoon light brown sugar
For the No Bake Pumpkin Pie Filling
- 1 cup heavy whipping cream
- 8 oz full fat cream cheese, softened to room temperature
- ¾ cup powdered sugar
- ¼ cup light brown sugar
- 1 cup pumpkin puree
- ¼ cup sour cream
- 1 teaspoon vanilla extract
- 1 tablespoon pumpkin pie spice
- pinch of salt
For the Topping
- 1 cup heavy whipping cream
- ¼ cup powdered sugar
- 1 teaspoon vanilla extract
- pumpkin pie spice or cinnamon optional
Instructions
Make the Ginger Snap Crust (skip if using a store bought crust).
- Combine 2 cups of fine ginger snap cookie crumbs with 6 tablespoon of melted unsalted butter, 2 tablespoon of light brown sugar and a pinch of salt. Carefully press the mixture into a prepared 9 or 10 inch pie pan to form the crust. Place the crust into the freezer for about 15 minutes to firm up while you make the pie filling. *Notes**The tighter you pack the crust the less likely it will be to fall apart when you cut it. You can use the bottom of a glass or other tool to press it into the corners and make a flat and even surface.*If you don't have a food processor you can crush the cookies by double bagging them into a ziplock freezer bag and bashing them with a rolling pin into fine crumbs.
Make the no bake pumpkin pie filling.
- In the bowl of a stand mixer or large mixing bowl add 1 cup of heavy whipping cream. Beat on medium high until stiff peaks form. Pour the whipped cream into a separate bowl and set aside until later.*Notes* See section above for how to know if your cream has been whipped enough.
- In the same large bowl you removed the whipped cream from add softened cream cheese, powdered sugar and light brown sugar. Beat for a couple minutes on medium high until smooth. Add in pumpkin puree, sour cream, vanilla extract, pumpkin pie spice, and a pinch of salt. Beat on high for another minute or 2 until well combined, with no lumps. Add the whipped cream into the bowl with the cream cheese mixture and fold together until no white streaks remain, being careful not to knock too much air out.
- Take the crust out of the freezer (if using homemade) and pour in the pumpkin pie filling. Smooth out the top then place in the fridge for at least 6 hours, ideally overnight, to set.
Add the whipped cream topping and serve.
- When ready to serve make the whipped cream topping. Combine 1 cup of heavy whipping cream, ¼ cup of powdered sugar and 1 teaspoon of vanilla extract and whip until soft to medium peaks form. Pour the whipped cream on top of the pie and add a sprinkle of pumpkin pie spice or cinnamon if desired. Serve cold and enjoy!
Notes
- This is a soft pie so if you know it's going to be sitting on the counter for a while you can place it in the freezer for a couple of hours before adding the whipped topping. This will help ensure a clean cut when you serve.
- See above RECIPE FAQs for more answers to your questions.

Lisa
Holy moly was this a winner! Even with people who don't like pumpkin pie! Our family may never go back...
Jet
I love that it skips Cool Whip for real whipped cream. Making this for Thanksgiving, no doubt!
Swathi
No-bake pumpkin pie is so good; I made it for our dinner. I am going to make it again for this Thanksgiving.
Lora
This no bake pumpkin pie is such a dreamy twist on the classic—light, creamy, and full of cozy fall flavor. Love that it’s effortless yet still feels special!
Krystle Smith
I whipped it up the night before a friends' get-together, and it set beautifully in the fridge, making it super easy to serve right when everyone arrived.
jamjarkitchen
So glad you liked it!